29 Mar 2025 12.00 AM I 341 Views
Can I customize the colors and fonts on the product detail pages? What are the steps to achieve this customization effectively?
- This Article is for stores running on Solo plan or higher
You can change the font style and color on the product detail pages from the Commmerce website builder panel.
Follow the below steps:
Step 1. Log in to your Commmerce’s Admin Panel by entering the
Registered mail ID and
Password. To log in
click here
Step 2. There are two options to change the font style and color on the product detail pages of your website.
Option 1- Click on 'Edit Website' on the dashboard (as shown in “1”).
Option 2- Click on the Website option on the left side, then select Website Builder (as shown in “2”).
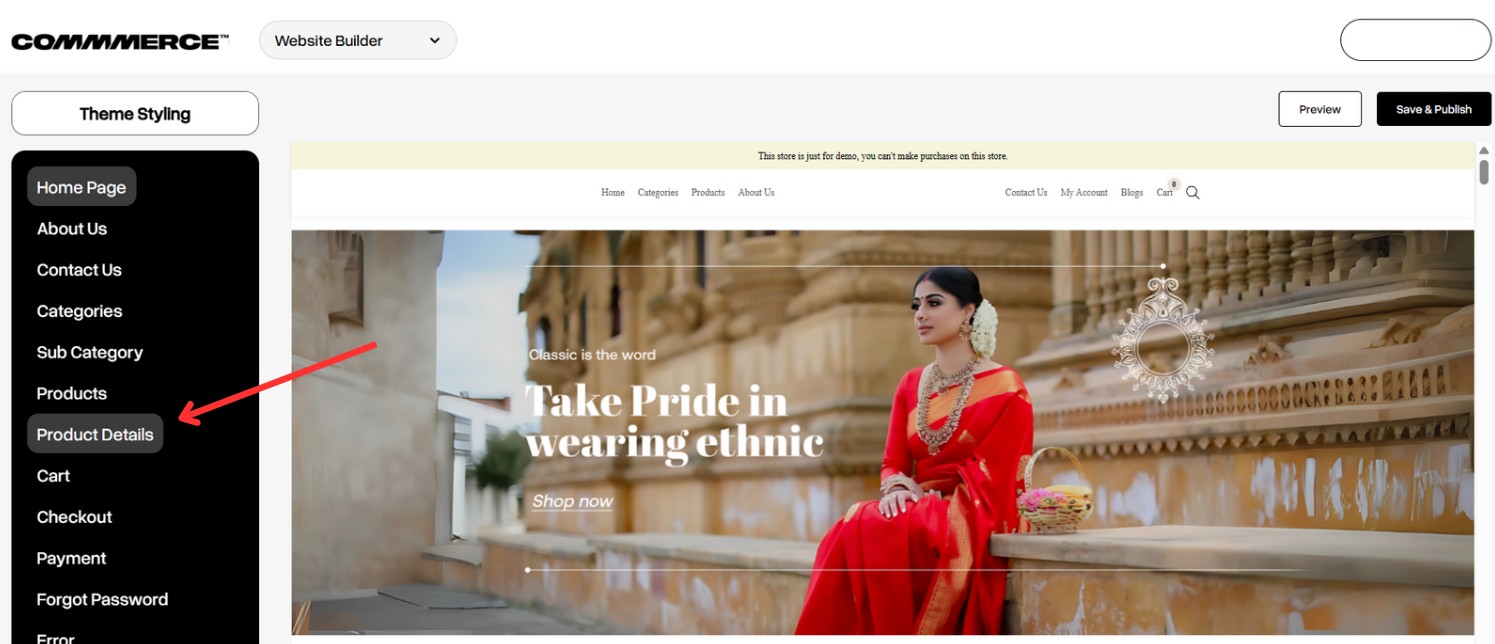
Step 3. On the website builder page, click the Product Details option on the left (as shown below).
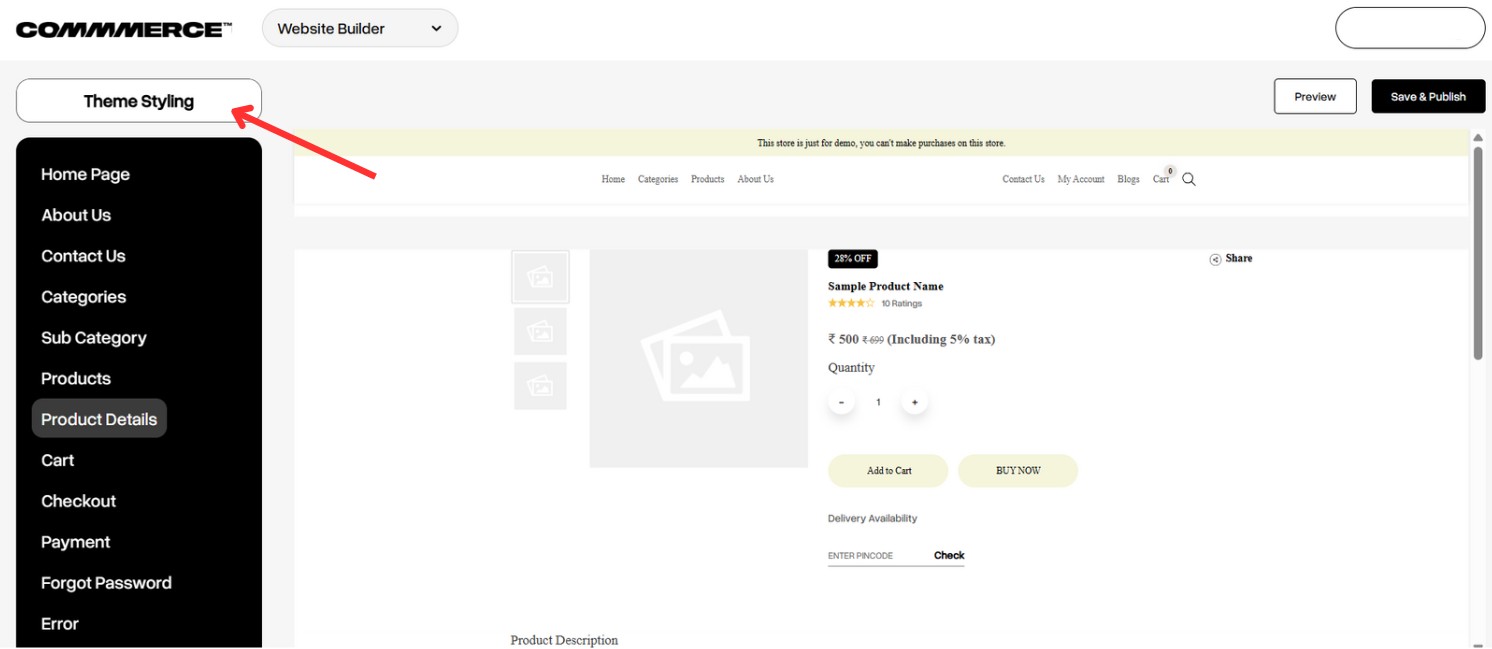
Step 4. Then, click the Theme Styling option in the top left corner (as shown below).
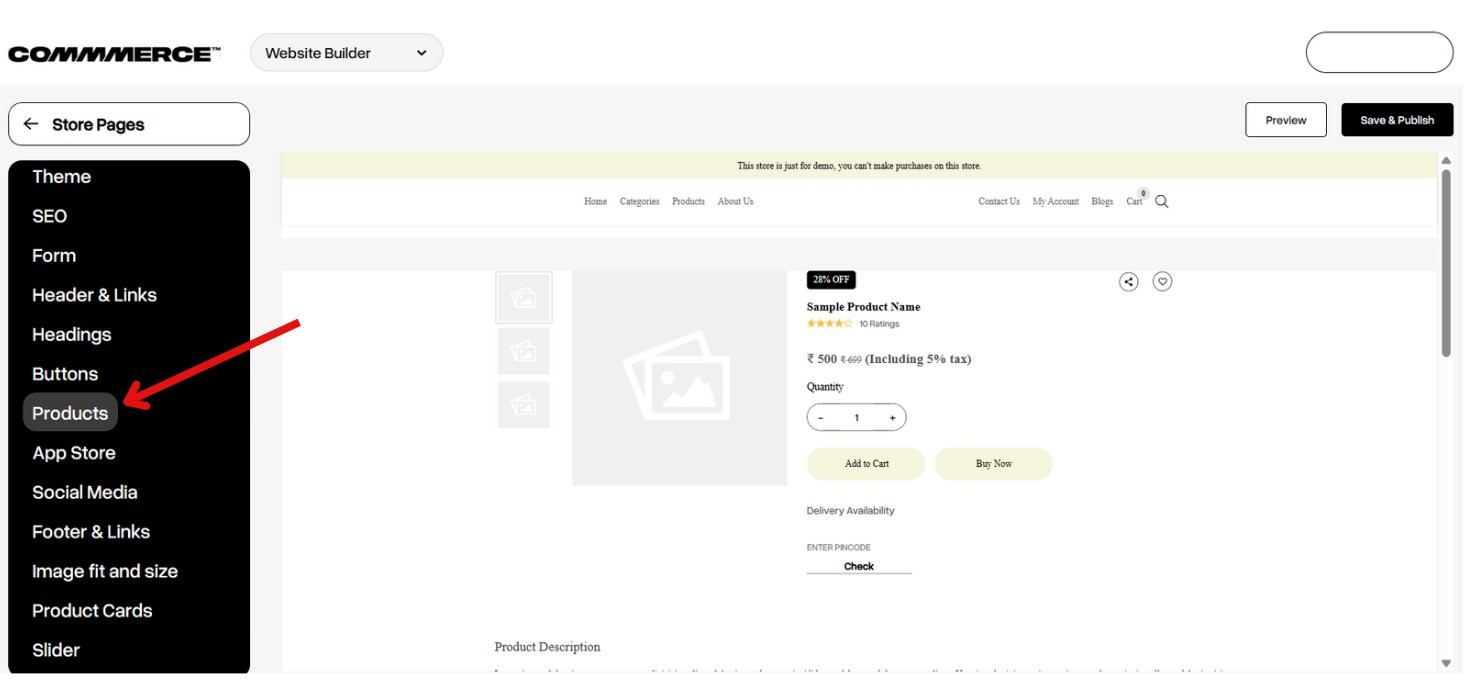
Step 5. Once you click on Theme Styling, a new menu bar will appear on the left side. This menu will enable you to customize various options, including font family, color, size, and more. To proceed, select the Products option from this menu (as shown below).
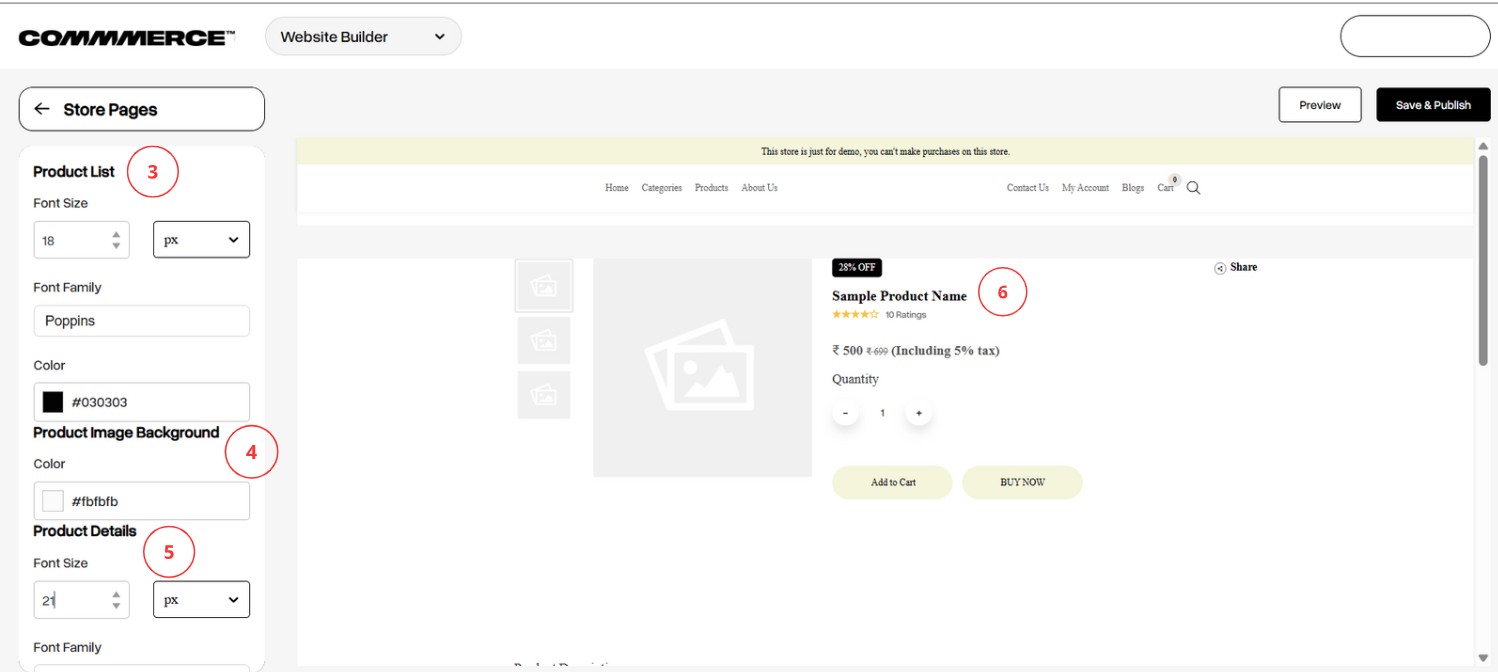
Step 6. You can customize the following elements for the product list page, which displays all products when you click on the Products label on the homepage:
Font Family, Size, and Color: Adjust these settings (as shown in "3")
Product Image Background Color: Change the background color of product images (as shown in "4")
Font Size for Product Details Page: Modify the font size for the product details page (as shown in "5")
Preview: After making your changes, you can view a live preview of the adjustments (as shown in "6")
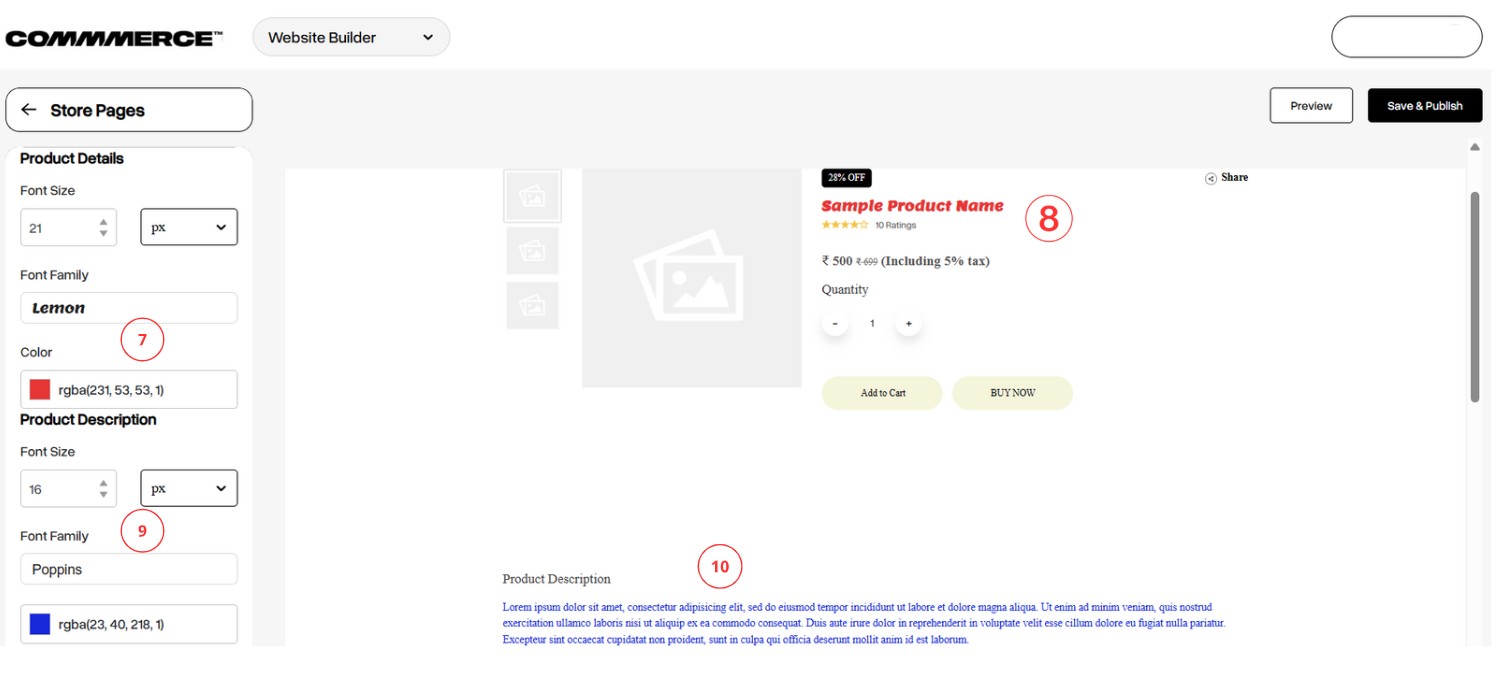
Step 7. You can also customize the following elements on the product details page:
Font Family and Color: Change the font family and color (as shown in "7"). You can preview these changes in the right-side image (as shown in "8").
Product Description: Adjust the font family, size, and color of the product description (as shown in "9").
The preview for these changes is available in the right-side image (as shown in "10").
Step 8. Once the details are updated, click the Save & Publish button in the top right corner (as shown below) to save and publish the changes made.
