06 Jun 2025 12.00 AM I 301 Views
Can I customize the order or arrangement of categories?
- This Article is for stores running on Solo plan or higher
Customize your Commmerce platform categories effortlessly with drag and drop. Rearrange and create up to
three levels of subcategories hassle-free through the admin panel.
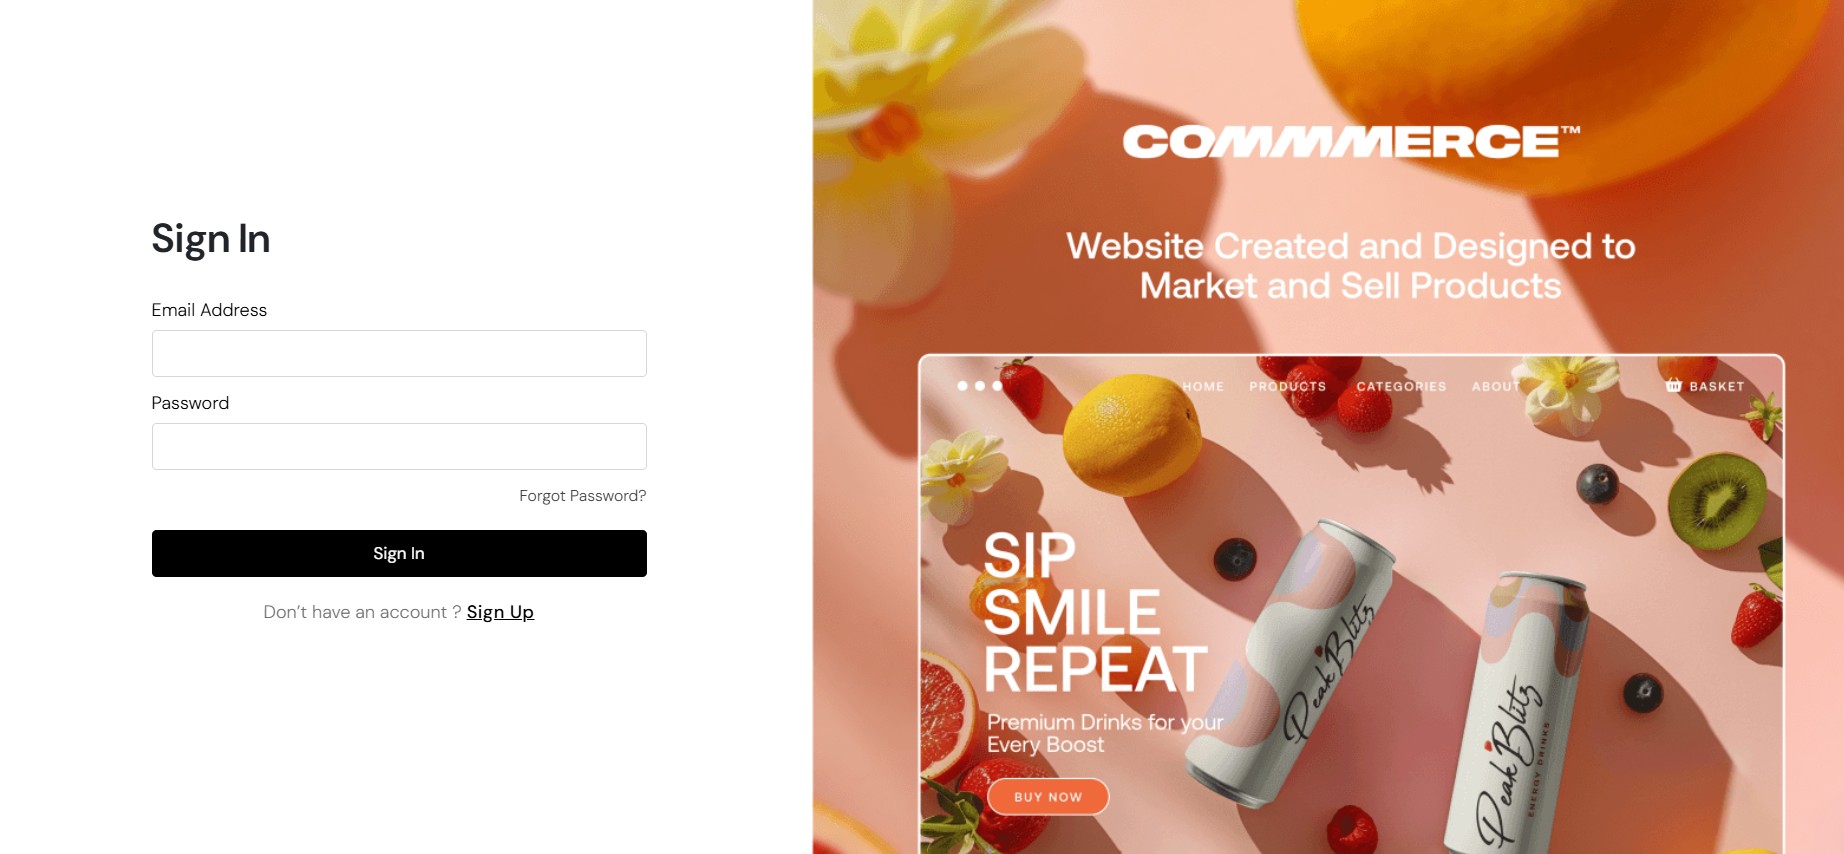
Step 1: Log in to your Commmerce’s Admin Panel by entering the
Registered mail ID and Password. To log in
click here
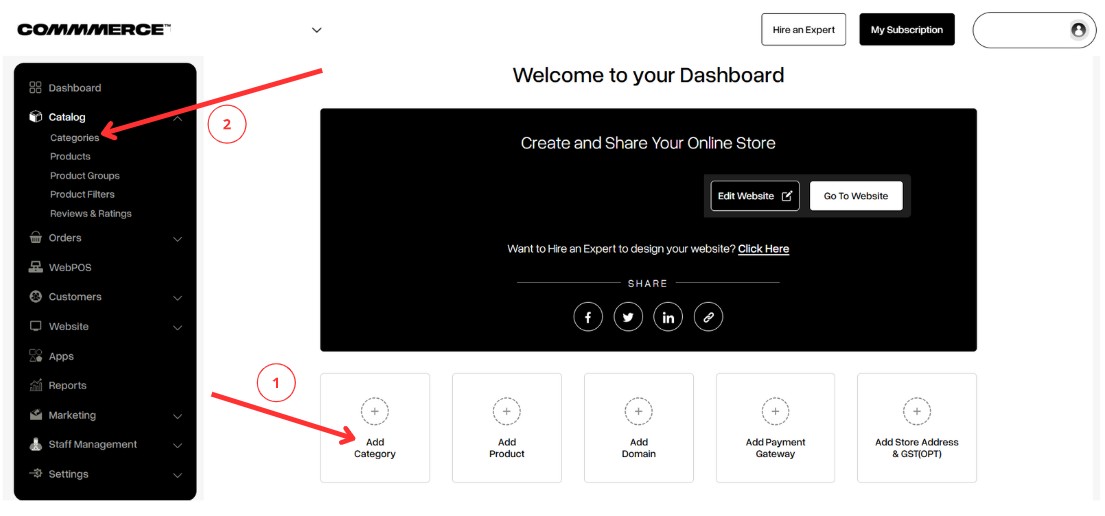
Step 2: You can either click on Dashboard on the left side of the admin panel and then click on Add category (as shown in “1” ) or you can click on Catalog on the left side of the admin panel and then click on Categories (as shown in “2”).
Step 3: Click the "Add category" button on the right side (as shown in “3”). A new category will be created.
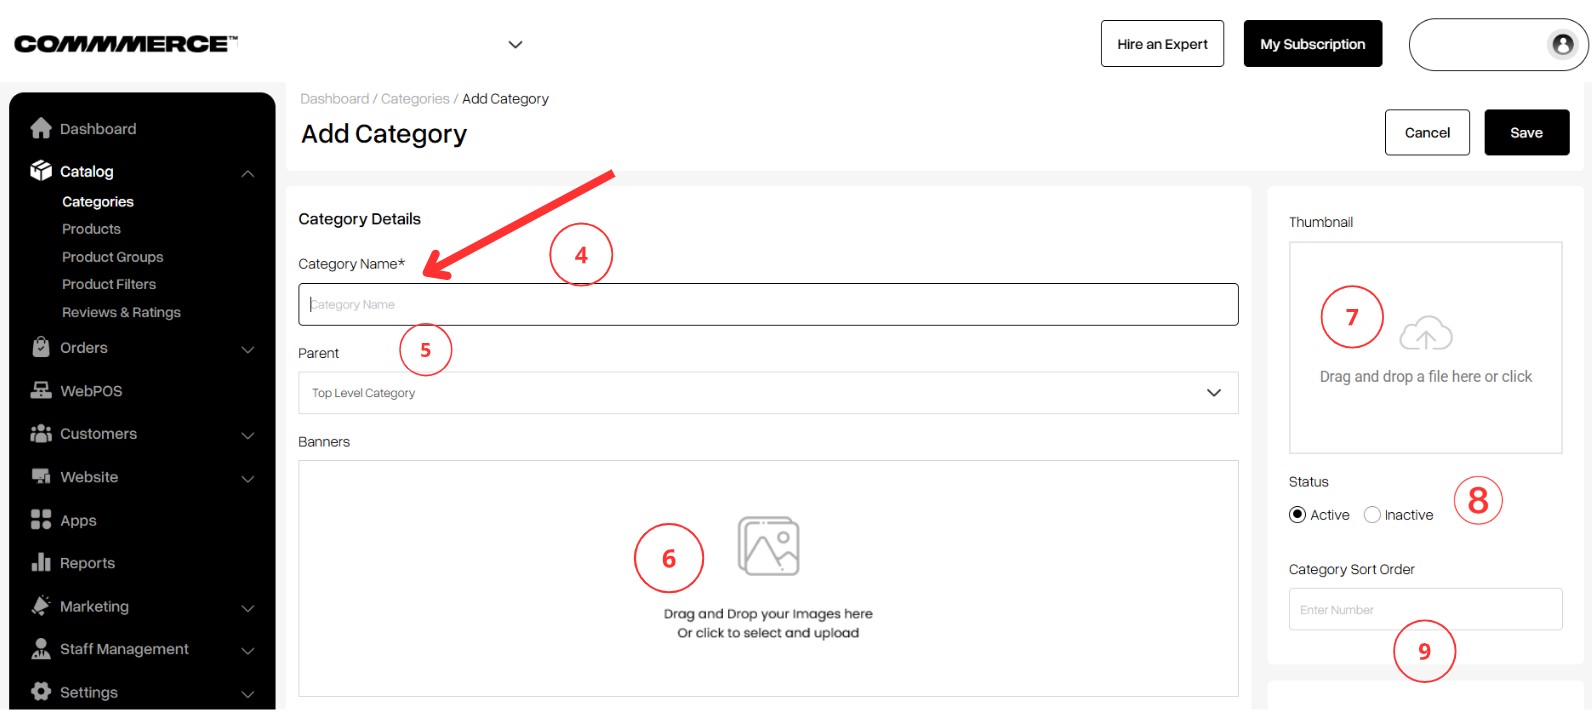
Step 4: Fill the Category Details
- Provide a Category Name for each category you create (as shown in “4”).
- A Parent Category serves as a higher-level classification that can contain one or more subcategories or child categories (as shown in “5”).
- You can add a banner image here, which will be displayed on the corresponding subcategory page (as shown in “6”).
- Upload a thumbnail image to visually represent the category (as shown in “7”).
- You can activate or deactivate the category status as needed (as shown in “8”).
- On the category page, you can set the sort order to arrange category positions according to your preferences (as shown in “9”).
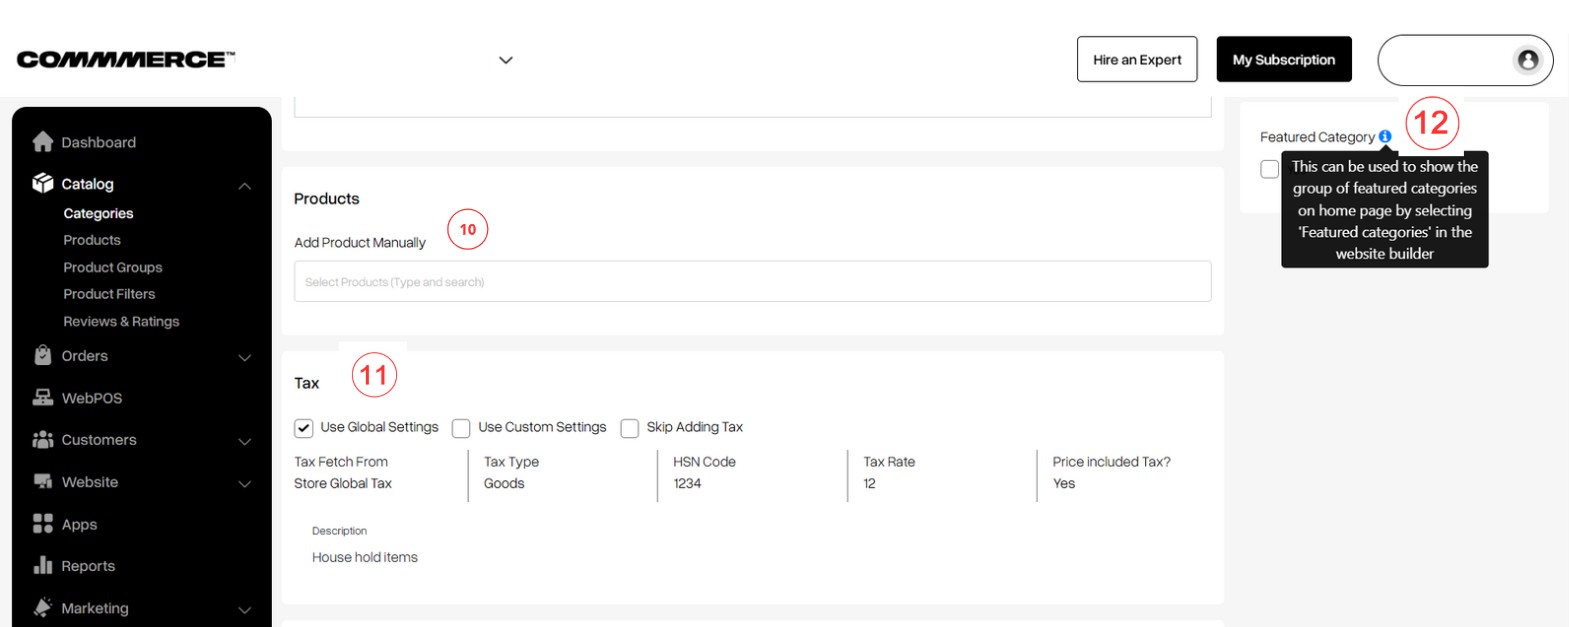
Step 5. If the products are already added, you can select products manually to add them under this category (as shown in "10").
- If the GSTIN details are updated, you will have the option to choose whether you want to use the global setting, custom setting, or skip the GST for this particular category (as shown in "11").
- On the right side, there is an option for a featured category. If you enable this, it can be used to display a group of featured categories on the homepage by selecting "featured categories" in the website builder (as shown in "12").
Step 6. Update
SEO details
(as shown in “13”)
- Meta title- A meta title is a brief, descriptive text that summarizes a webpage's content. It appears in search engine results and browser tabs, influencing click-through rates.
The ideal length for the meta title is 50–60 characters. Google starts to cut off the title tag after 50-60 characters. Hence it is a good practice to keep your title tag around this length.
- Meta Keywords- Meta keywords are a set of specific words or phrases that describe the content of a webpage. They are used to help search engines understand the page's topic.
There is no specific limit to the number of meta keywords/tags you can include, but it's generally recommended to keep them relevant and concise.
- Meta description- A meta description is a summary of a webpage's content, typically 150-160 characters long. It appears in search engine results beneath the page title and aims to attract clicks by providing a concise overview.
- Meta image- A meta image (often referred to as an Open Graph image or social media image) is an image specified in the metadata of a webpage that appears when the page is shared on social media platforms.
- URL- URL or meta URL refers to the web address specified in the metadata of a webpage, often used to indicate the canonical URL or the primary link for the content.
Step 7. Once you have updated all the details, click the save button in the top right corner.
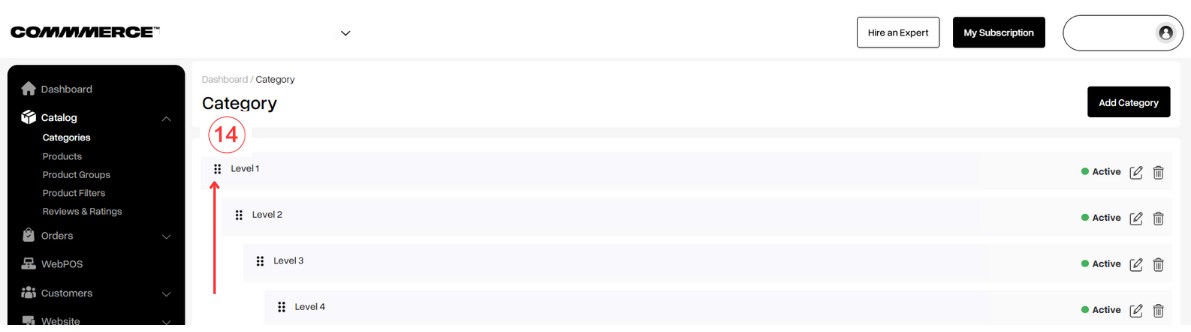
Step 8. After creating your categories, you can easily create sub-categories by dragging and dropping. Click on the six dots (as shown in "14"), then gently drag to the right and release. This will create your sub-category. You can create up to three levels of sub-categories.