27 Jan 2025 12.00 AM I 1423 Views
How can I configure Shiprocket?
- This Article is for stores running on Solo plan or higher
Following are the steps to configure Shiprocket:
Step 1. You can
sign up on Shiprocket if you are a new user or
log in on Shiprocket if you are an existing user
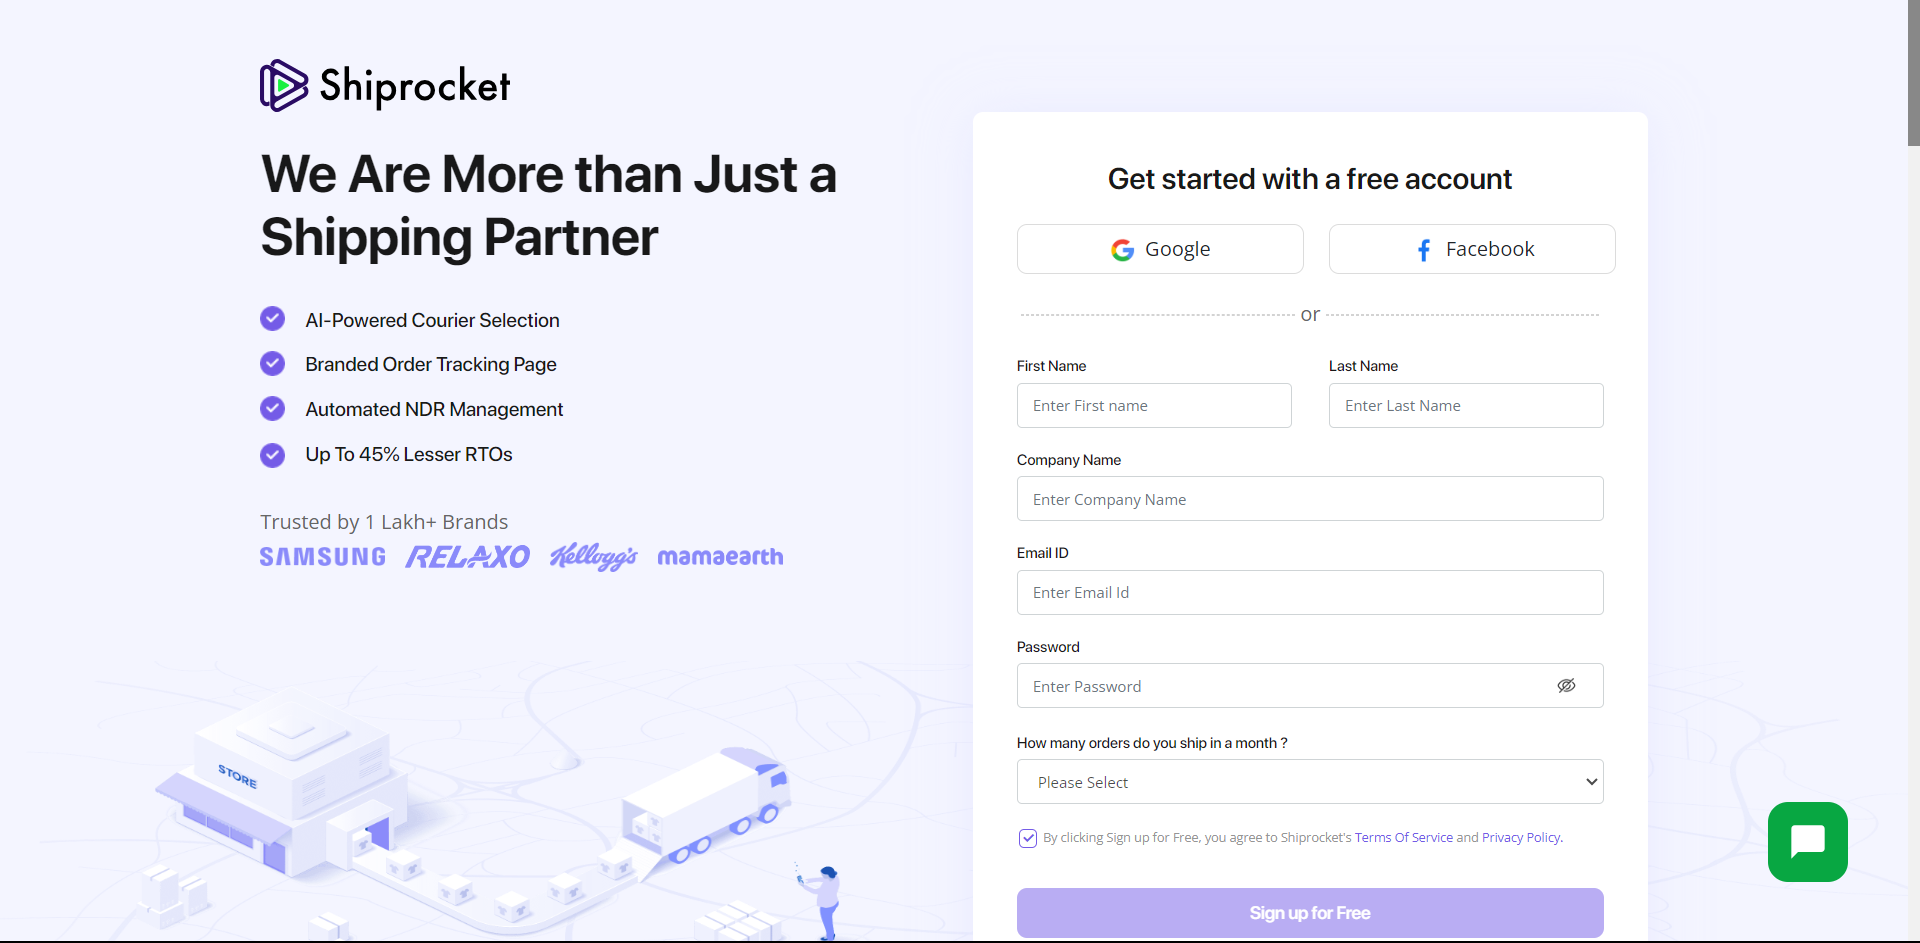 To sign up on Shiprocket
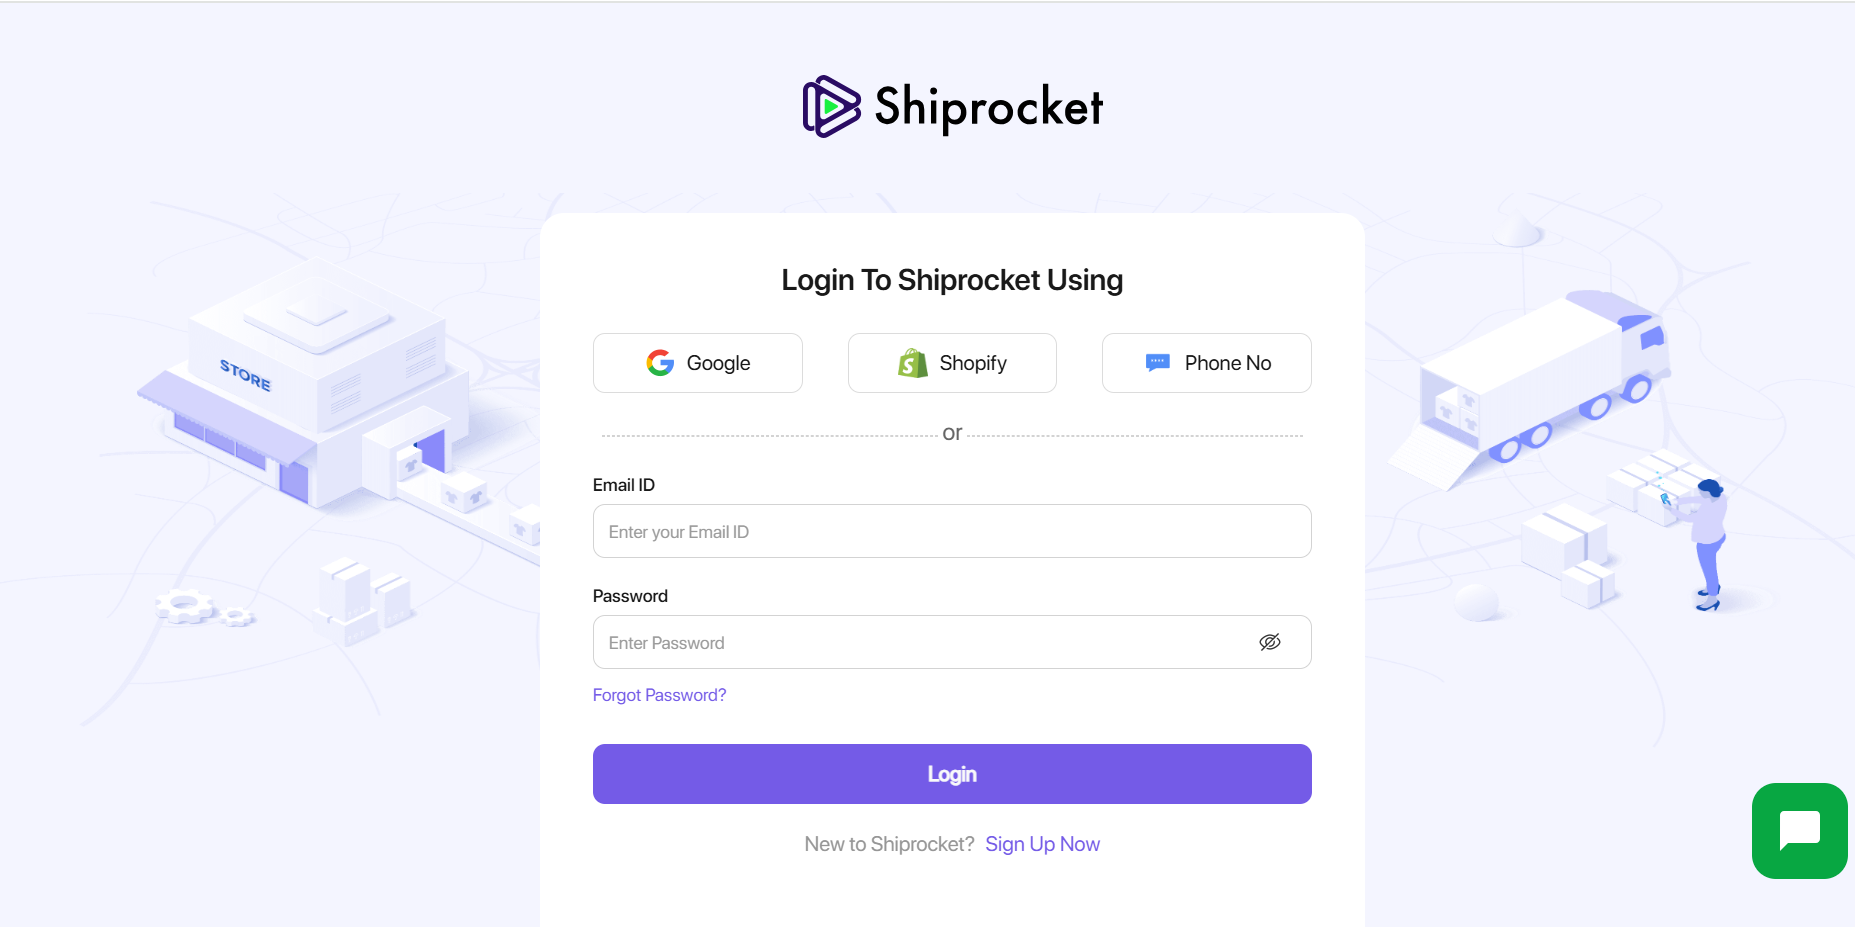 To log in to Shiprocket
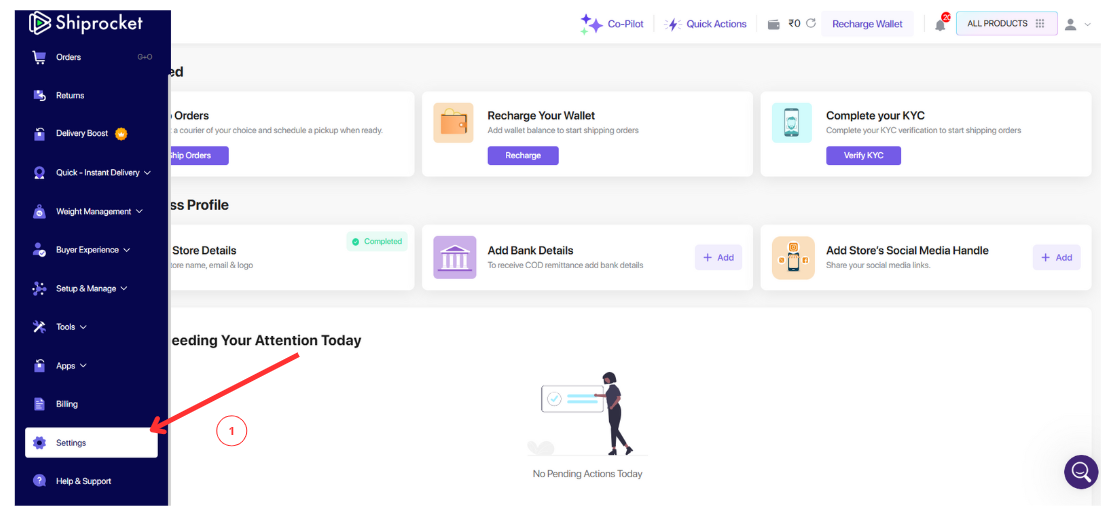
Step 2. After logging in on Shiprocket - Click on Settings in the left corner of the Shiprocket Panel/Dashboard (as shown in “1”)
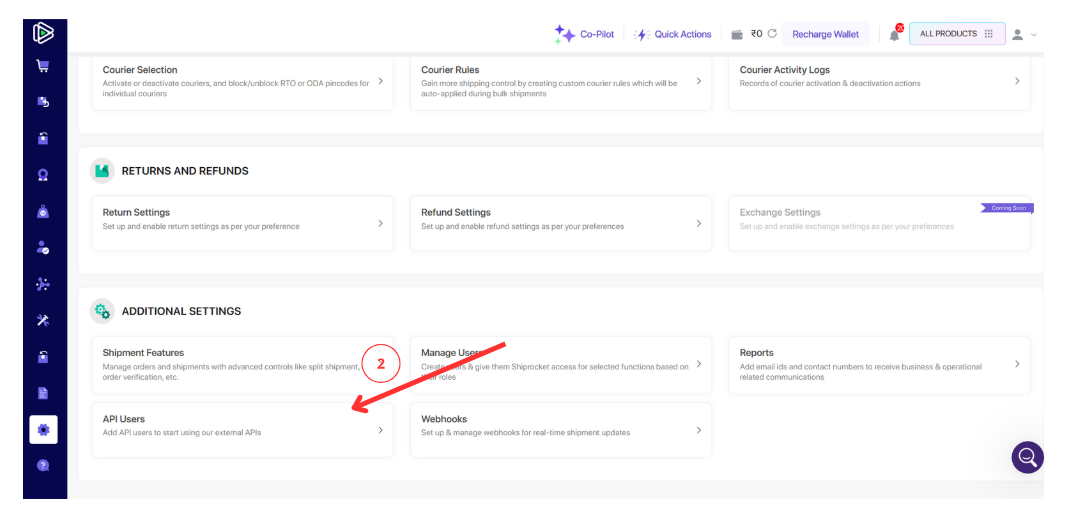
Step 3. Scroll down and you will find 'API Users' as an option (as shown in “2”)
Step 4. After clicking on API Users, you will see an 'Add New API User' button (as shown in “3”)
Step 5. Add an email address different from the registered email id and the password to create a new user
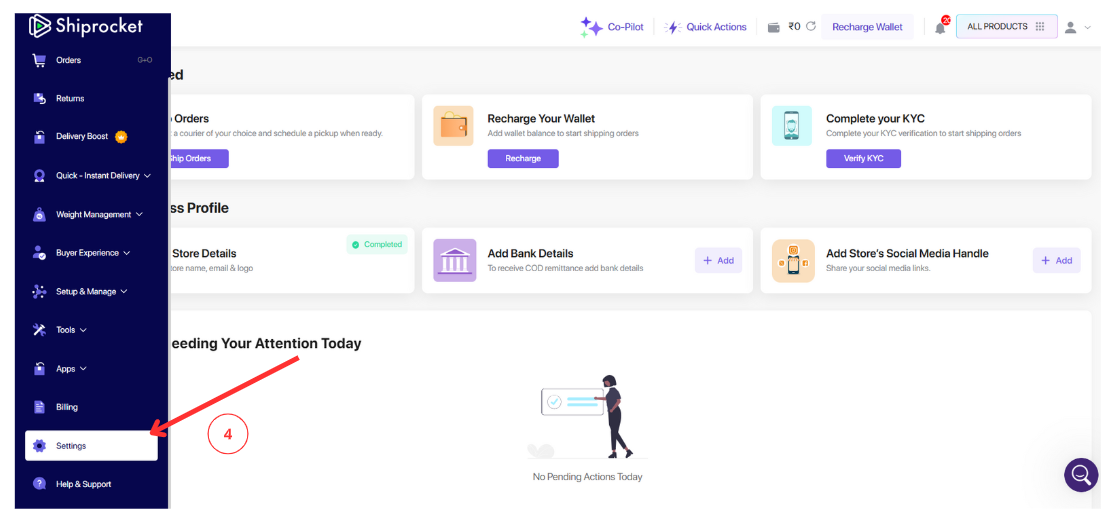
Step 6. Once the user is created, click on the settings option again (as shown in “4”)
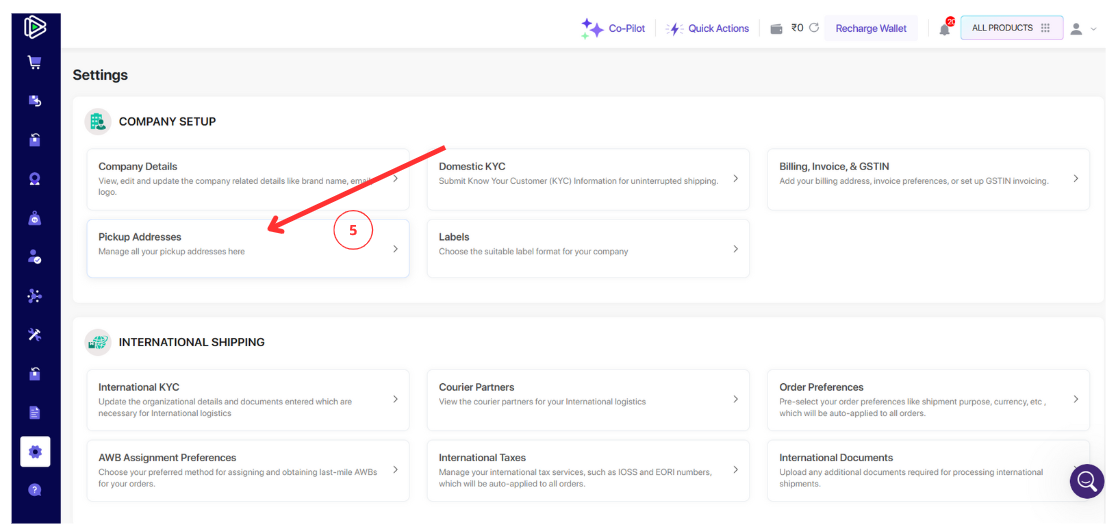
Step 7. Under Company Setup, you will see 'Pickup Addresses' as an option (as shown in “5”)
Step 8. After clicking on Pick Up Addresses, you will see an 'Add Pickup Address' button (as shown in “6”)
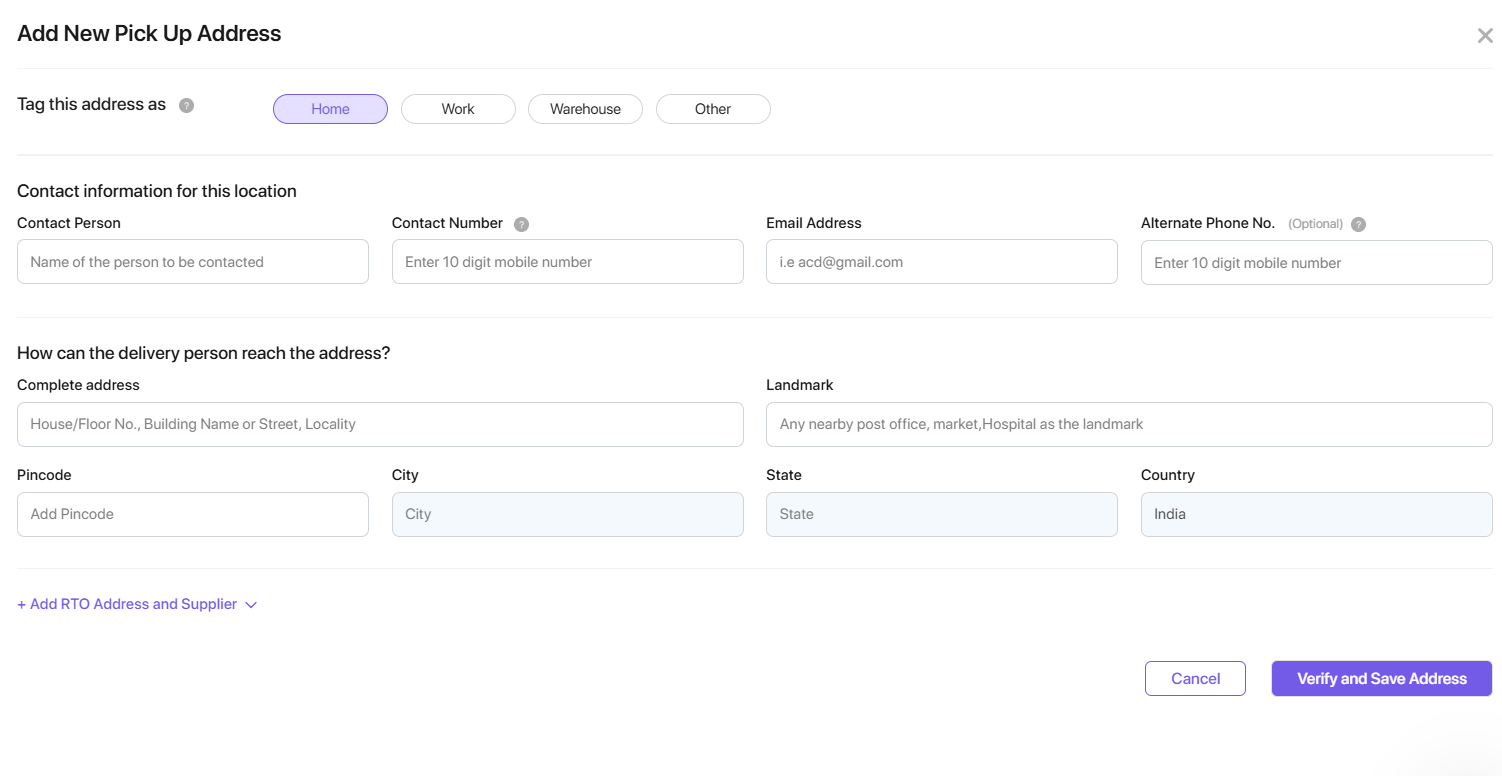
Step 9. Fill in all the details to add a new pick-up address. Then, click the 'Verify and Save Address' button to verify and save the address.
Step 10. Log in to your Commmerce’s Admin Panel by entering the
Registered mail ID and
Password. To log in
click here
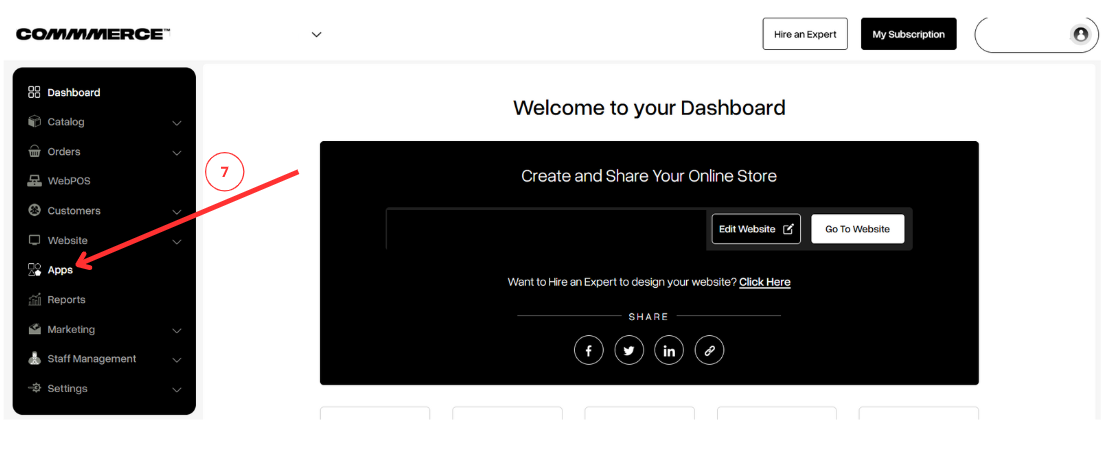
Step 11. Now click on the Apps option on the left-hand side panel (as shown in “7”)
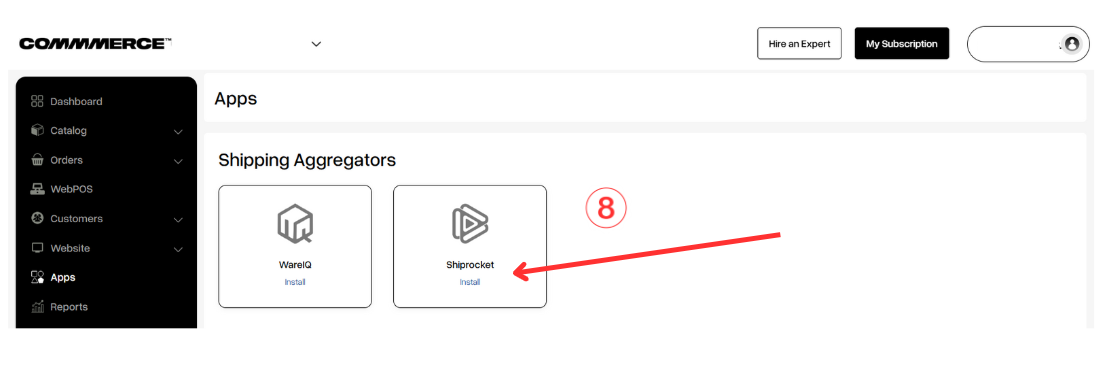
Step 12. Install Shiprocket. If not installed, you can click on Install (as shown in “8”). If you have already installed then click on Configure.
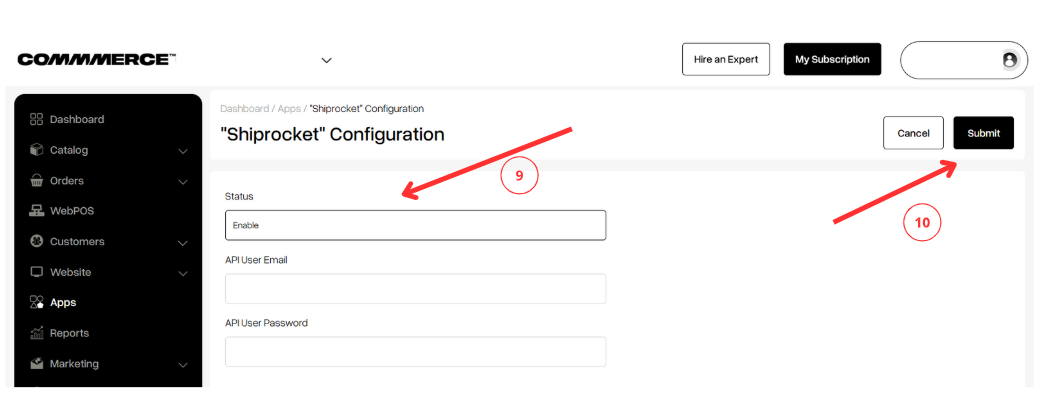
Step 13. After clicking on Configure, change the Status to 'Enable' (as shown in “9”). Provide the API credentials i.e. API User email and API User password you received in Shiprocket. Then click on the Submit button (as shown in “10”)
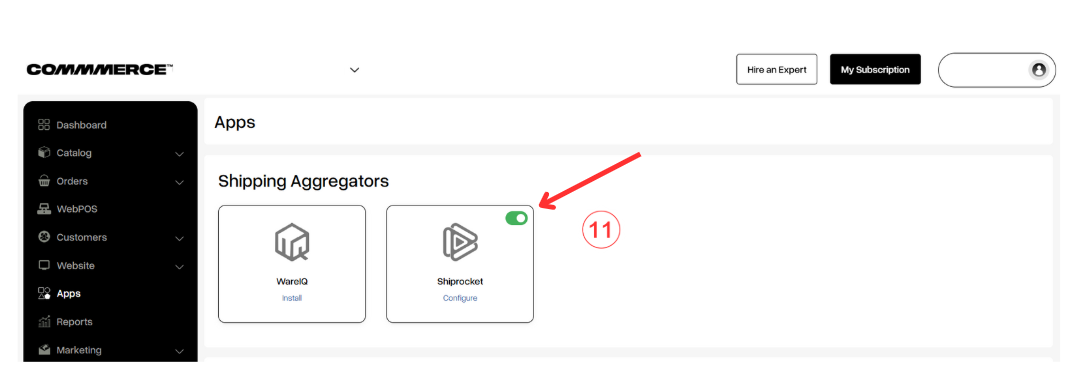
Shiprocket is now configured (as shown in “11”)
 To sign up on Shiprocket
 To log in to Shiprocket
