27 Mar 2025 12.00 AM I 251 Views
How can I edit text and images on my pages?
- This Article is for stores running on Solo plan or higher
Follow the below steps to edit text and images on the home page:
Step 1. Log in to your Commmerce’s Admin Panel by entering the
Registered mail ID and
Password. To log in
click here
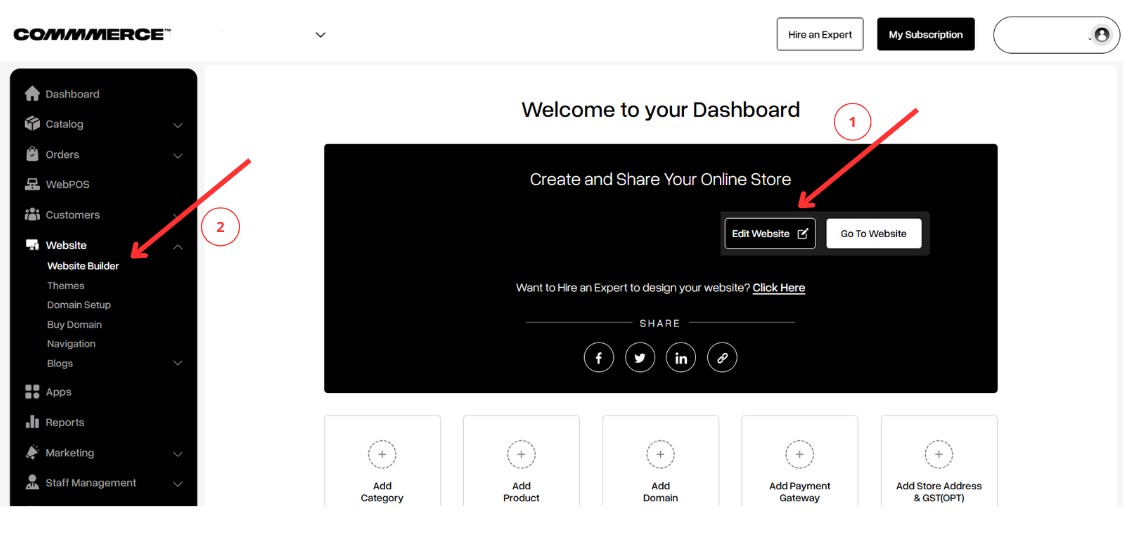
Step 2. There are two options for editing the text and images on pages such as Home, Contact Us, About Us, and Policy Details, etc.
Option 1- Click on the Edit Website option on the dashboard (as shown in "1").
Option 2- Click on the Website option on the left side, then select Website Builder (as shown in "2").
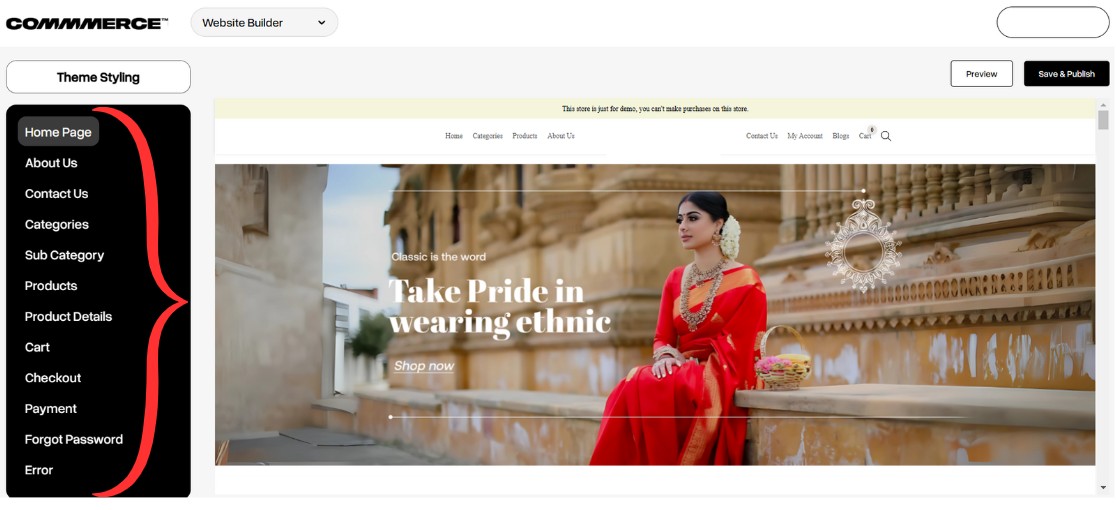
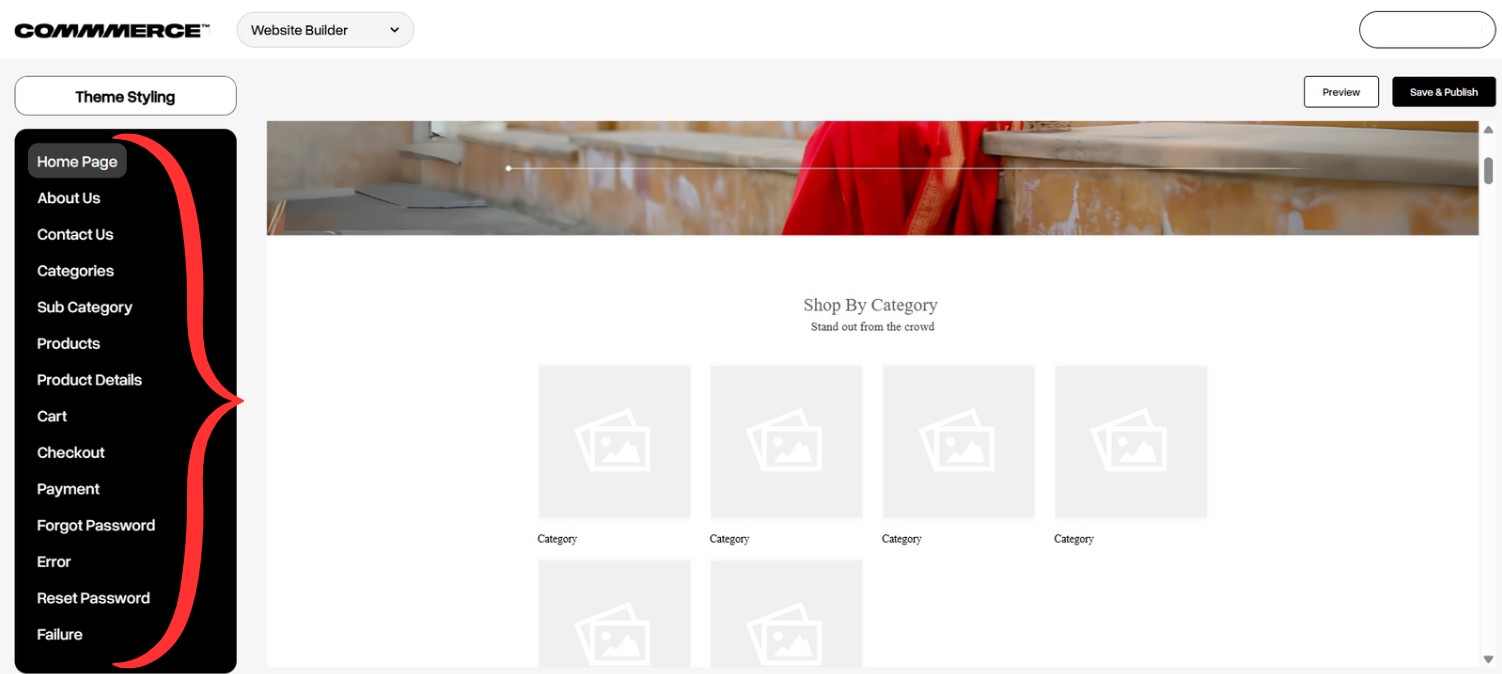
Step 3. Select/Click the pages that you want to edit the text in (as shown below).
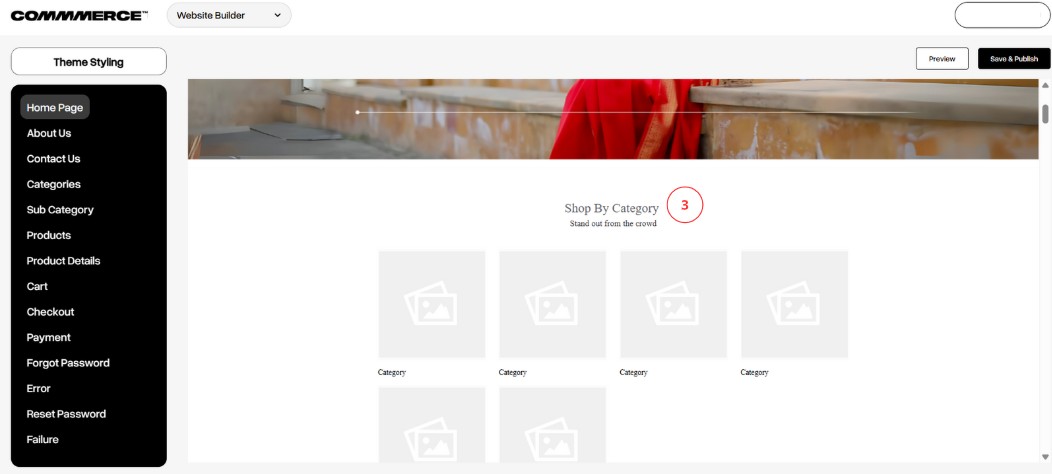
Step 4. You can edit the heading on the homepage by clicking on the text (e.g., "Shop by Category") to change it to anything you like (as shown in “3”).
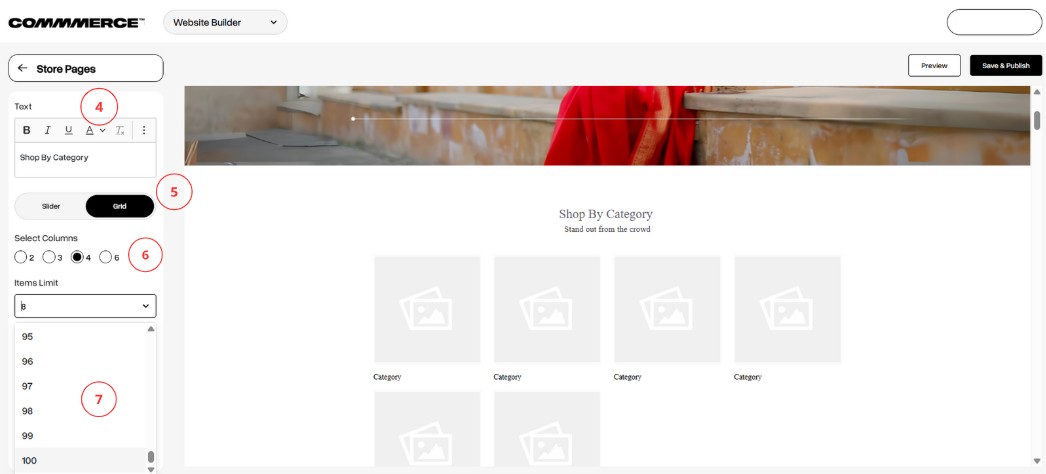
Step 5. On the left-hand side, you will find an option to edit the text (as shown in "4"). Next, you can choose how you want the images to appear: as a Slider or in a Grid format (as shown in "5").
After that, you can decide how many columns you want to show on the homepage (as shown in "6").
Additionally, you can set the maximum number of products to display, with options ranging from 1 to 100 (as shown in "7").
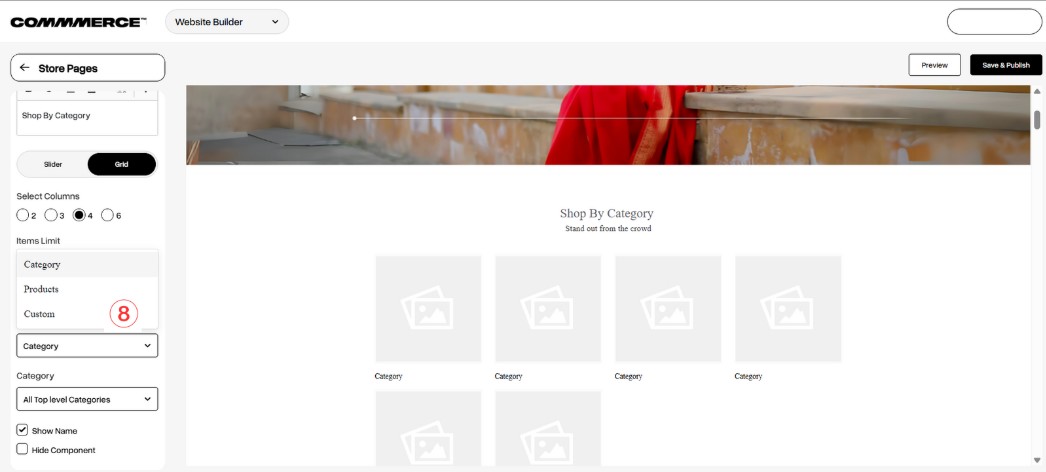
Step 6. Here, you can choose the type of content you want to show on the homepage. You can select from different categories, specific products, or custom images that you’d like to display (as shown in "8").
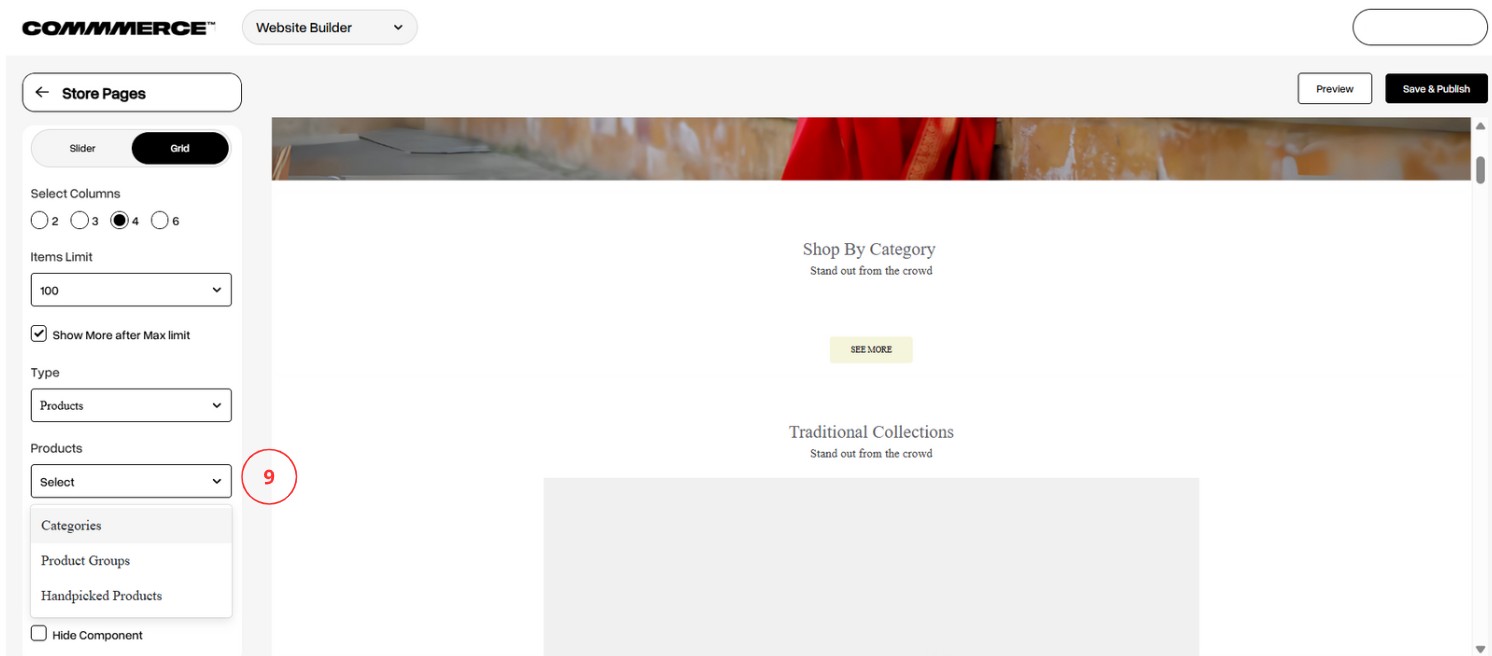
Step 6.1. If you choose "Product" as the type, you will have the option to select products from various sources: you can pick from a specific Category, a Product Group, or even Handpicked Products that you prefer (as shown in "9").
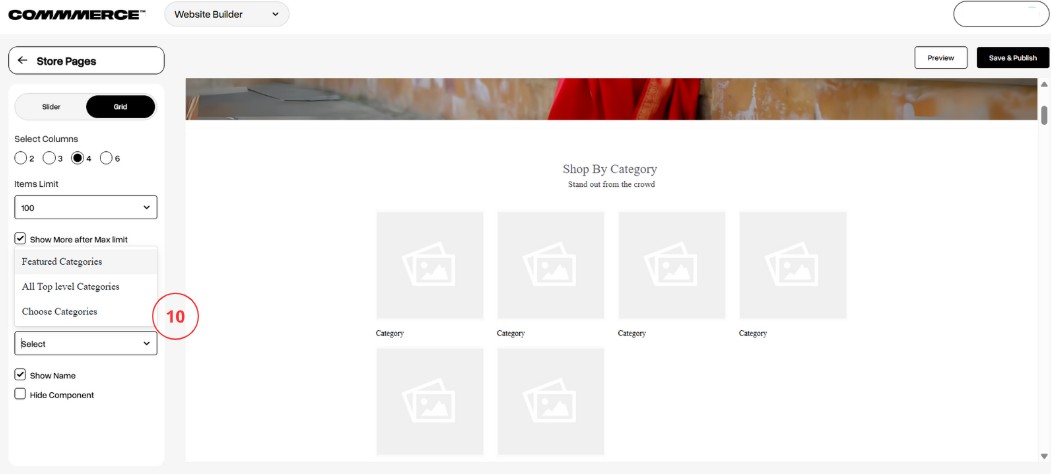
Step 6.2. If you choose "Category" as the type, you will be able to select from different options: you can choose from Featured Categories, view All Top-Level Categories, or pick specific categories that you want to display on the homepage (as shown in "10").
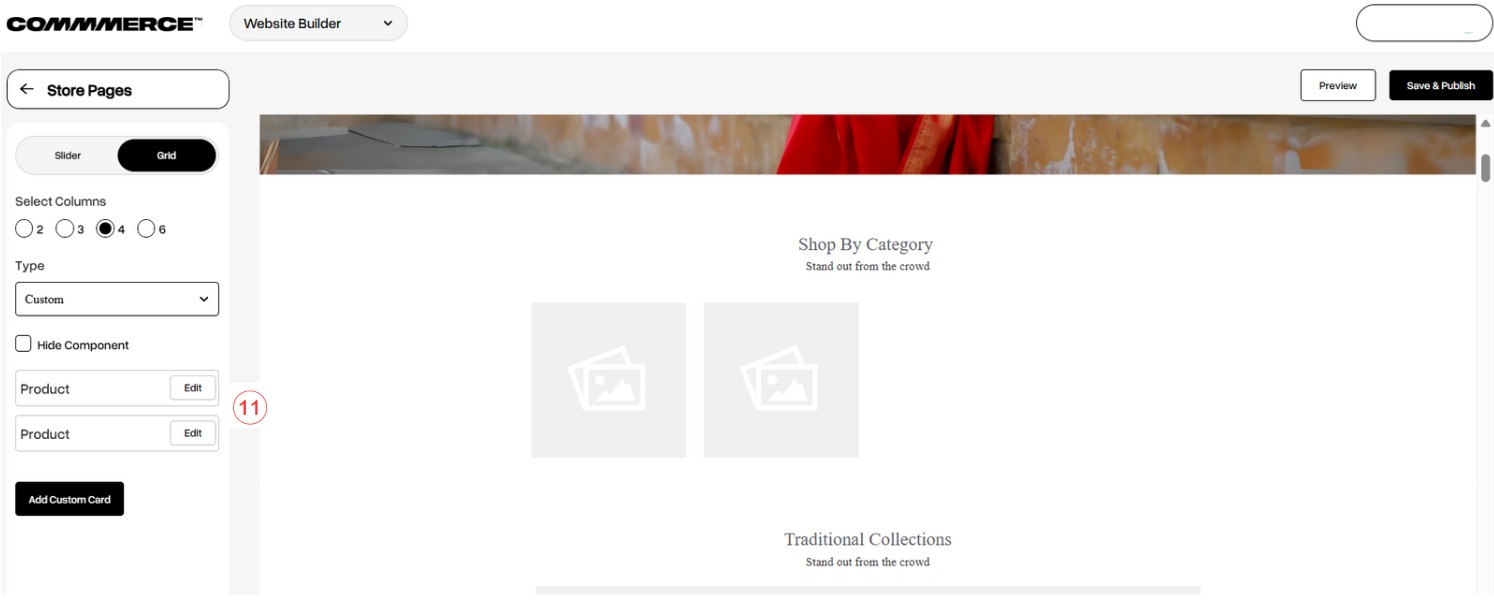
Step 6.3. If you choose "Custom" as the type, you can manually edit the details. Simply click the Edit button (as shown in "11") to add and customize the information as you like.
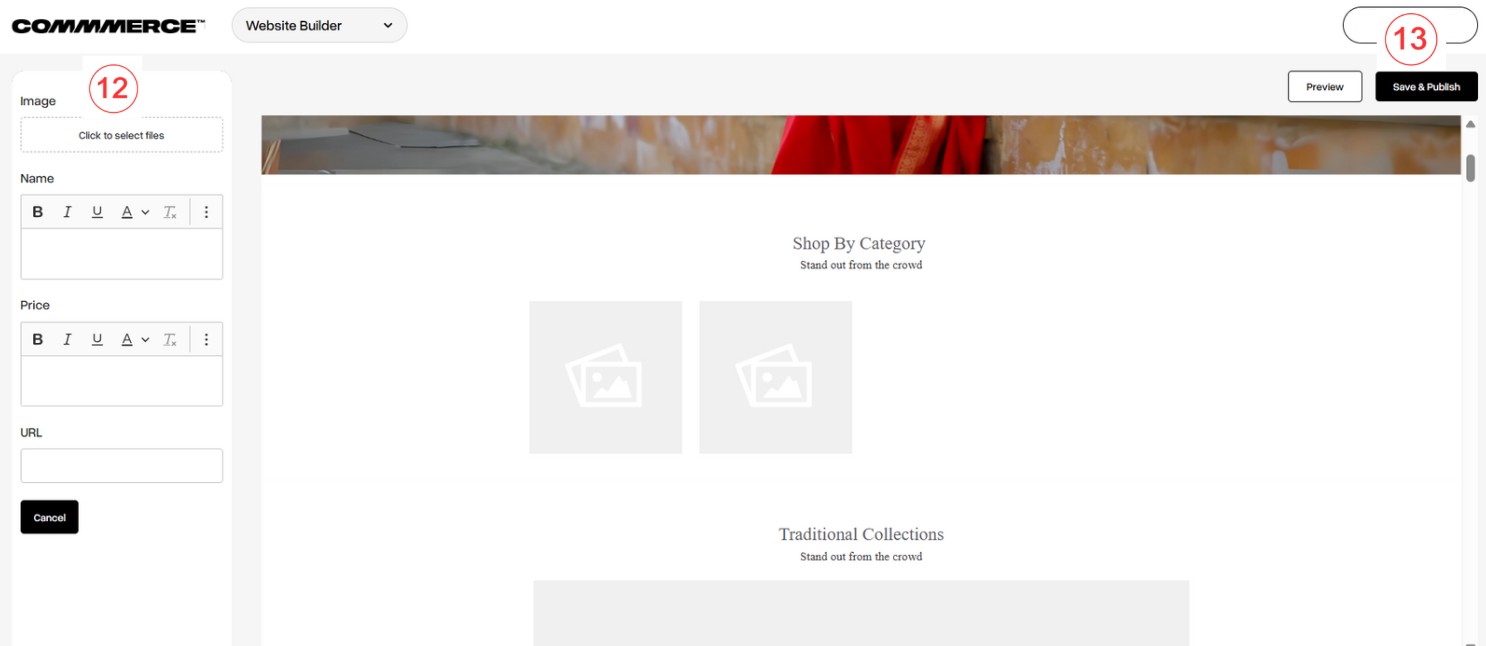
Step 6.4. After clicking the Edit button, you will have the option to upload an image (as shown in "12"). You can also enter the product name, set the price, and provide the URL for the page where customers will be directed when they click on the image. Once you’ve updated all the details, click on Save and Publish (as shown in "13") to finalize your changes.
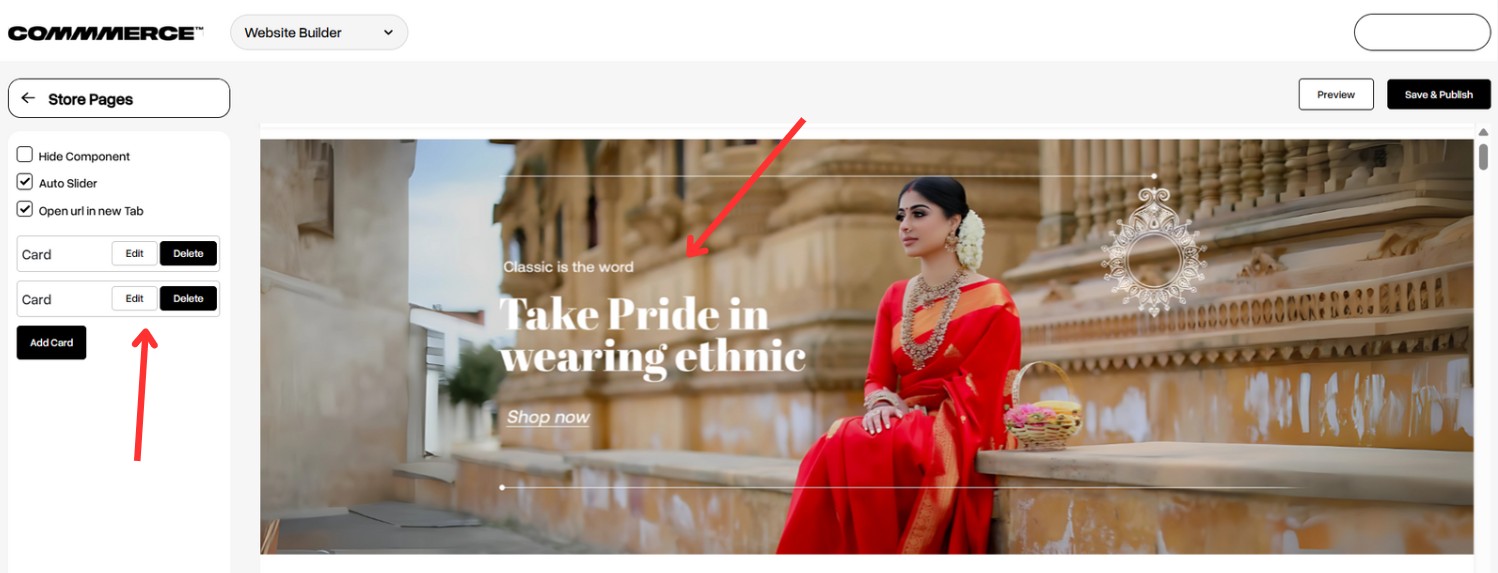
Step 7. If you want to edit the banner images, click on the banner image. You’ll see options on the left to Edit or Delete.
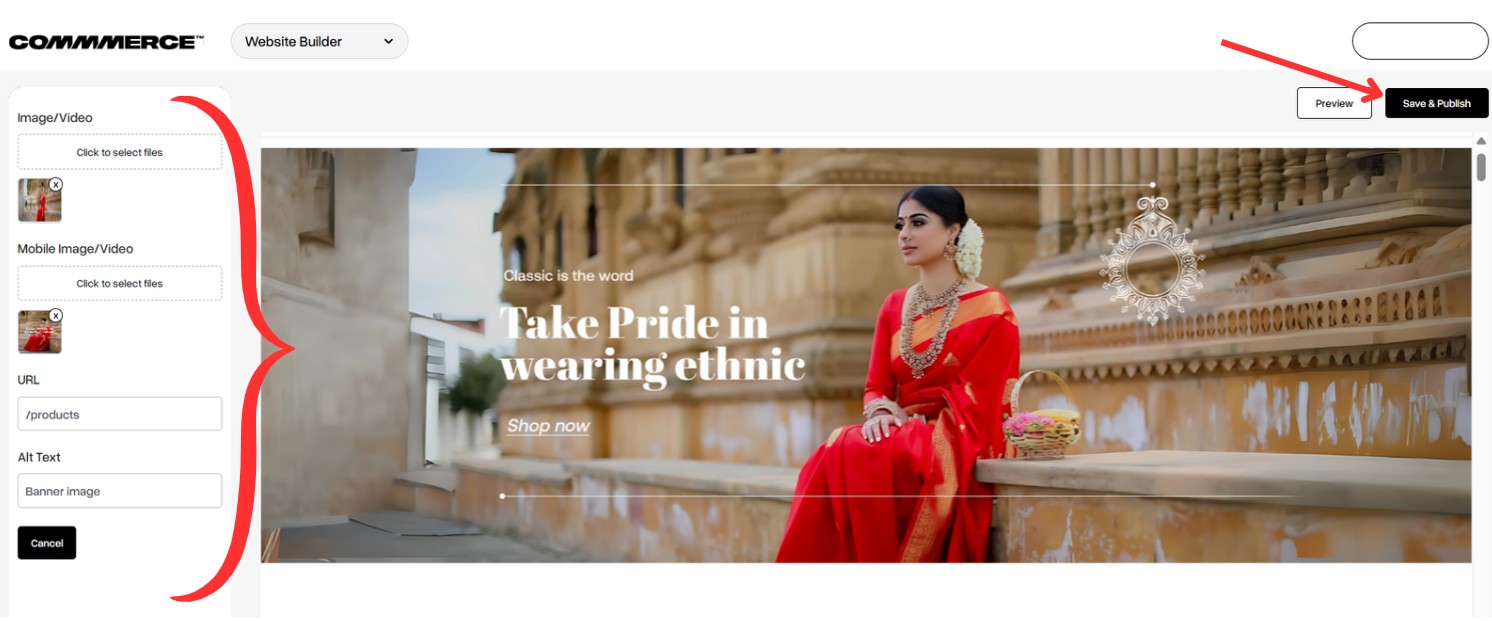
Step 8. Once you click on Edit, you can add a Desktop Banner Image or Video, a Mobile Banner Image or Video, and a URL for redirection to the desired page. If the page fails to load, it’s recommended to enter the image name (for example, banner image 1, banner image 2) in the Alt Text for better accessibility. After updating all the details, click on Save and Publish in the top right corner to apply your changes.
Step 9. If you want to edit any image or text on the website builder page (as shown in below image), click on Text / Image in the website builder. Whether it’s an image or text, you’ll see the editing options on the left. Enter the text or add the image as needed, and then click Save and Publish.
