10 Feb 2025 12.00 AM I 428 Views
How can I set specific dates and times for scheduling Emails and SMS messages?
- This Article is for stores running on Solo plan or higher
Follow the below steps to set specific dates and time for scheduling emails and SMS messages:
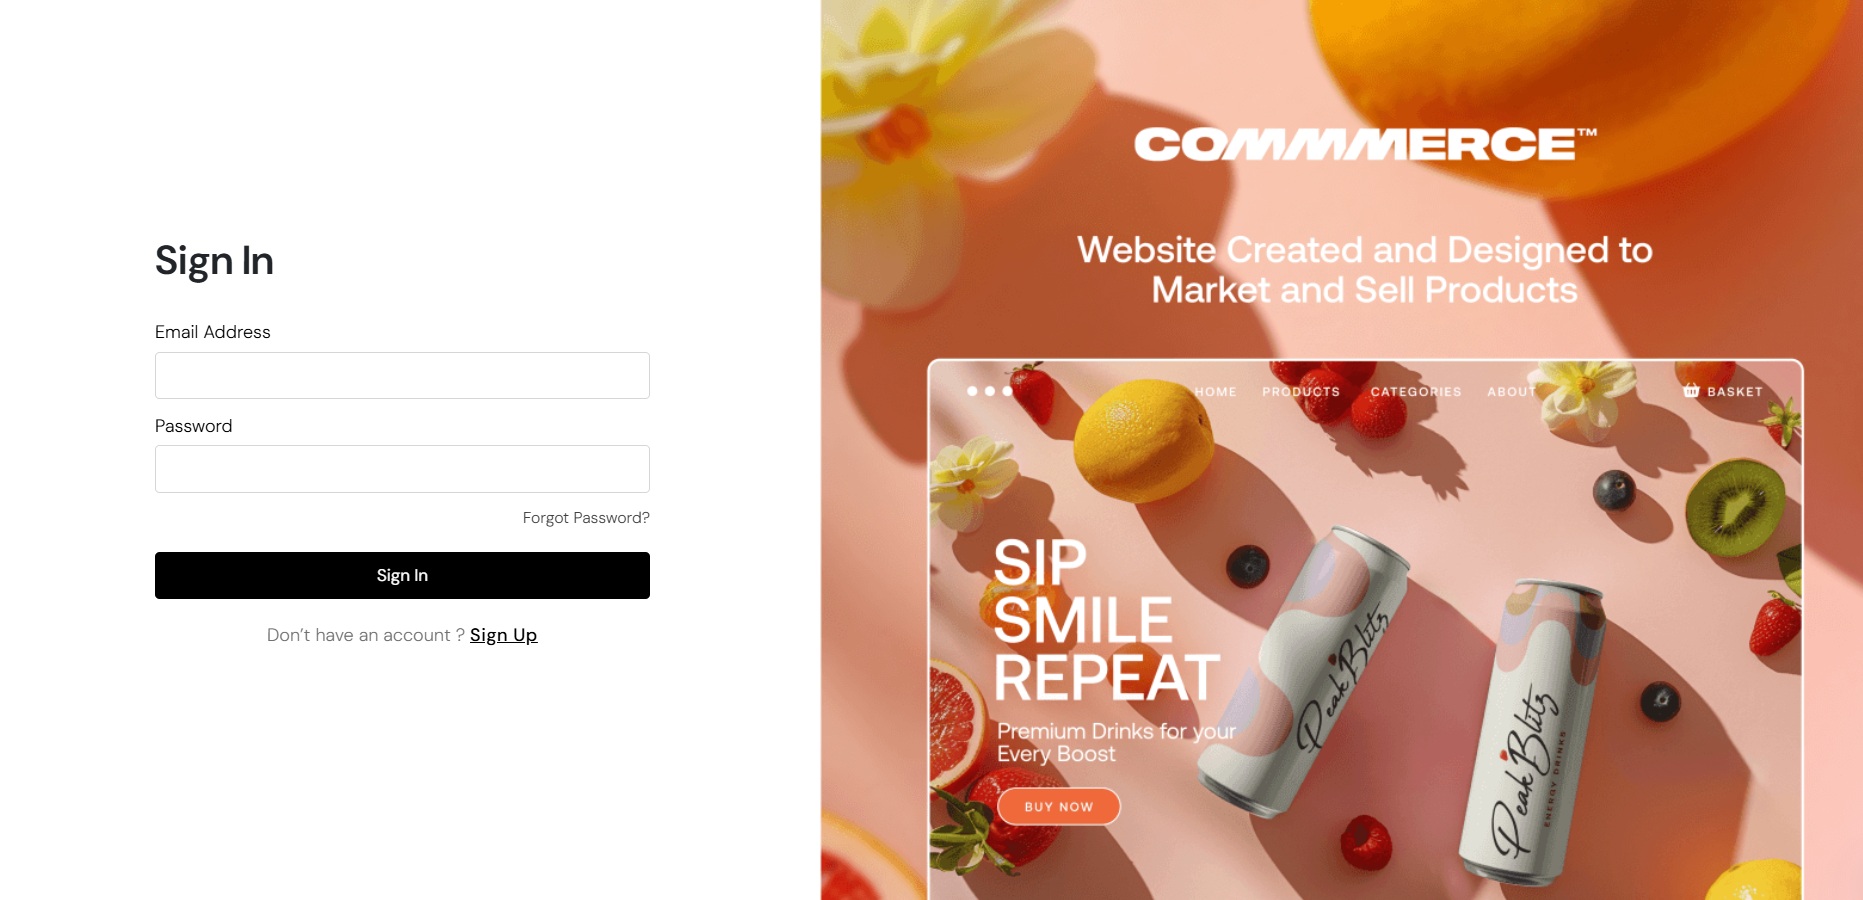
Step 1. Log in to your Commmerce’s Admin Panel by entering the
Registered mail ID and
Password. To log in
click here
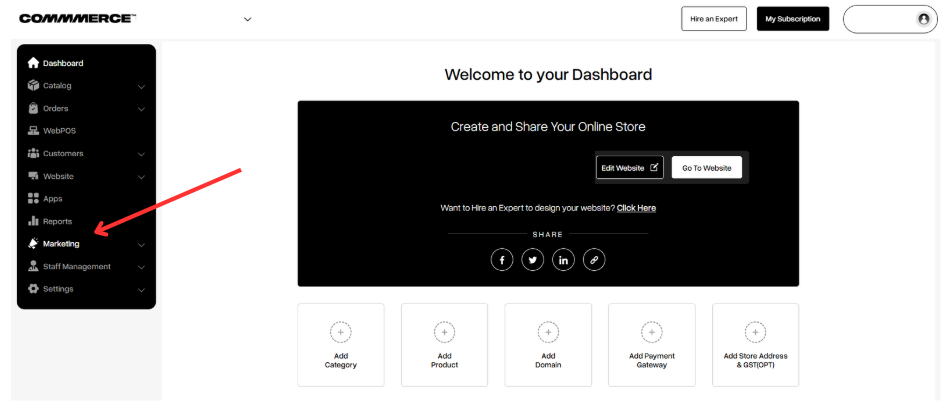
Step 2. Click on the Marketing option on the left side of the Dashboard (as shown below)
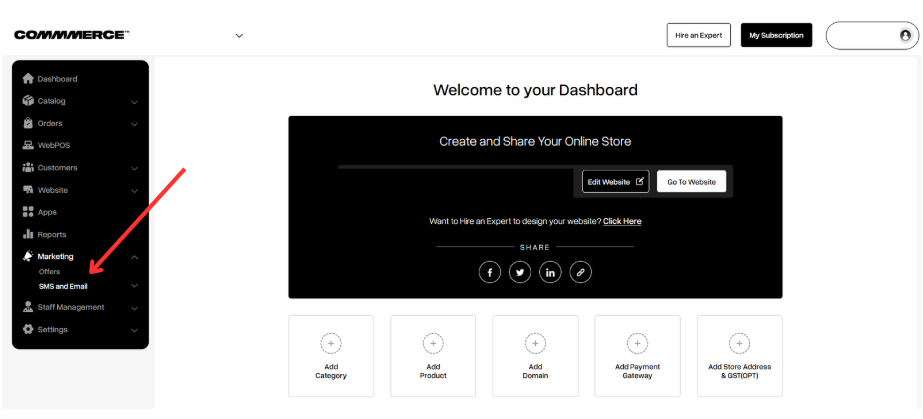
Step 3. Below the Marketing option, you will find the SMS & Email section. Click on SMS & Email (as shown below)
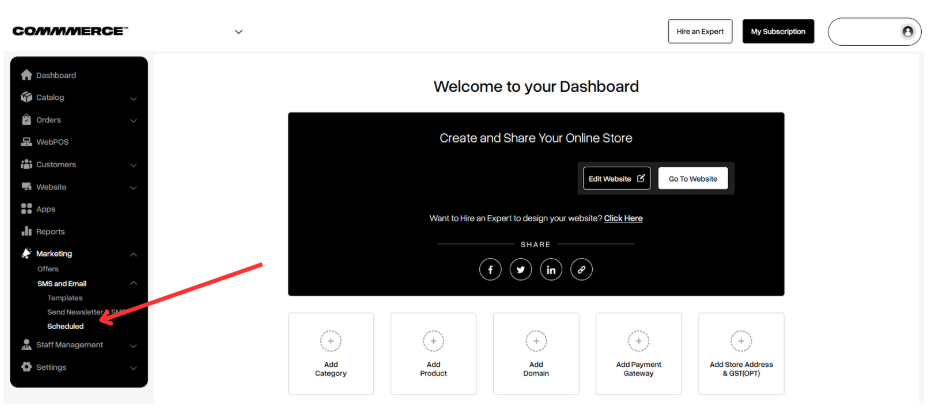
Step 4. Below the SMS & Email option, you will find the Scheduled option (as shown below)
Step 5. Then click on the Add New Schedule button in the top right corner (as shown below)
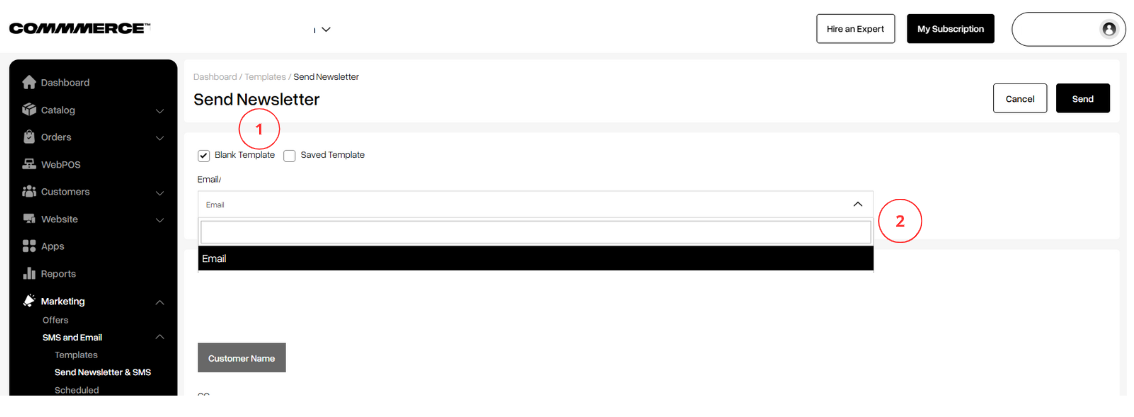
Step 6. You can choose a Blank template or a Saved template per your requirement.
6.1. If you select a Blank Template (as shown in “1”), you’ll get the option to create your own Email template (as shown in “2”).
**Please be advised that, due to regulations set forth by the Telecom Regulatory Authority of India (TRAI), SML templates are not subject to editing.
6.1.1. Fill in the required details (as shown below)
6.1.2. You can add an unsubscribe link and use your email address to check the email template preview.
6.1.3. Select the dropdown menu for Recipients to choose to whom you want to send the email.
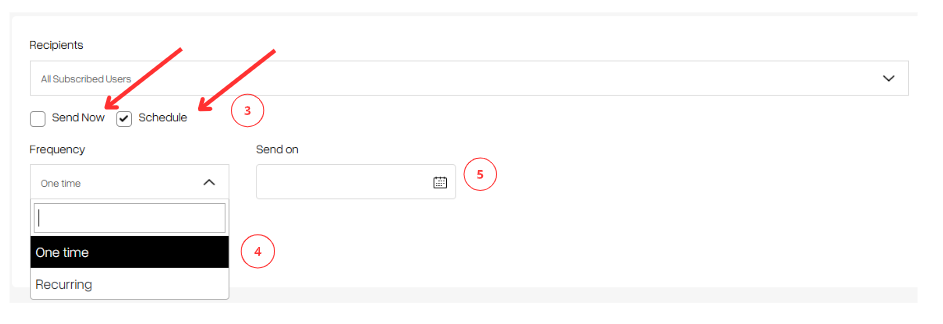
6.1.4. If you click on 'Send Now,' the email will be sent to everyone you selected in the recipients. If you select 'Schedule,' (as shown in "3") it will prompt you for frequency.
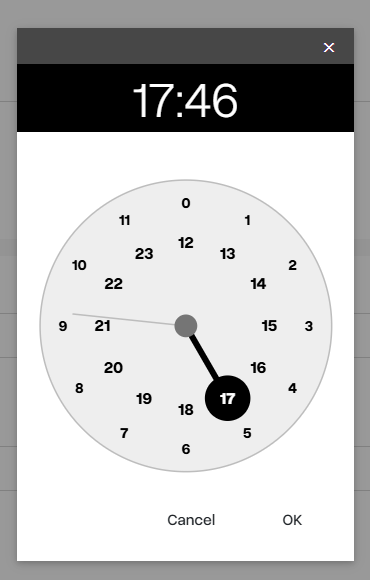
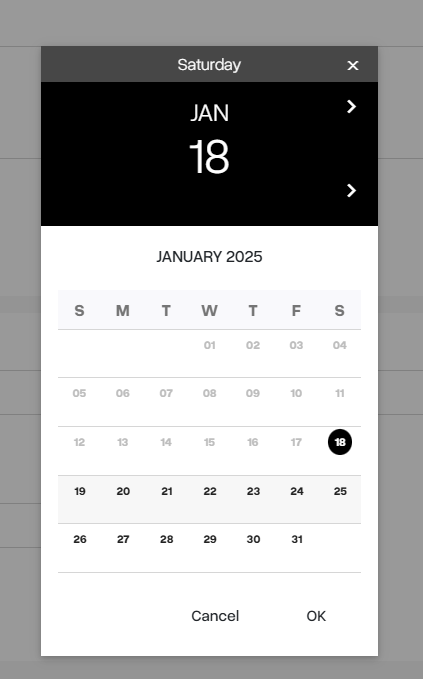
Choose 'One Time' (as shown in "4") to send the email once and then set the date and time (as shown in "5").
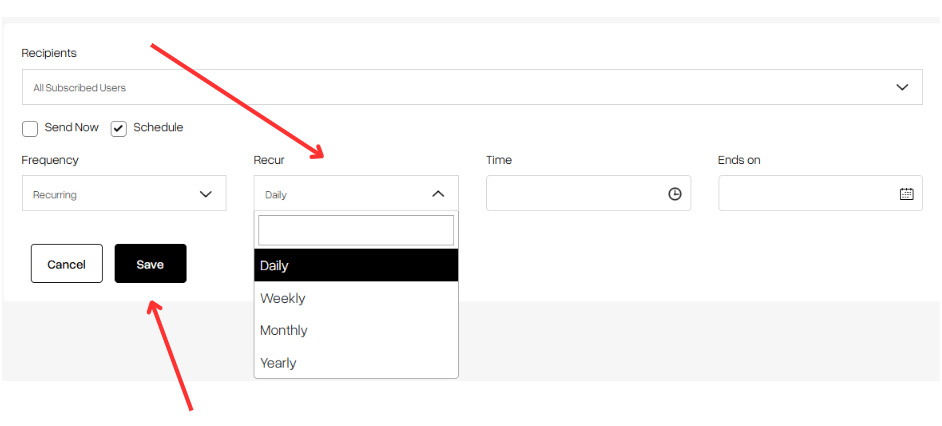
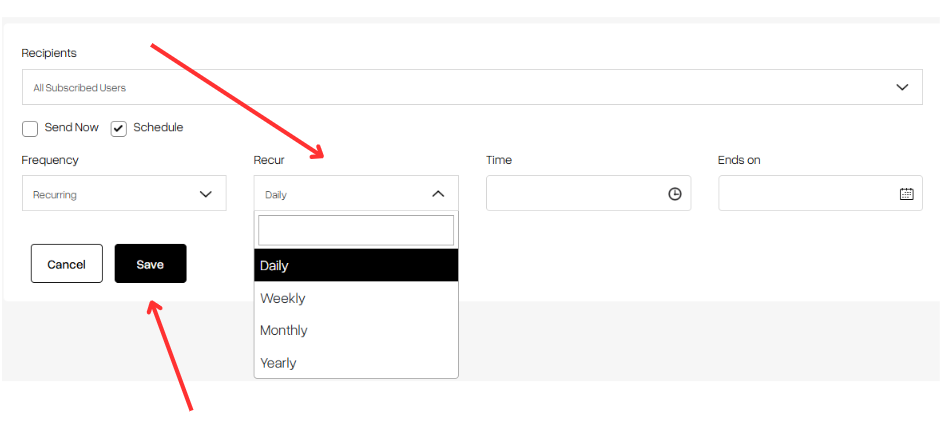
6.1.5. If you choose the recurring option, you will be able to select daily, weekly, monthly, or yearly frequencies. Additionally, you can specify the recurring time and end date for this schedule. Once all details have been updated, please click on the 'Save' button.
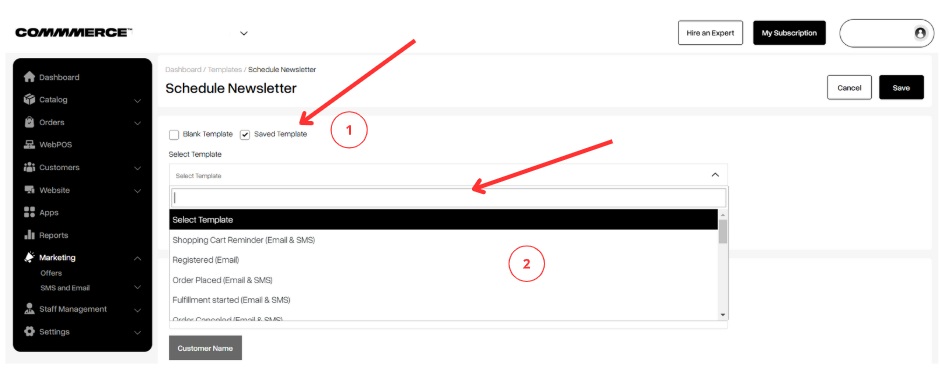
6.2. If you select a saved template (as shown in "1"), you will find several pre-created templates available for your selection (as shown in "2"), and you can choose to proceed further.
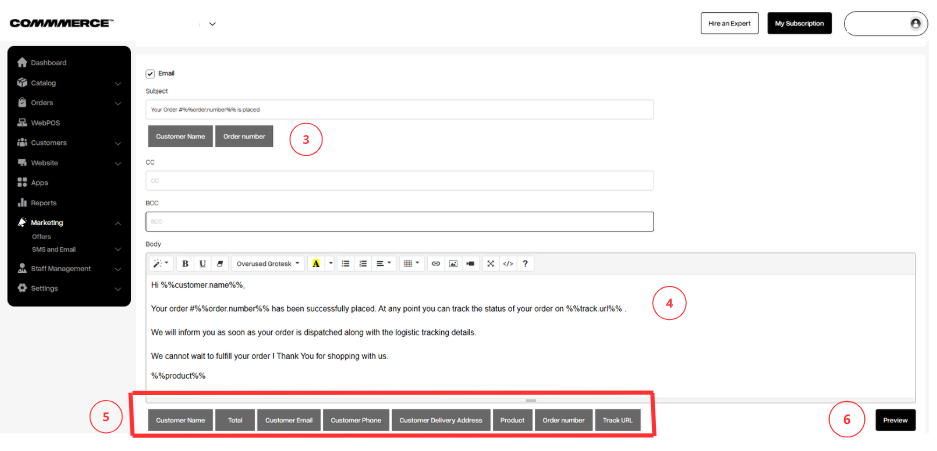
6.2.1. In the subject line, you can select the customer's name and order number (as shown in "3").
You can also edit the email templates and add images or text to the email (as shown in "4").
In the body of the email, you can select the customer's name, product, tracking URL, and more( as shown in "5").
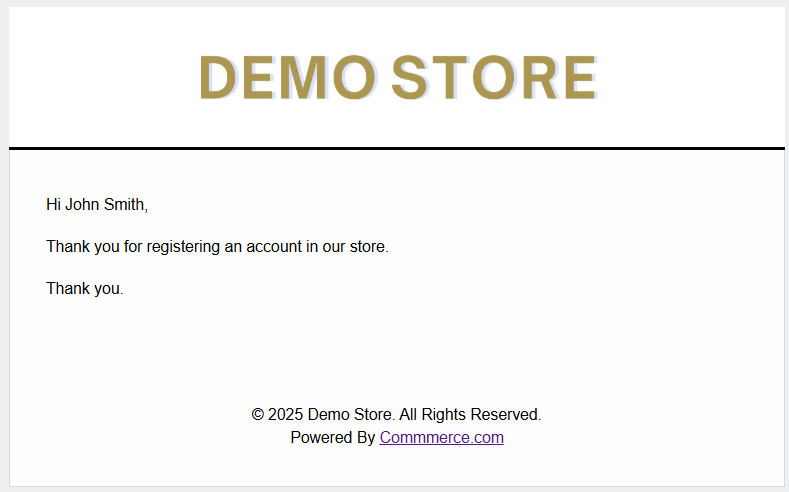
Once all the details are updated, you can click on 'Preview' to check the email format (as shown in "6").
6.2.2. You can add an unsubscribe link (as shown in “7”) and use your email address to check the email template preview.
6.2.3. You can select the Recipient to whom you want to send the Email
6.2.4. If you click on 'Send Now,' the email will be sent to everyone you selected in the recipients. If you choose 'Schedule,' (as shown in "8") it will prompt you for frequency; choose 'One Time' (as shown in "9") and then set the date and time (as shown in "10").
6.2.5. If you choose the recurring option, you will be given the choice to select from daily, weekly, monthly, or yearly frequencies. Additionally, you can specify the recurring time and the end date for this schedule. Once all details have been updated, please click the 'Save' button.




.png)


1.png)
