29 Mar 2025 12.00 AM I 332 Views
How can I specify shipping costs for different regions in the Commmerce dashboard?
- This Article is for stores running on Solo plan or higher
There is an option in the Commmerce dashboard where you can specify shipping costs for different regions. You can create different shipping zones for various regions and set different shipping rates for each zone.
Step 1. Log in to your Commmerce’s Admin Panel by entering the
Registered mail ID and
Password. To log in
click here
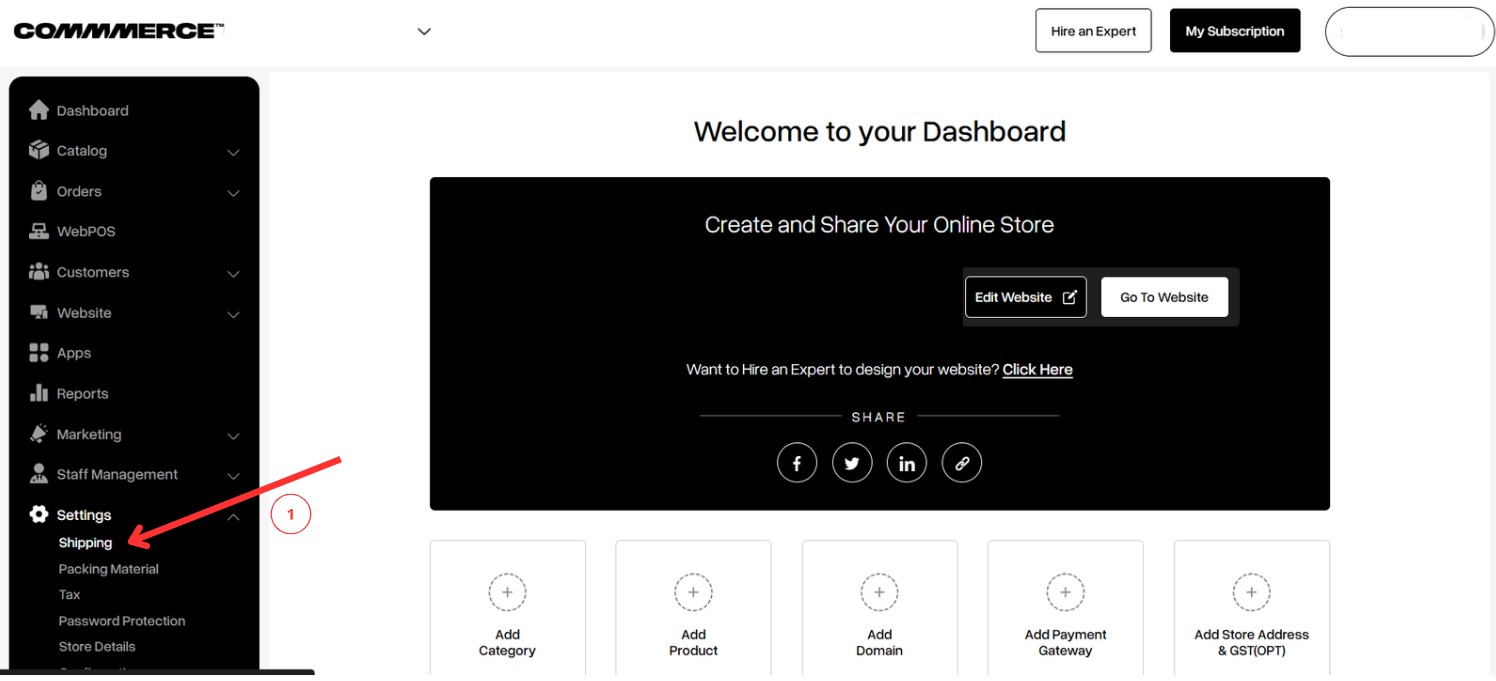
Step 2. After logging in, click on the Settings option in the left side menu bar of the dashboard, and then click on Shipping (as shown in “1”).
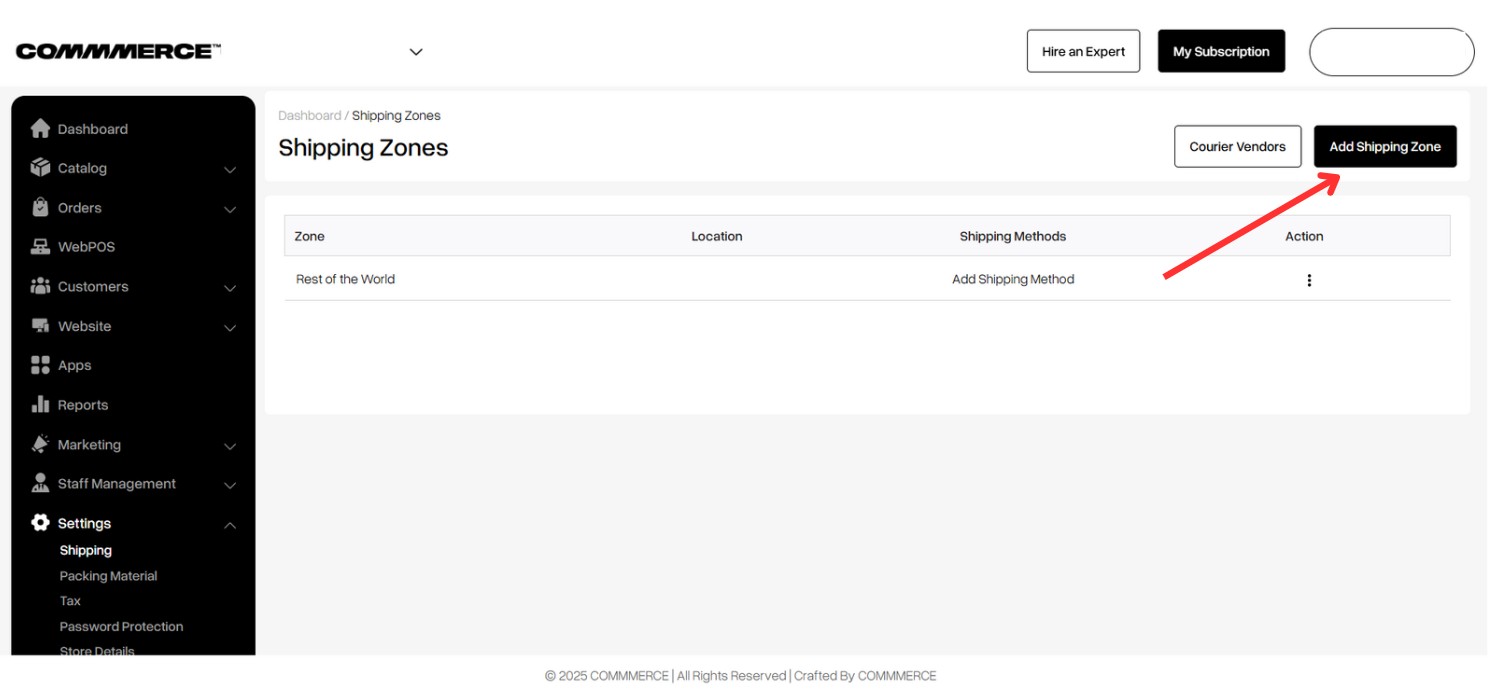
Step 3. On the shipping zone page, click on Add Shipping Zone in the top right corner (as shown below).
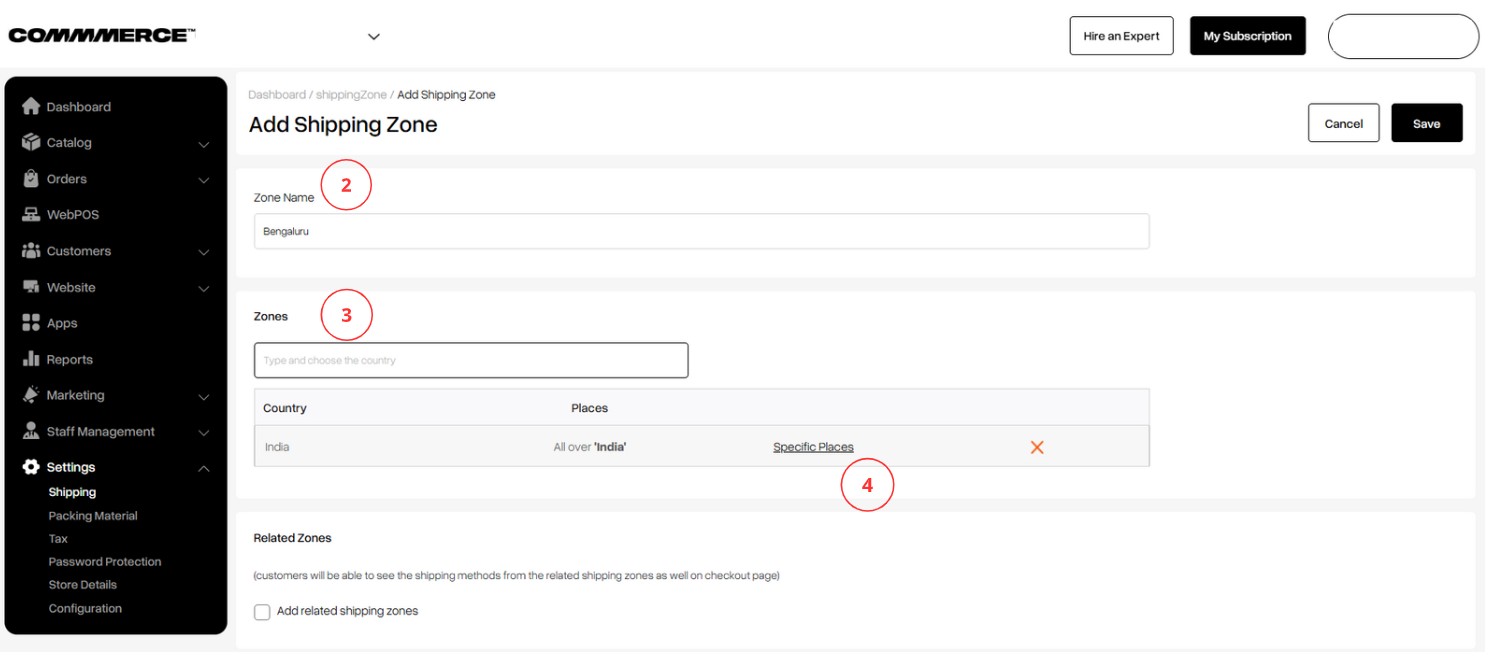
Step 4. Enter a name for the zone according to your requirements (as shown in “2”).
In the Zones section, type "India" and select it (as shown in “3”).
You will then have the option to specify the location by state, city, or PIN code. Click on the specific locations you wish to include (as shown in “4”).
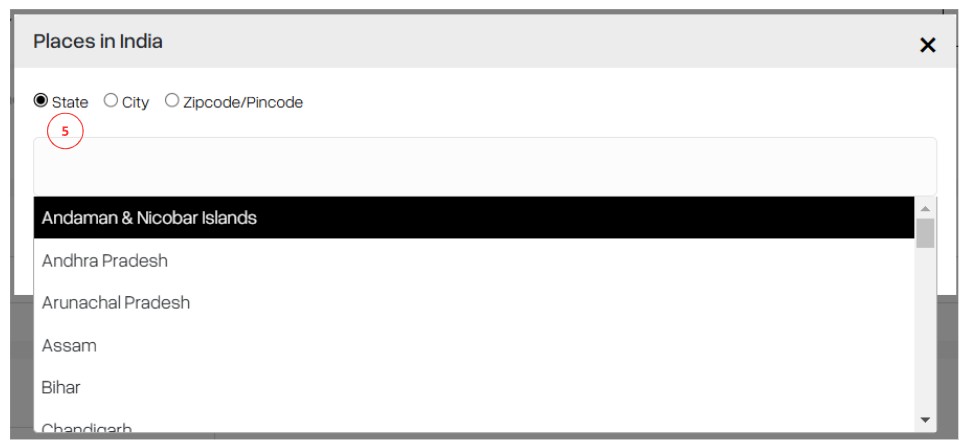
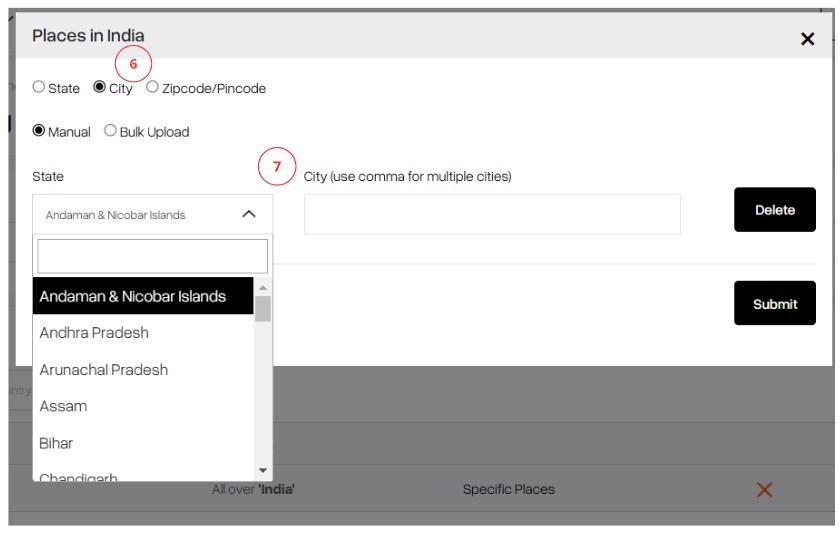
Step 5. When you click on the Specific Places option, a pop-up will appear where you can select the location based on your needs (as shown below).
5.1. Select State (as shown in “5”), and then choose your desired Indian state from the drop-down menu.
5.2. By selecting the City option (as shown in “6”), you will have the opportunity to choose both the state and the corresponding city name. (as shown in “7”).
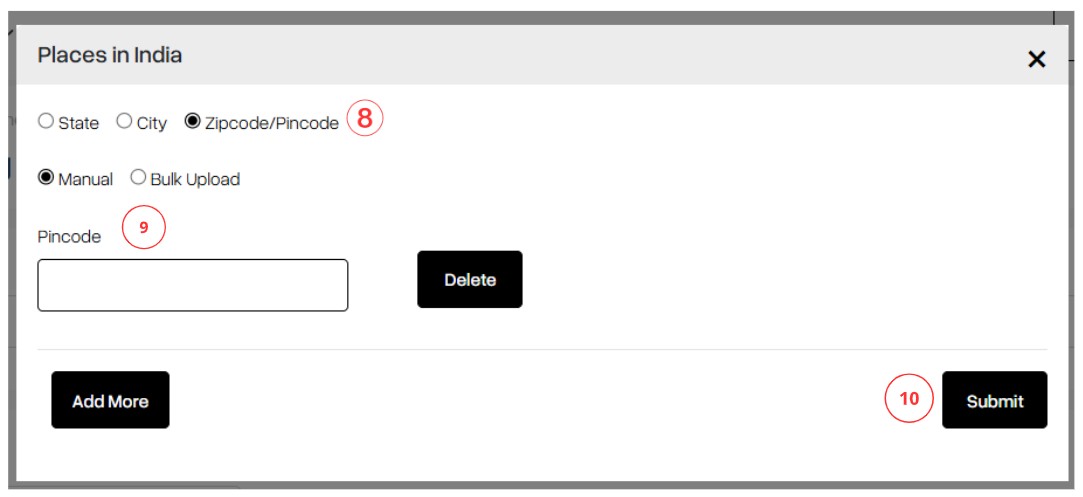
5.3. When you select the Zipcode/Pincode option (as shown in “8”), you can choose to add the Pincode either manually or through a bulk upload.
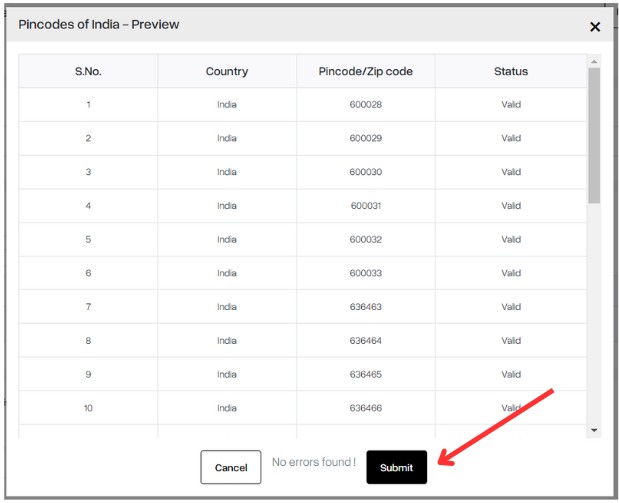
5.3.1. If you opt for manual entry, you can input each pincode individually (as shown in “9”). Once you have updated the Pincode, simply click on the Submit button (as shown in “10”) to complete the process.
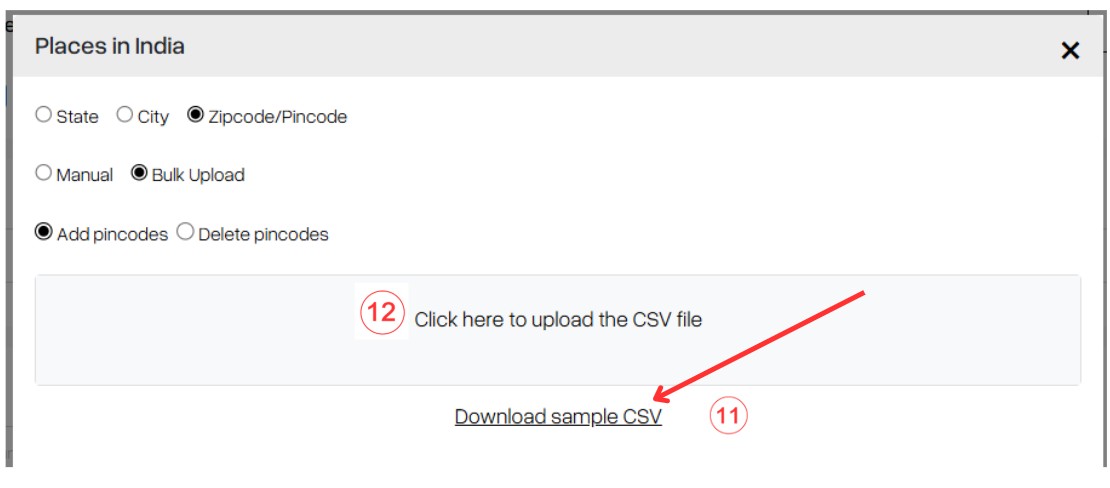
5.3.2. Upon selecting the bulk upload option, you will have the opportunity to download a sample file (as shown in image “11”).
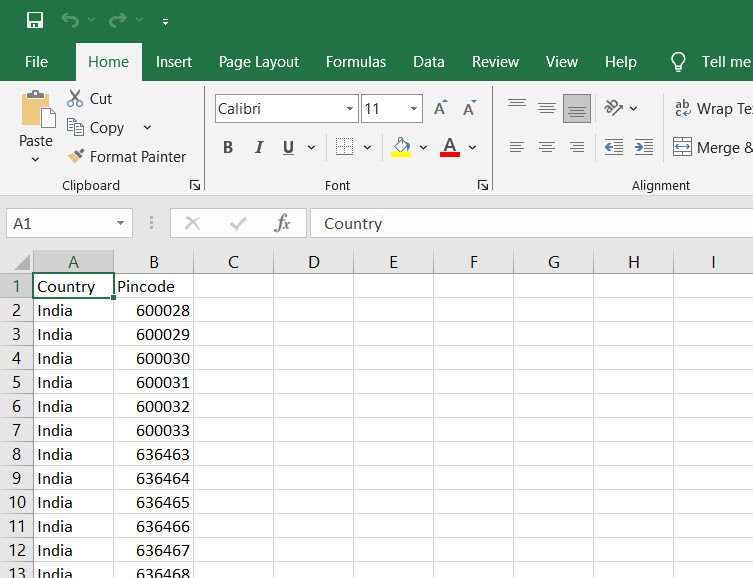
Click the download link to retrieve a CSV file, which you can update with your details.
After making the necessary updates, click on 'Click here to upload the CSV file' (as shown in image “12”) to complete the upload process.
Once the file is uploaded successfully, you can click on the Submit button (as shown below).
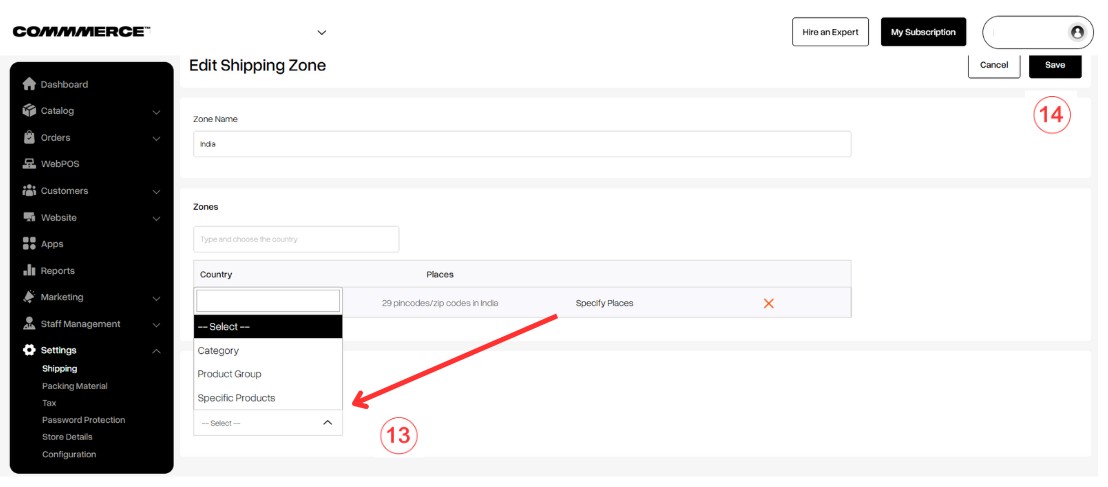
Step 6. Once you have set the location, you can choose to display either a category, specific products, or a product group in that designated zone (as shown in “13”). Then, click on the Save button located in the right corner (as shown in “14”).
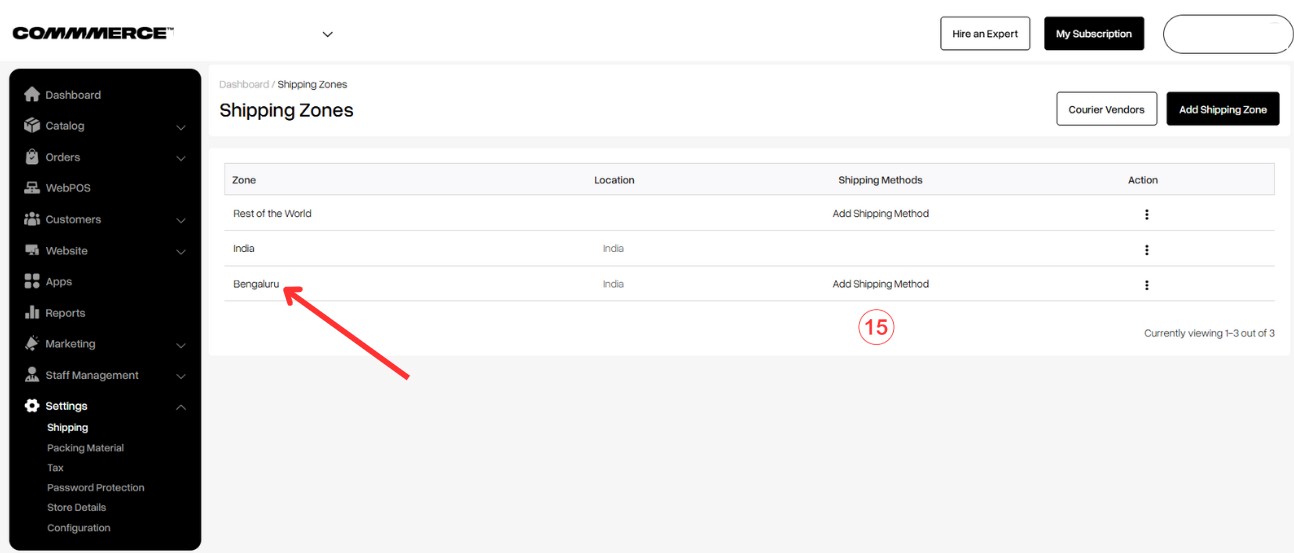
Step 7. After creating a shipping zone, click on the Add Shipping Method option (as shown in “15”).
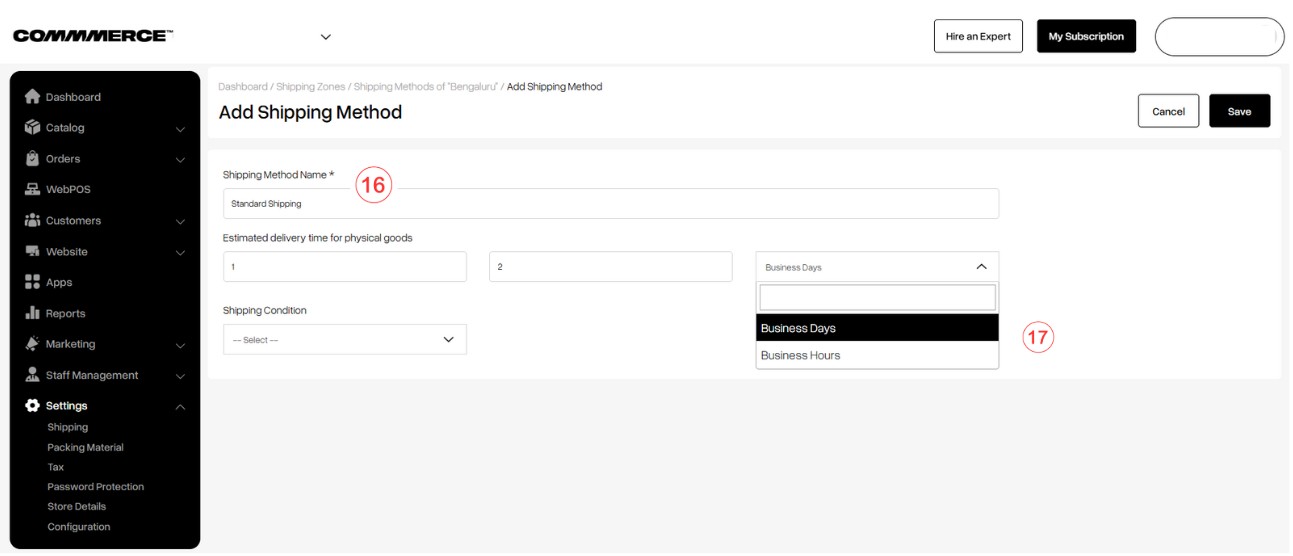
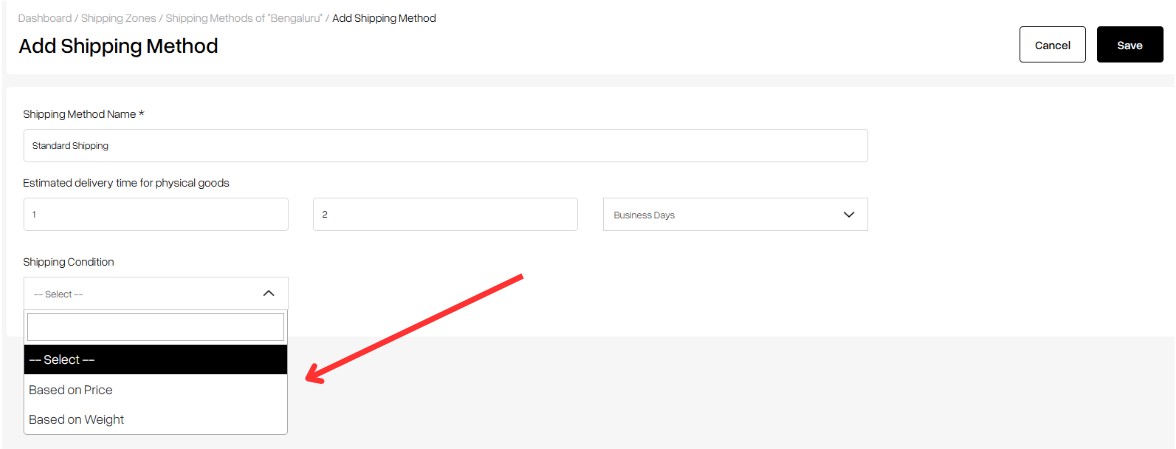
Step 8. Add the details such as the shipping method name (as shown in “16”).
Specify the estimated delivery time for physical goods.
Select either business days or business hours (as shown in “17”).
Step 9. Select the shipping condition from the drop-down menu, either based on price or based on weight (as shown below).
Step 10. When you select
“based on price” as
the
Shipping Condition
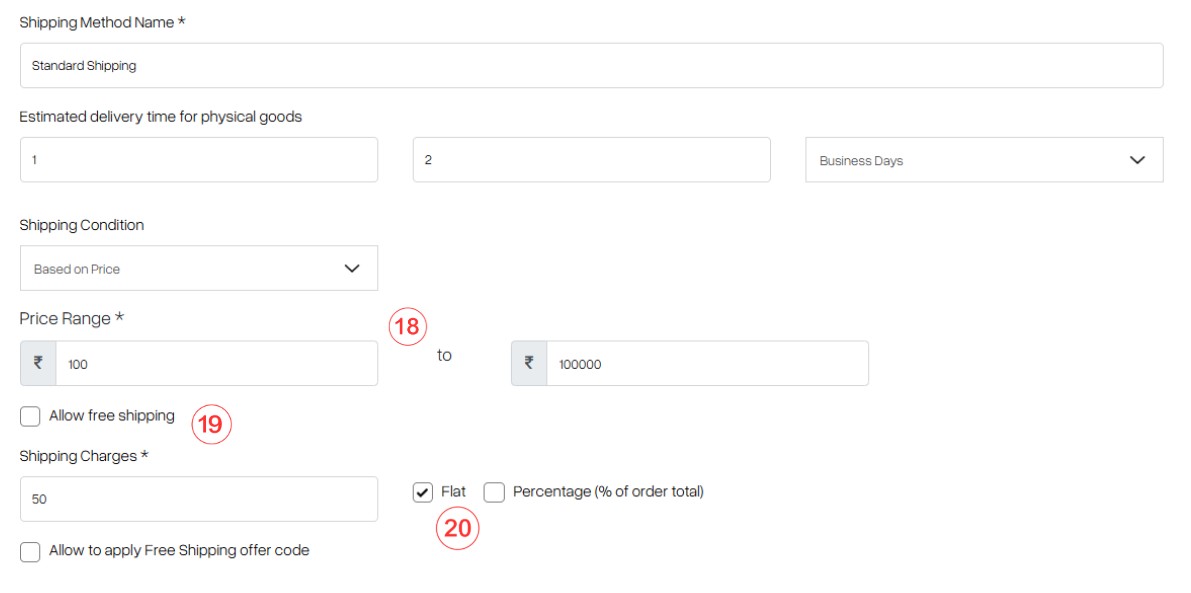
- Add the price range (as shown in “18”).
- You can uncheck the “Allow free shipping” option to apply shipping charges (as shown in “19”).
- Then, you can add the shipping charges based on a flat rate or a percentage of the order total (as shown in “20”).
When you select
"based on weight" as
the
Shipping Condition
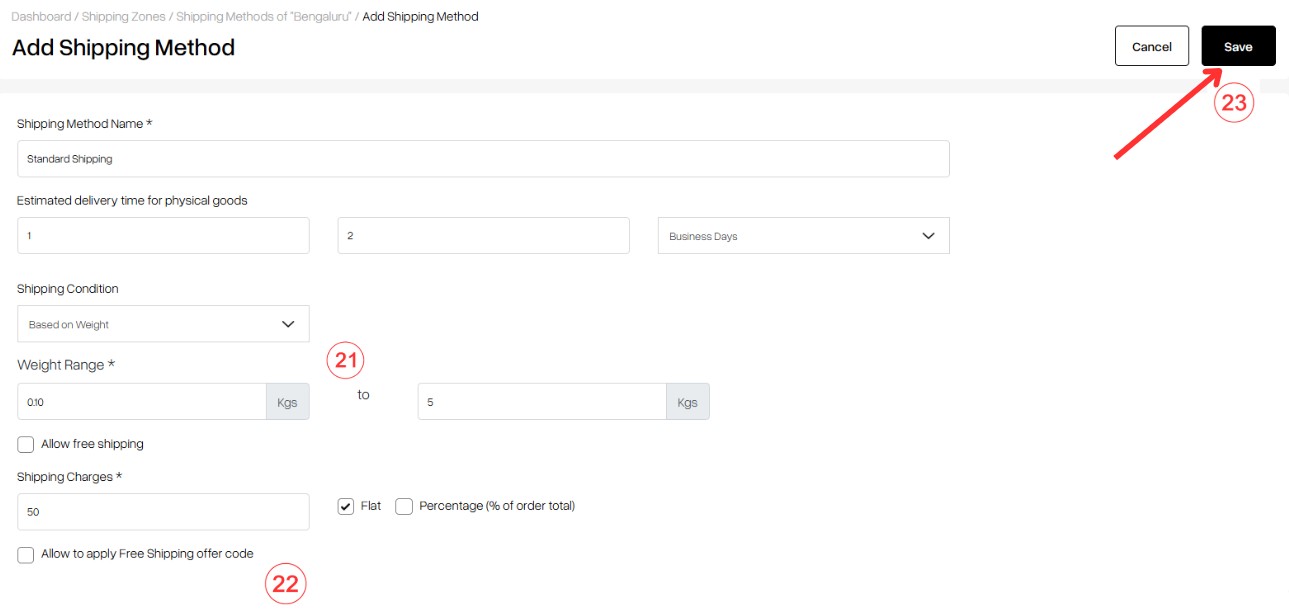
- Add the weight in kilograms (as shown in “21”).
- Then, set the shipping charges. If you want your customers to use a free shipping offer code for this shipping method, enable the option (as shown in “22”).
- Once you have updated all the details, click the Save button in the top right corner (as shown in “23”) to save all the changes.

