27 Jan 2025 12.00 AM I 668 Views
How do I process an order on my Commmerce website through Shiprocket?
- This Article is for stores running on Solo plan or higher
There are two methods for placing an order:
Method 1- Online Ordering: End customers can visit your website to place their orders directly.
Method 2- Manual Order Entry: Alternatively, orders can be placed manually on behalf of the end customer using the WEB-POS option.
Here we are going to discuss Method 1
Step 1. Log in to your Commmerce’s Admin Panel by entering the
Registered mail ID and
Password. To log in
click here
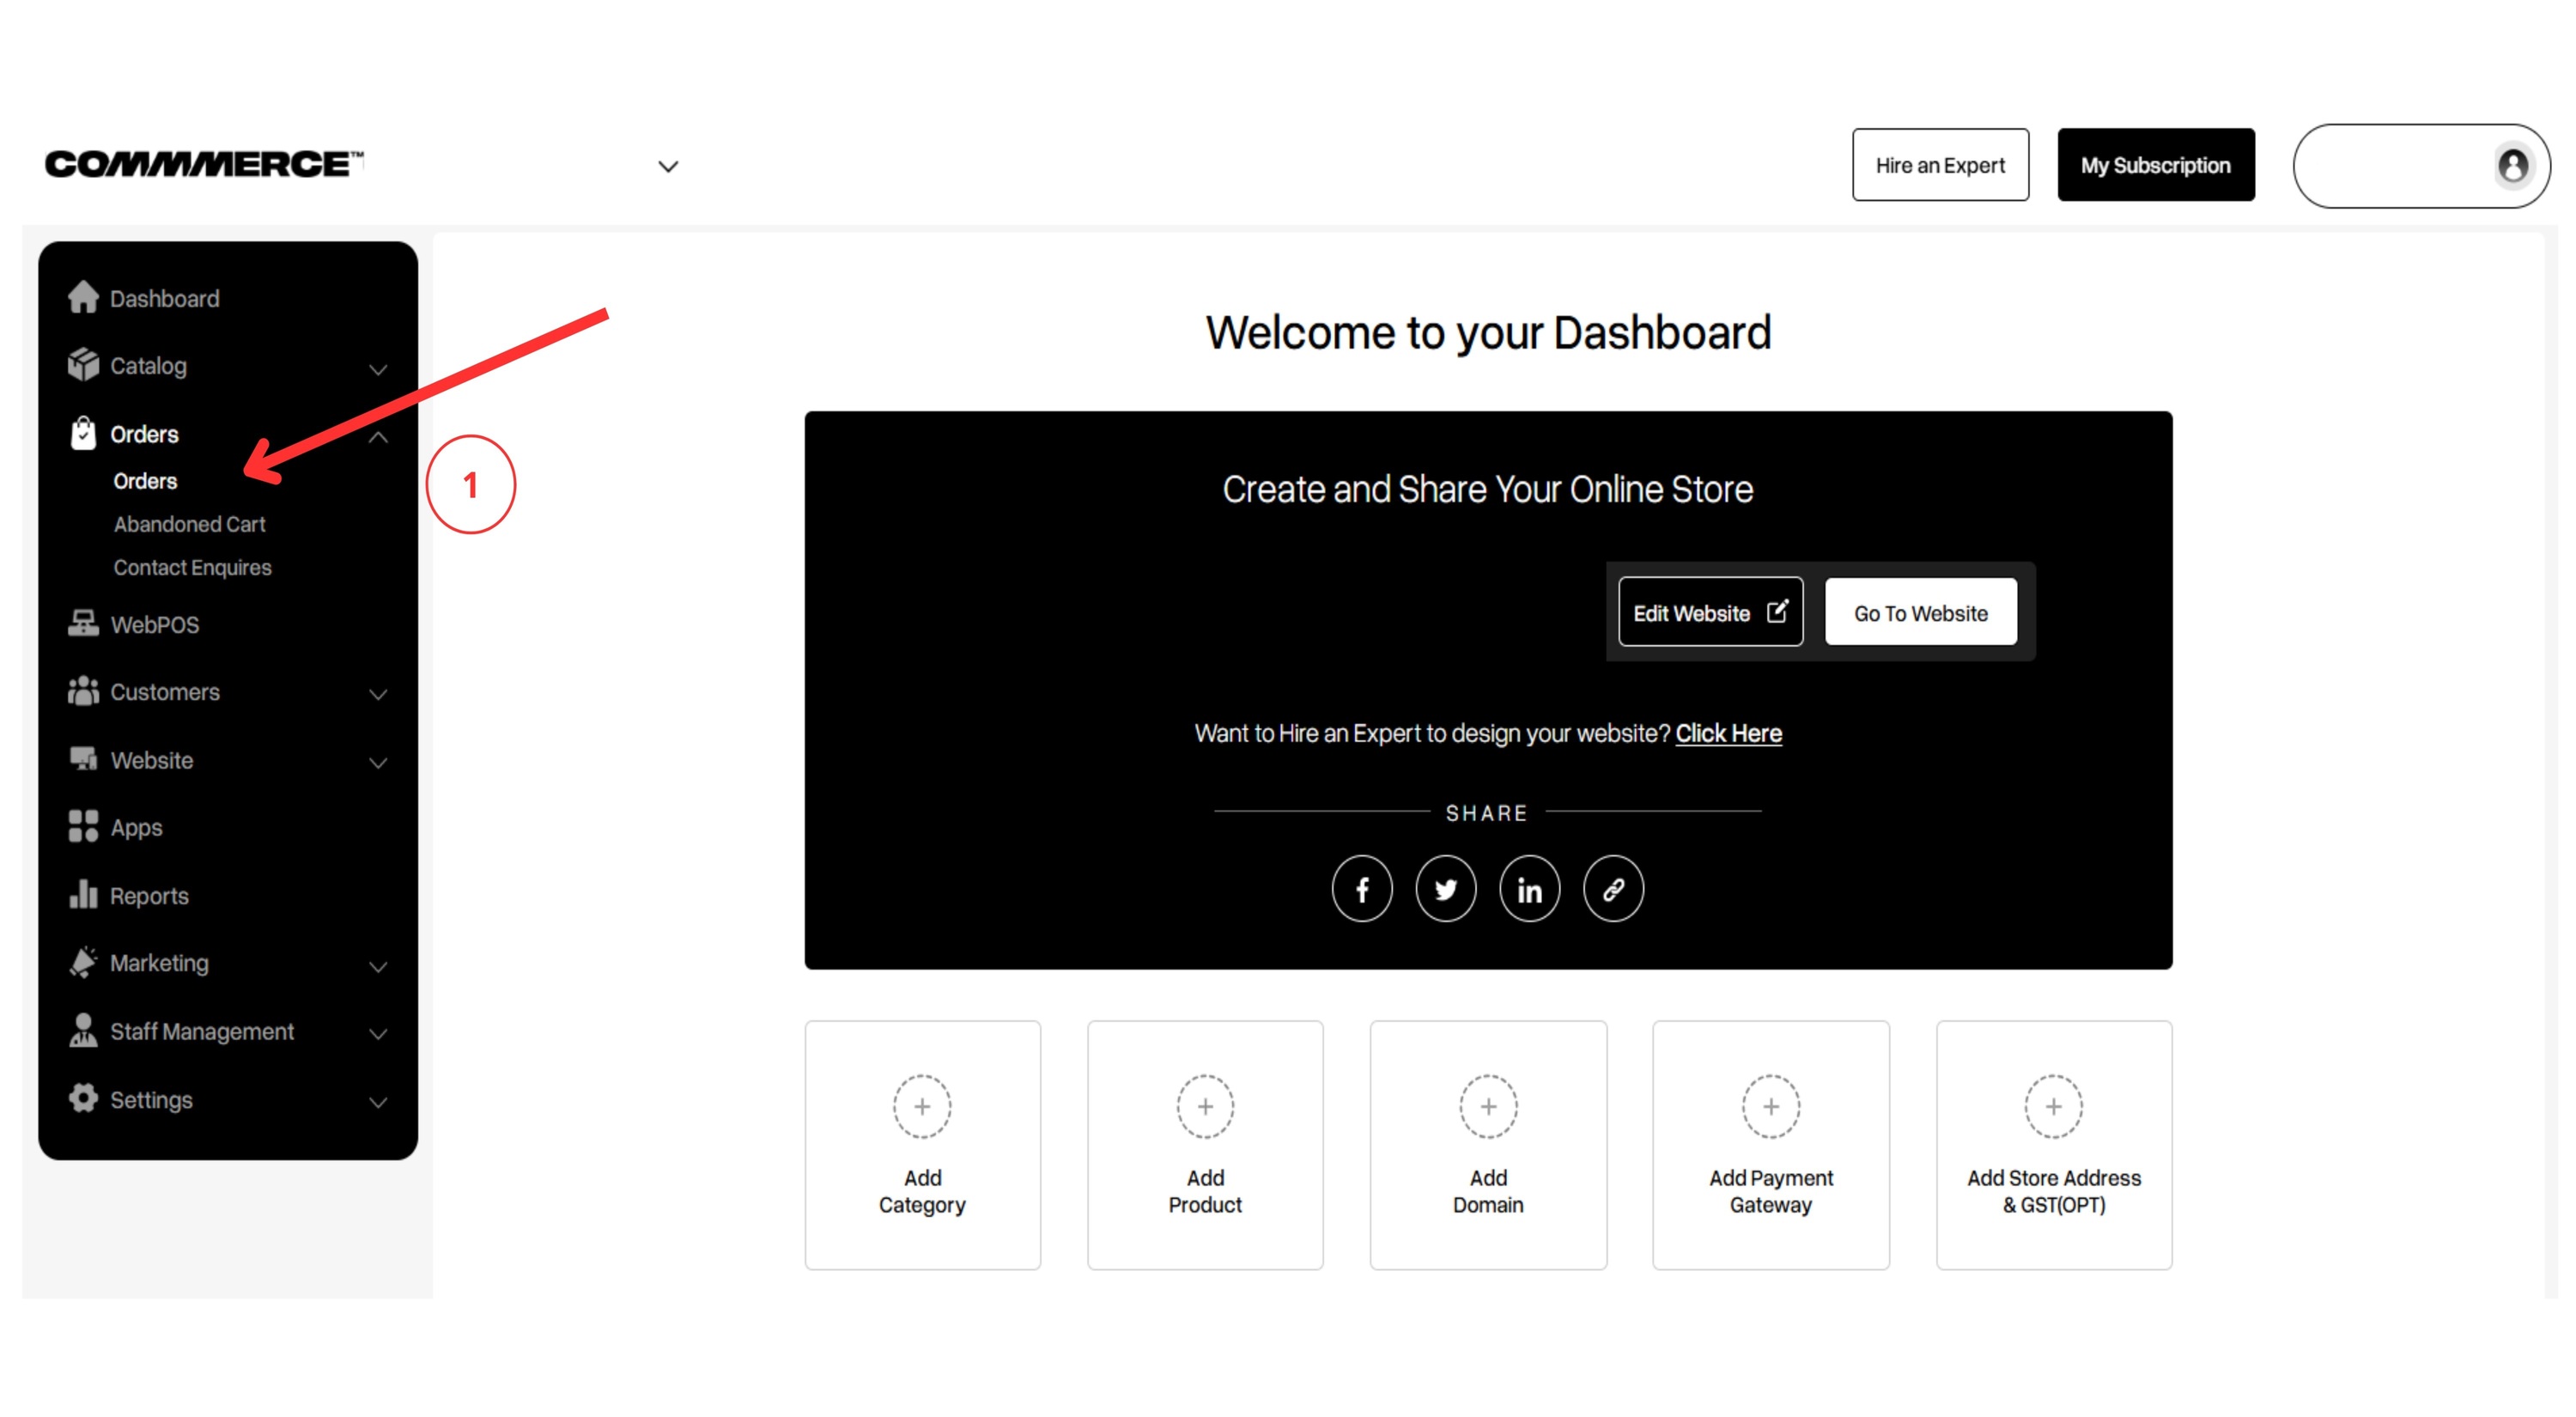
Step 2. Click on Orders on the left side of the admin panel (as shown in “1”). You will find Orders as an option in the Orders section.
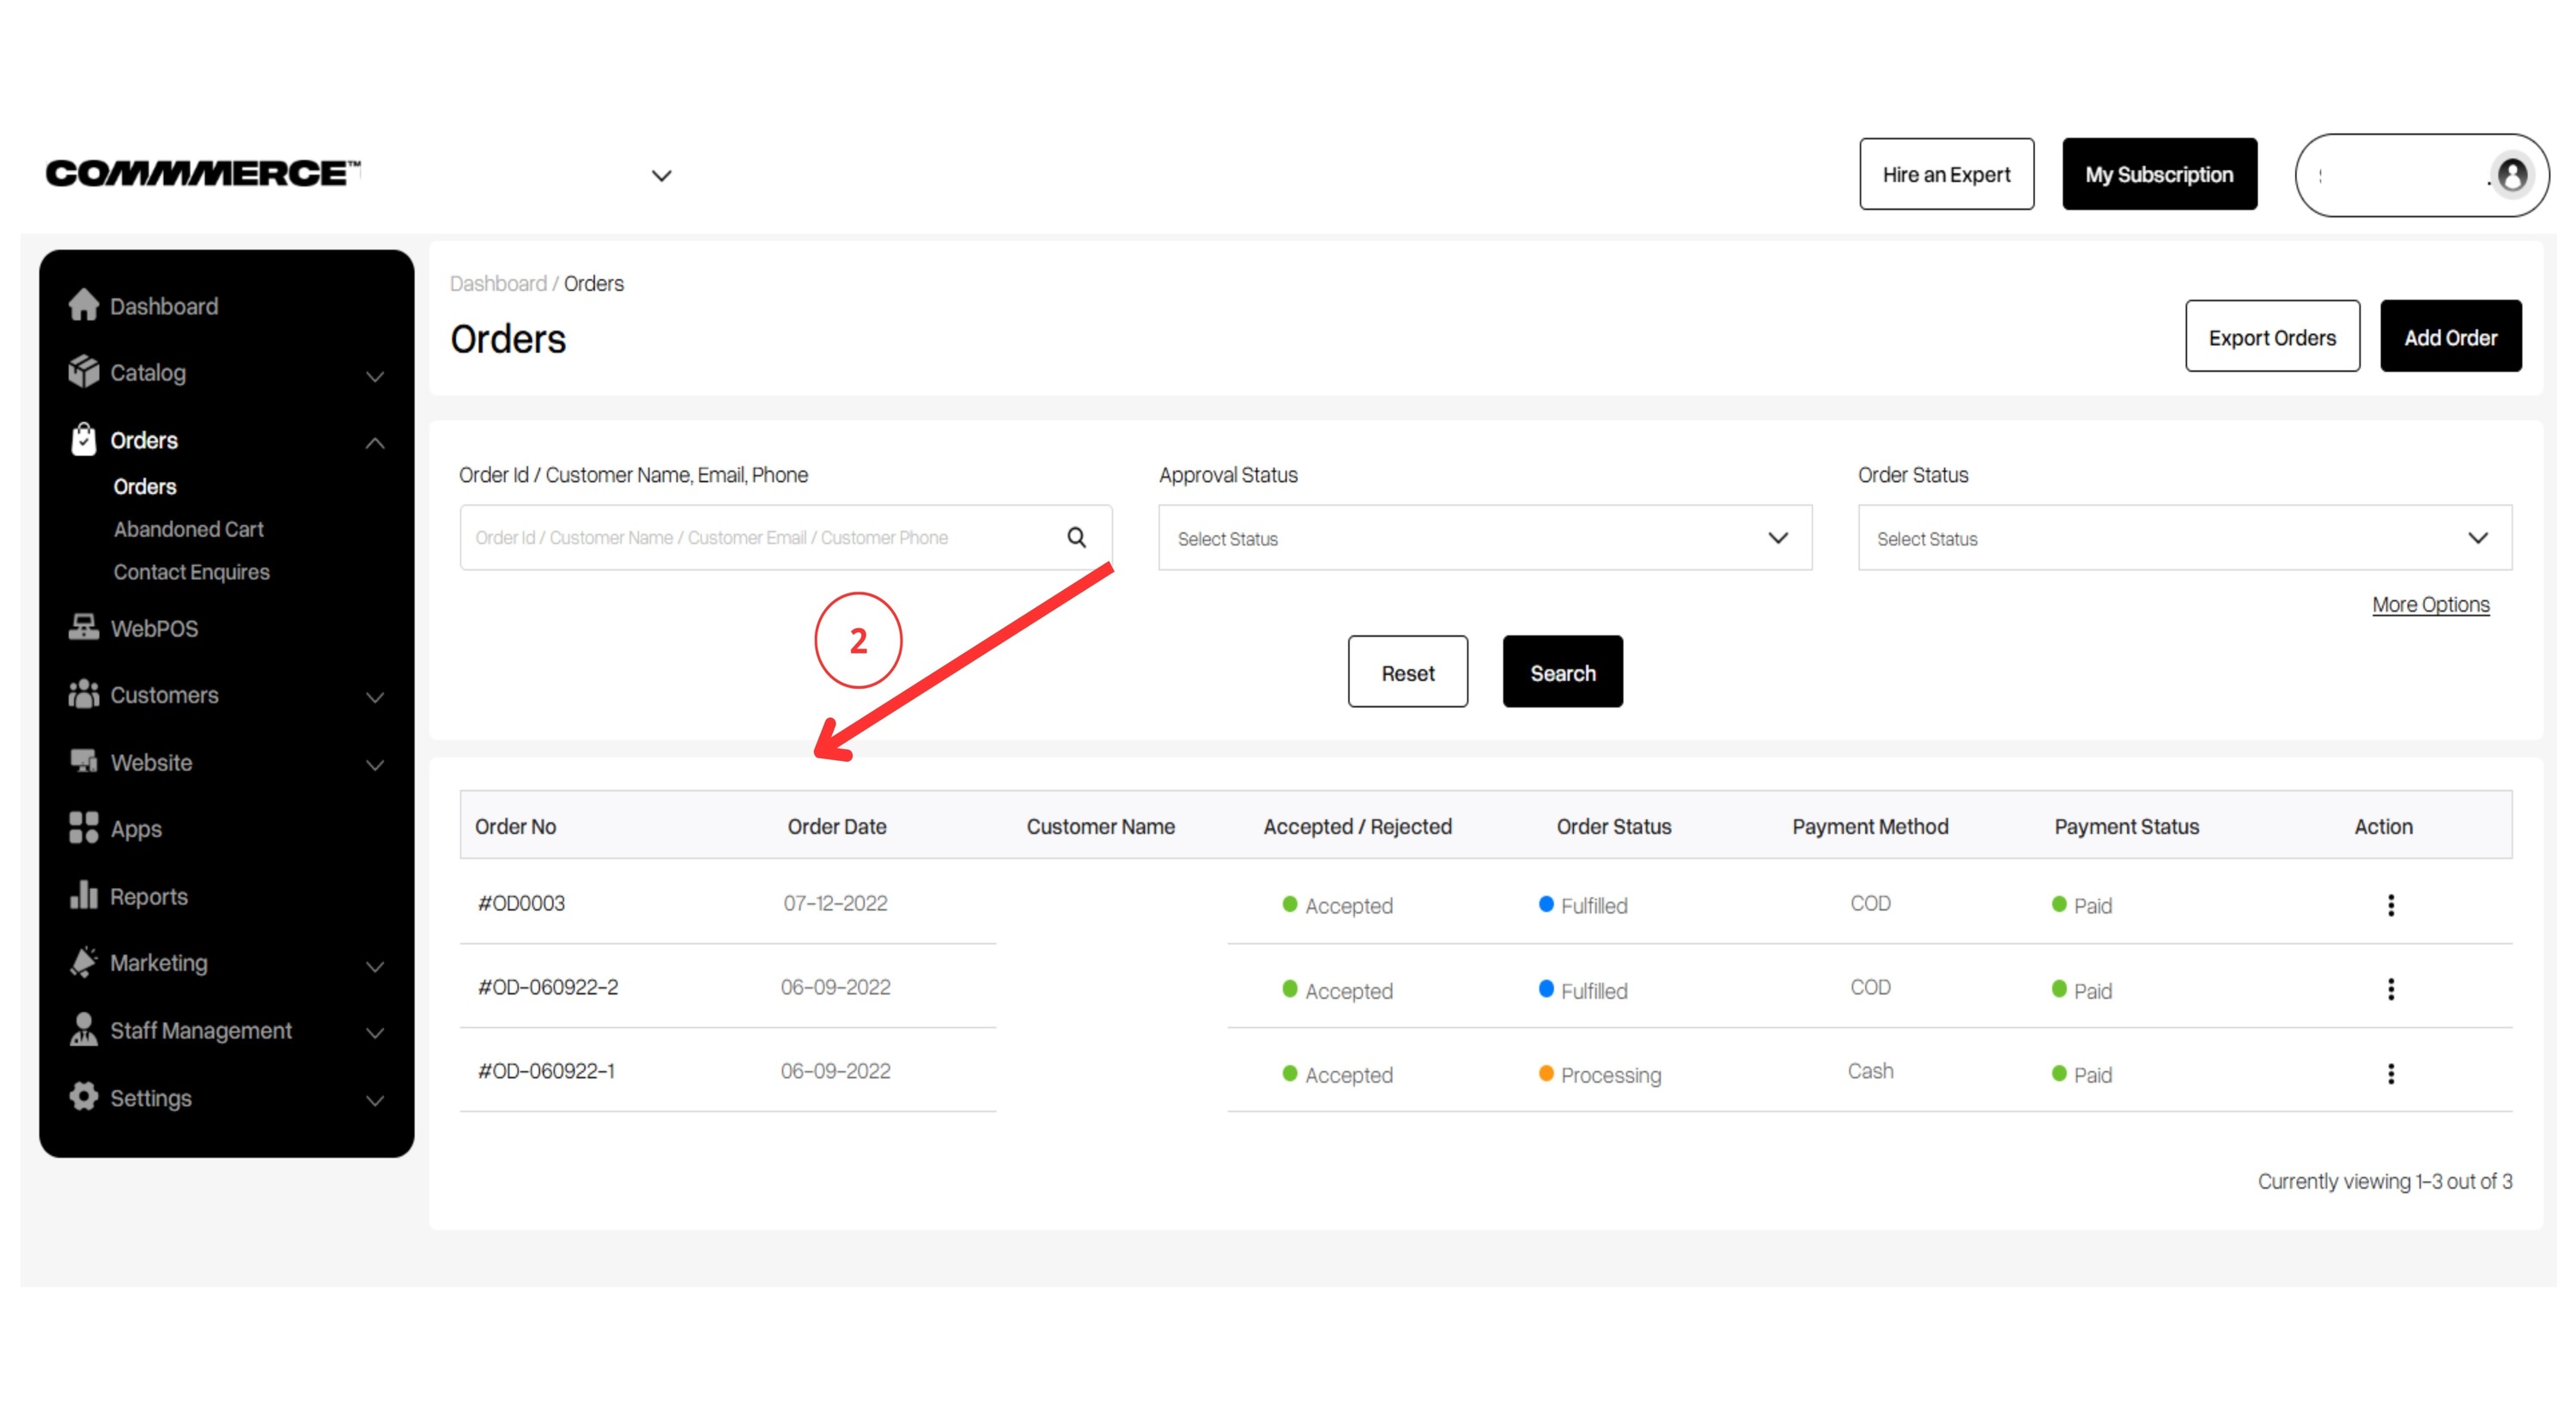
When you click on that, it will show you the orders received (as shown in “2”)
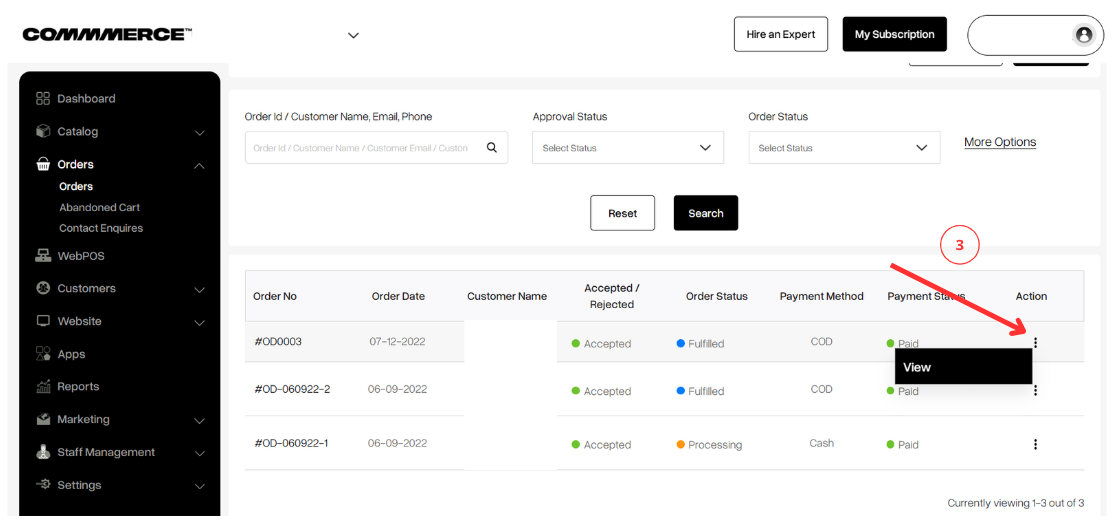
Step 3. Click on the three vertical dots (︙) that are below the action tab and then click on the 'View' option (as shown in “3”)
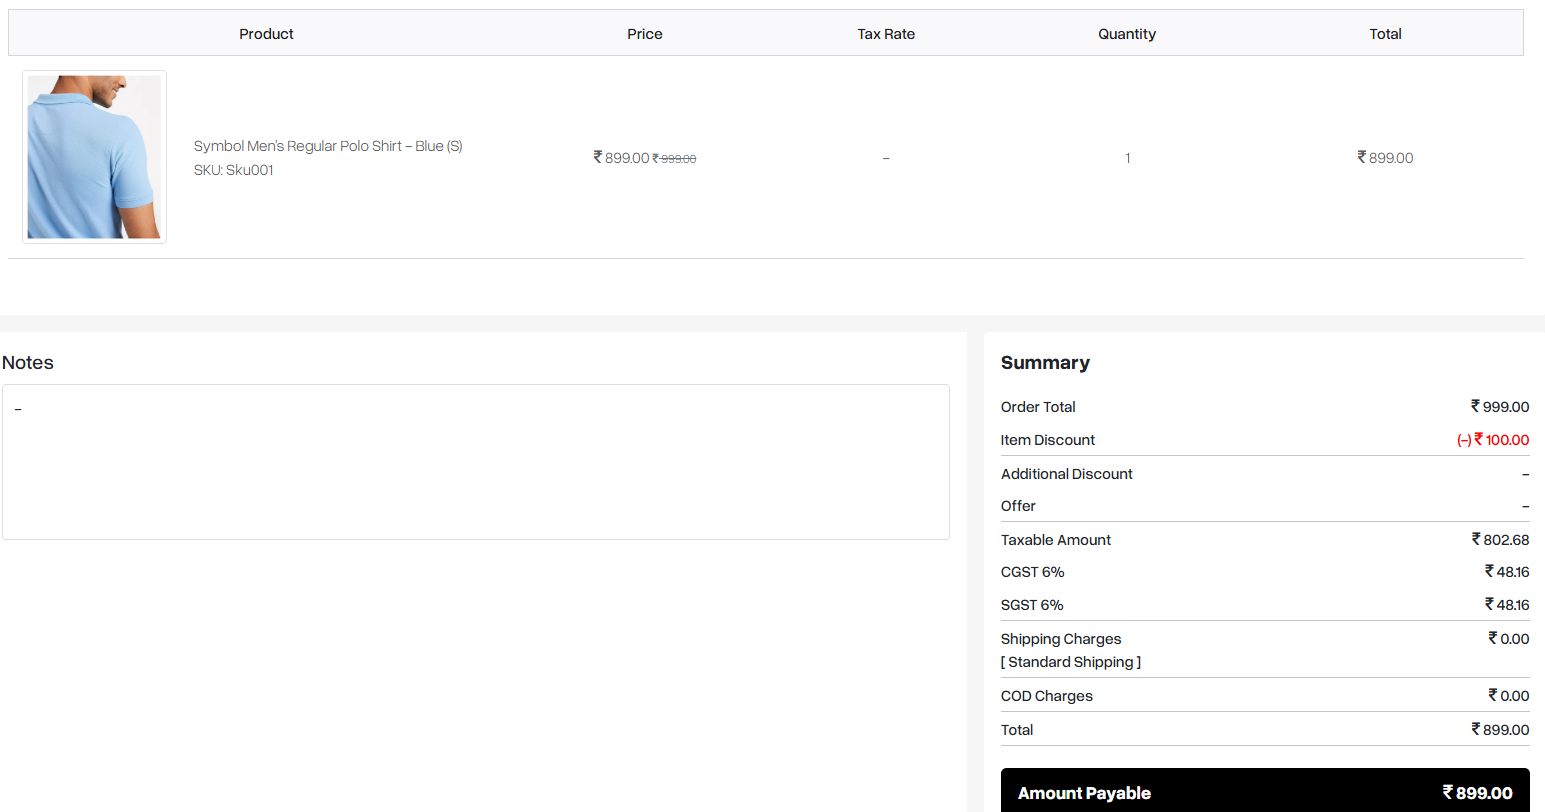
Step 4. After clicking on the View option, it will take you to the ‘View order’ page of that particular order
Step 5. Check the customer details, billing address, shipping address, product details and the amount to be paid or the amount paid
Step 6. After checking all the details, you can scroll down, and click on the Accept Order button (if you have disabled the Auto Accept Upcoming Orders option from settings)
After checking all the details, you can scroll down, and click on the Mark as Processing button (If you enable your Auto Accept Upcoming Orders option from settings)
Step 7. Now you will see options to Generate an Invoice, Cancel the order, or Mark the order as paid (as shown below)
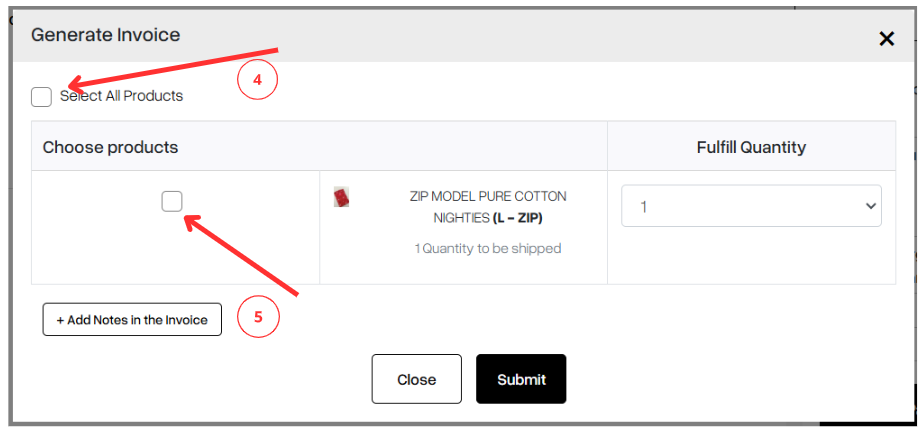
Step 8. A pop-up will appear when you click the 'Generate Invoice' option. In this pop-up, you can manually select the products for which you wish to generate an invoice (as shown in “5”) or choose the 'Select All Products' option (as shown in “4”)
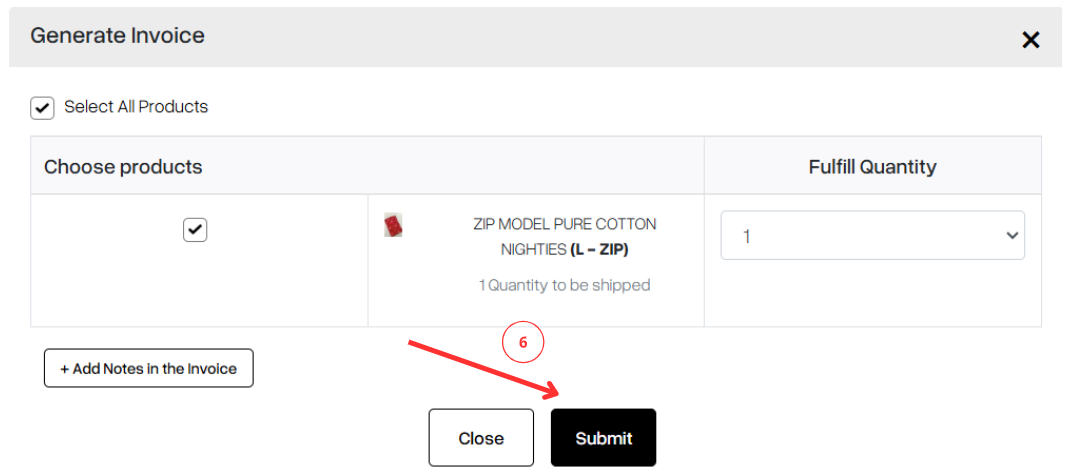
Step 9. Once you have manually selected the products for which you need an invoice or opted for the 'Select All Products' option, you can click the Submit button (as shown in “6”)
Step 10. Scroll Down and Click on the Convert to fulfilment button (as shown below)
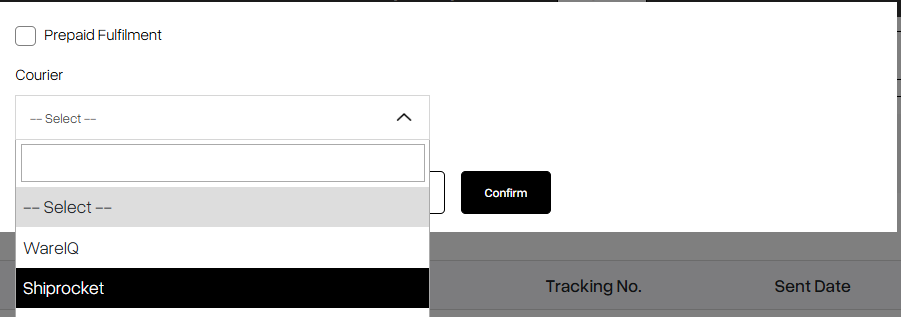
Step 11. After clicking on the Convert to Fulfilment button, you will see a popup.
Choose the Courier option as Shiprocket.
FYI- The 'Prepaid Fulfilment' option is checked only when you have received payment from the end customer before the product is delivered.
Step 12. Now you have to
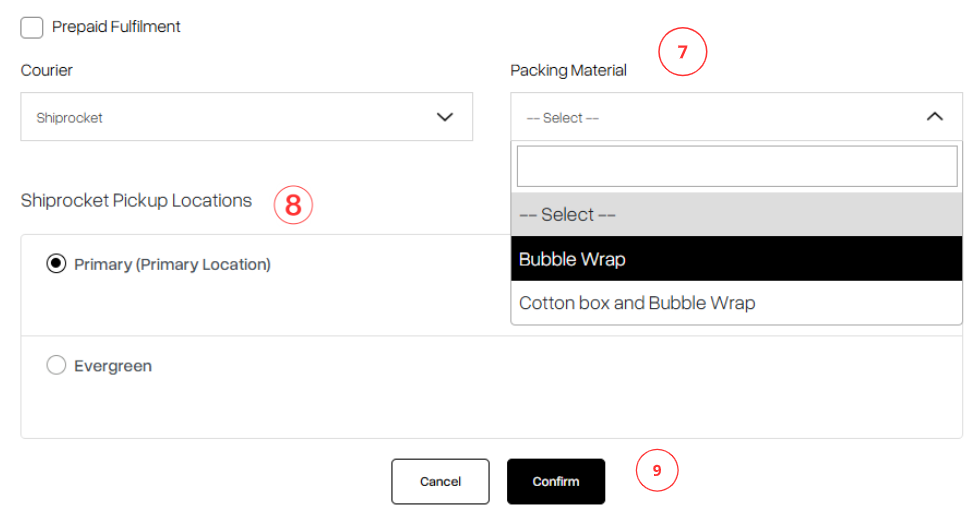
select the packing material (as shown in “7”) and then click on Shiprocket Primary locations
Note- To add packing material options in the admin panel, navigate to Settings, click on the Packing Materials option, and then select Add Packing Material
You can
select the Pickup location (as shown in “8”) and then click on the
Confirm button (as shown in “9”)
Note- To add pickup location in Shiprocket,
click here
Step 13. Now, you can go to Shiprocket and
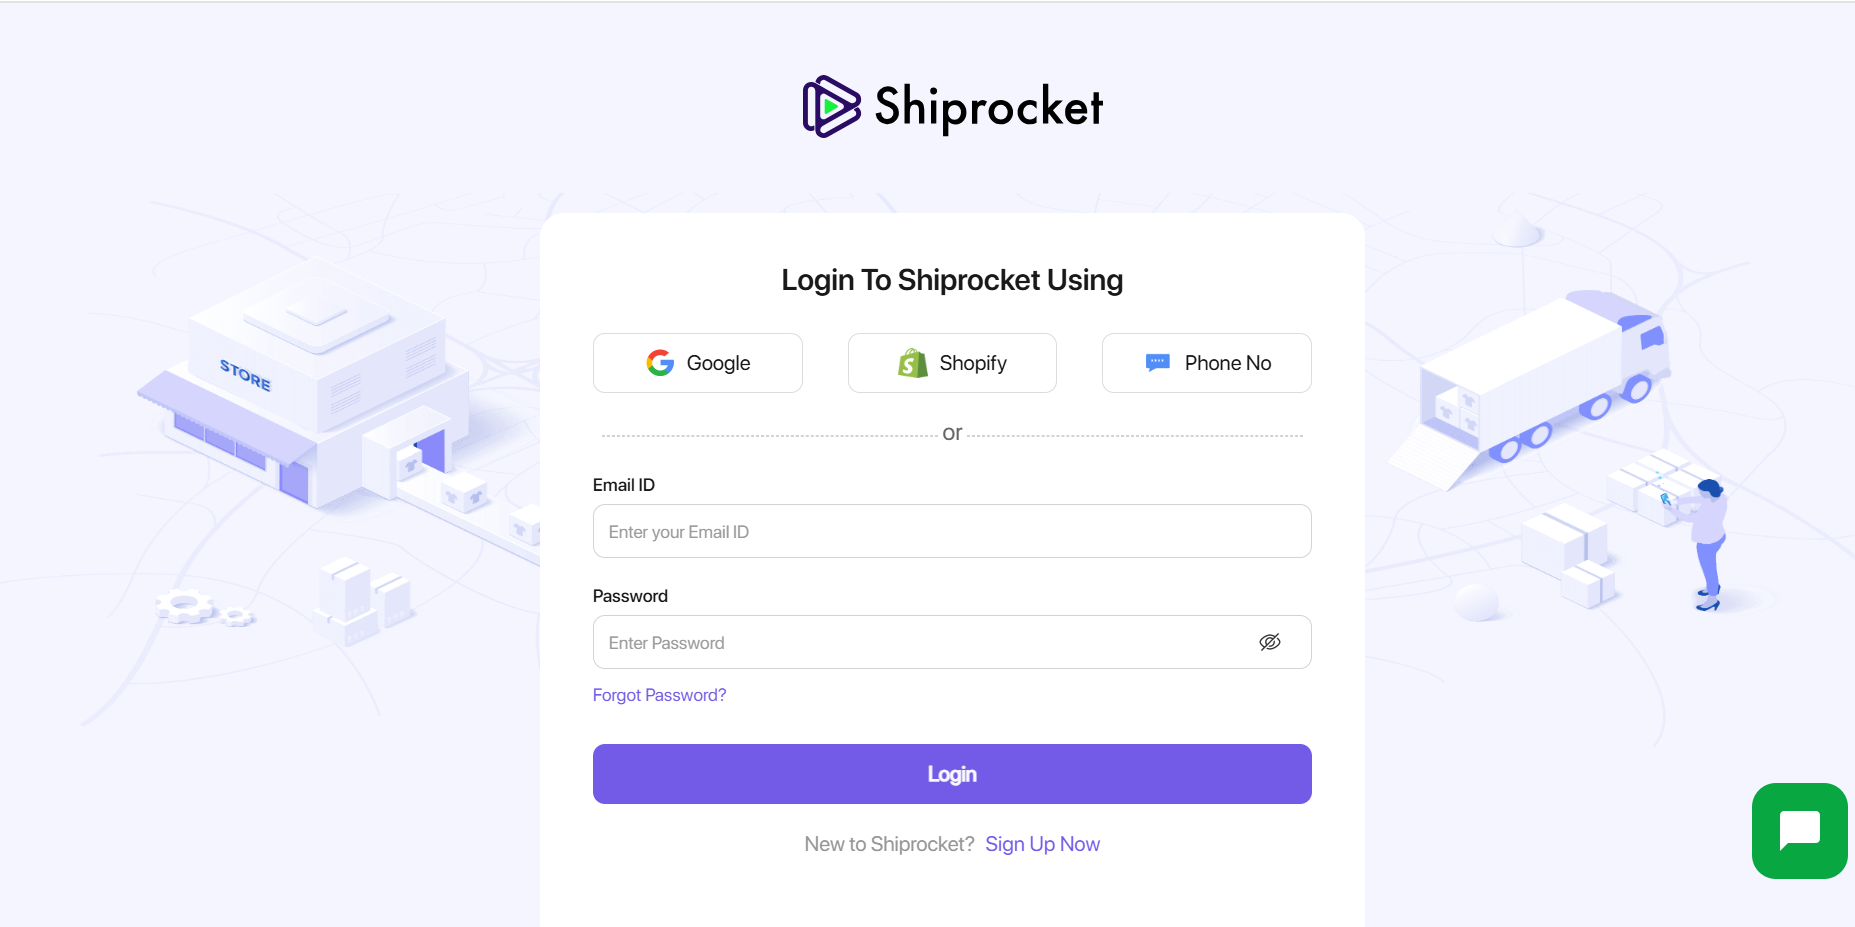
log in
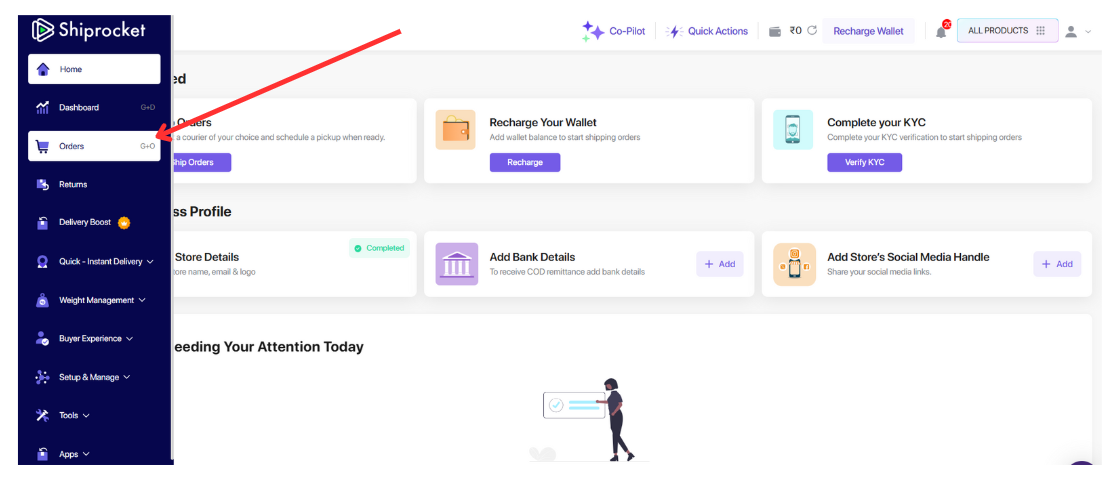
Step 14. Click on orders in the Shiprocket Dashboard (as shown below)
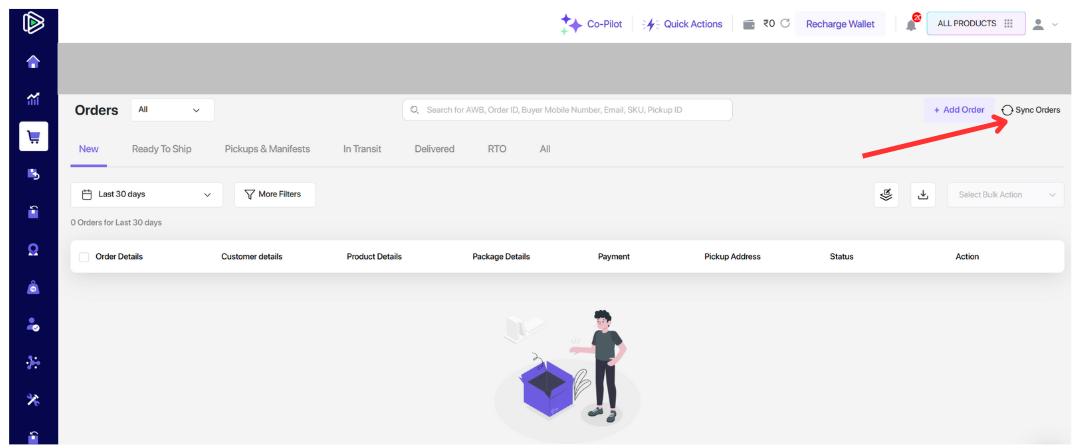
Step 15. Then click on sync order (as shown below)
Step 16. Please wait for 10 to 15 minutes for the order to sync with Shiprocket (as shown below)
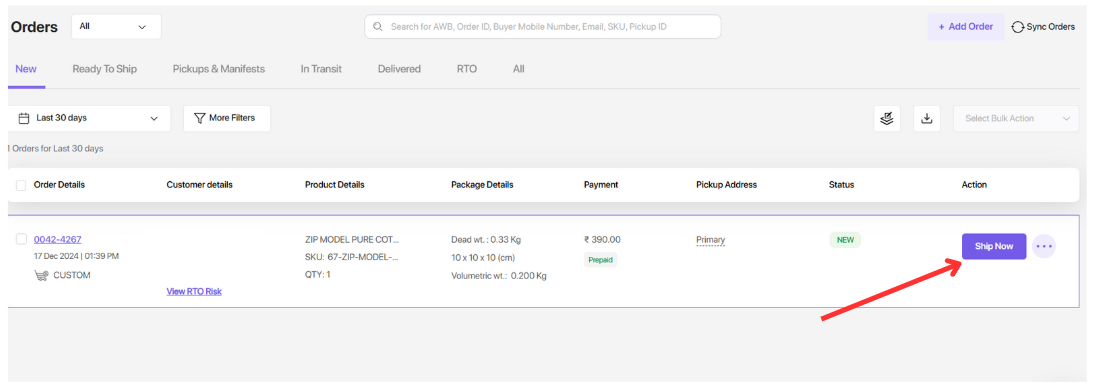
Step 17. Next, click on the Ship Now button. You will see a list of multiple courier partners. You can select one of the courier partners from the list.
Step 18. After your order has been delivered by the courier partner, go to Commmerce’s Admin Panel.
You can mark the order as paid after the customer has paid for the order (as shown in “10”)
Step 19. You can mark the order as delivered after the order has been delivered to the customer (as shown in “11”)

