19 Feb 2025 12.00 AM I 264 Views
How to Add store details in the Commmerce Admin Panel?
- This Article is for stores running on Solo plan or higher
To add your store details like Name, address, and GST details please follow these steps:
Step 1. Log in to your Commmerce’s Admin Panel by entering the
Registered mail ID and
Password. To log in
click here
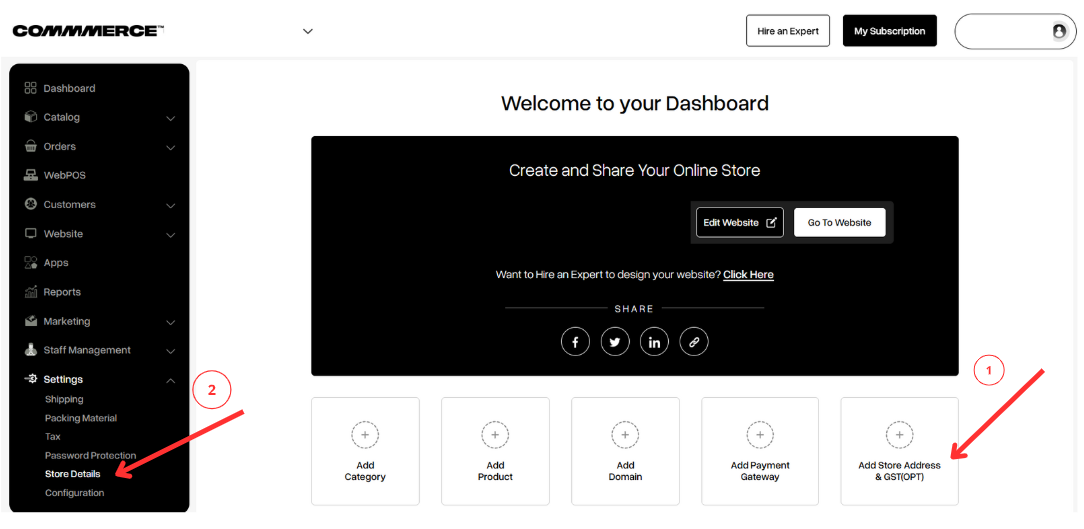
Step 2. On the Dashboard of the admin panel click on Add Store Address & GST (OPT) (as shown in “1”) or find the Store details option under Settings ( as shown in “2”)
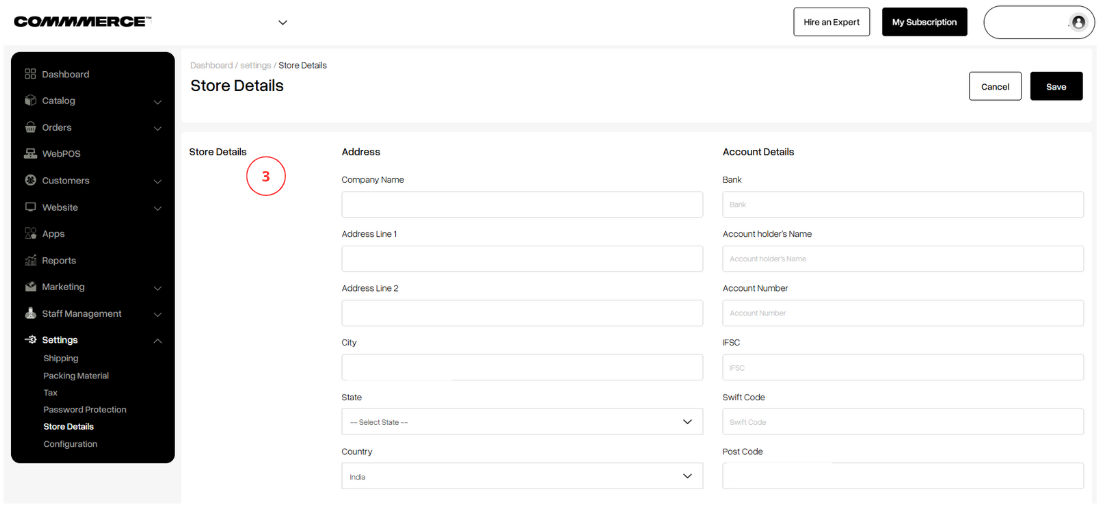
Step 3. Fill in the required Store details (as shown in “3”)
3.1. Address
Company Name- include the name of your company
Address Line 1 & Address Line 2- include the address of your company
City, State, Country- include the company name along with the complete address, specifying the city, state, and country where it is located
3.2. Account Details
Bank- provide the name of the bank where your company's account is held
Account holder’s name- provide the name of the account holder
IFSC- provide the IFSC code or Indian Financial System Code for the bank
Swift code- this is used for International transactions.
**As Commmerce is catering to India only, this code is not needed
Post Code- provide a postcode to identify the company’s location more precisely
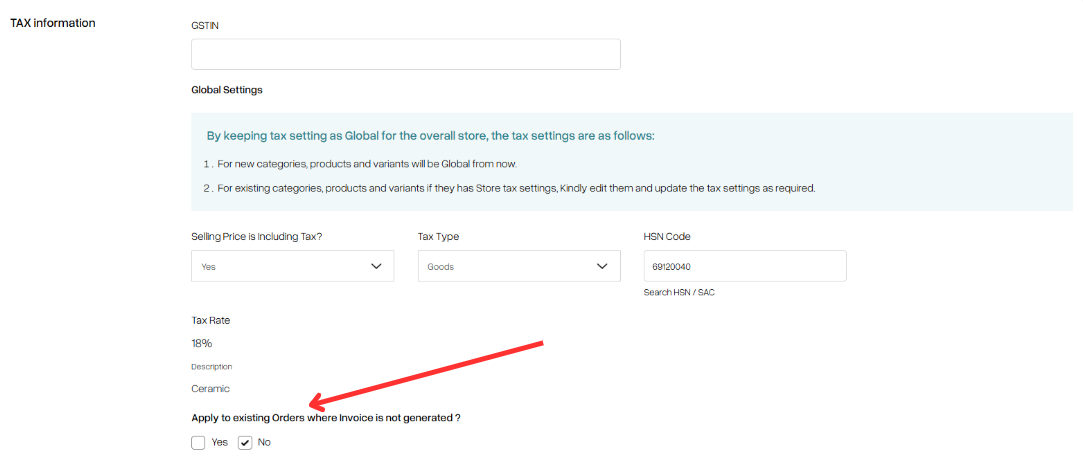
Step 4. Fill in the Tax information (as shown below)
If available, please provide the GSTIN (Goods and Services Tax Identification Number) details of the company (as shown in “4”)
** This field is optional
Step 5. After entering your valid GST number (as shown in “4”), you will see a dropdown option to indicate whether the selling price of your product includes tax. Select "Yes" if the tax is included in the selling price, and "No" if it is excluded. (as shown in “5”).
Next, click on the "Tax Type" option to select from the dropdown menu. Choose "Goods" if you are selling products, and select "Services" if you are offering services
Click on the Search HSN/SAC option (as shown “6”).
The HSN code (Harmonized System of Nomenclature) is a standardized numerical method of classifying goods and products. It is used internationally to facilitate trade and is essential for taxation under the Goods and Services Tax (GST) in India. Each HSN code corresponds to a specific category of goods, helping in the identification and taxation of products.
The SAC code (Services Accounting Code) is a classification system used in India to identify and categorize services under the Goods and Services Tax (GST). Each SAC code corresponds to a specific type of service, facilitating the accurate assessment of tax rates and compliance for service providers.
Step 6. A pop-up will open. To add a new HSN/SAC code, you need to click on the “Click here” option (as shown “7”)
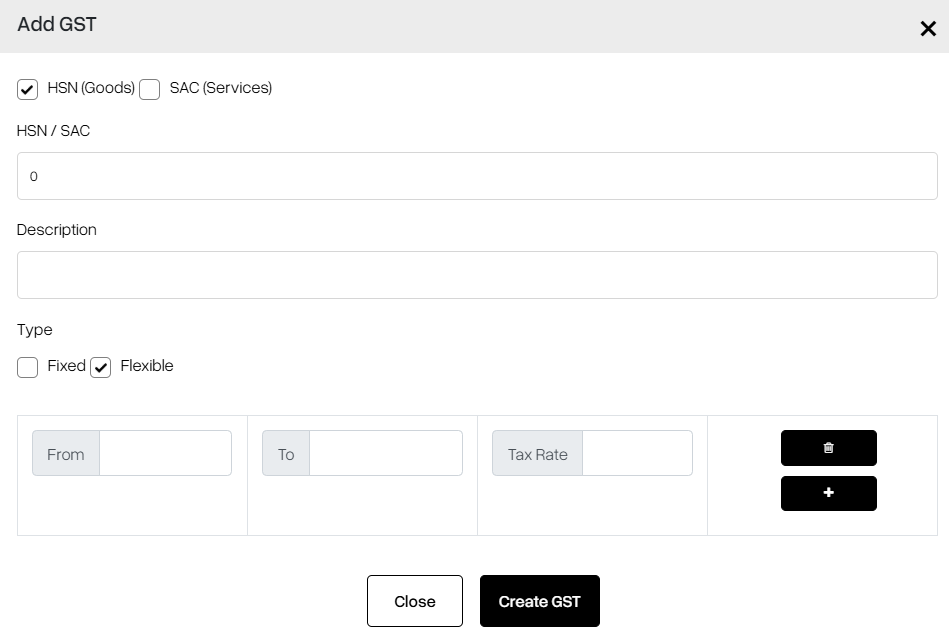
Step 7. A new pop-up window will appear (as shown below).
Select "HSN Code" if you are selling products, or choose "SAC Code" if you are offering services. You may also provide a short description if desired.
GST rates can be set as fixed for all products/services or flexible for individual items (as shown below). In the case of flexible GST rates, you can specify different price ranges and select the applicable GST for each particular range.
Then click on the “Create GST” option.
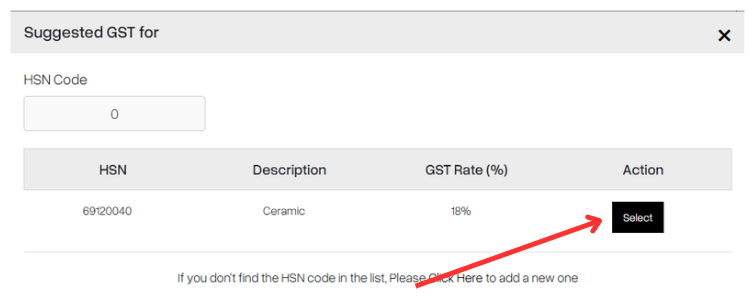
Step 8. Once you have created the Fixed GST, click on the "Select" button to proceed (as shown below)
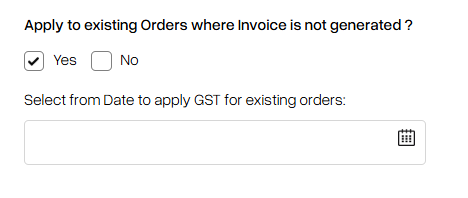
Step 9. If the HSN/SAC code should be applied to existing orders that have not yet had their invoices generated, then click on the ‘Yes’ option otherwise click on the ‘No’ option. (as shown below)
Step 10. If you select 'Yes', you will be prompted to choose a 'From' date to apply GST to your existing orders.
Step 11. Now you can click on the ‘Save’ button to save the store details

