31 Jan 2025 12.00 AM I 734 Views
What is a Sitemap? How can we generate it and connect it to the Google search console?
- This Article is for stores running on Solo plan or higher
Sitemap
A Sitemap is a crucial navigational tool for search engines like Google, providing a comprehensive overview of the pages, content, and structural elements of your e-commerce website. This XML-formatted file facilitates efficient navigation by search engines, allowing them to understand the organization of your site more effectively. Typically, a Sitemap includes essential details such as the last updated timestamp for each page, the frequency of content changes, and the relative importance of each page within the site hierarchy. By implementing a Sitemap, you can significantly enhance your website's visibility and indexing in search engine results, making it easier for users to discover your content.
Key points about a Sitemap
- Structure: A sitemap provides a detailed outline of your website's architecture, including the URLs of individual pages, their interrelationships, and the overall content hierarchy.
- Indexing: Search engines, such as Google, utilize sitemaps to gain insights into the organization of your site, ensuring that all pertinent pages are effectively crawled and indexed.
- Updates: Regularly updating your sitemap to reflect new content or modifications to existing pages, and promptly submitting it to search engines, can significantly accelerate the indexing process.
Follow these steps to learn how to generate a Sitemap:
Step 1. You can either manually create a Sitemap or use a Sitemap generator tool
- Manual Creation: You can manually create a sitemap by utilizing a text editor to draft the necessary XML structure. Once completed, save the file with a .xml extension to ensure it is properly recognized by search engines.
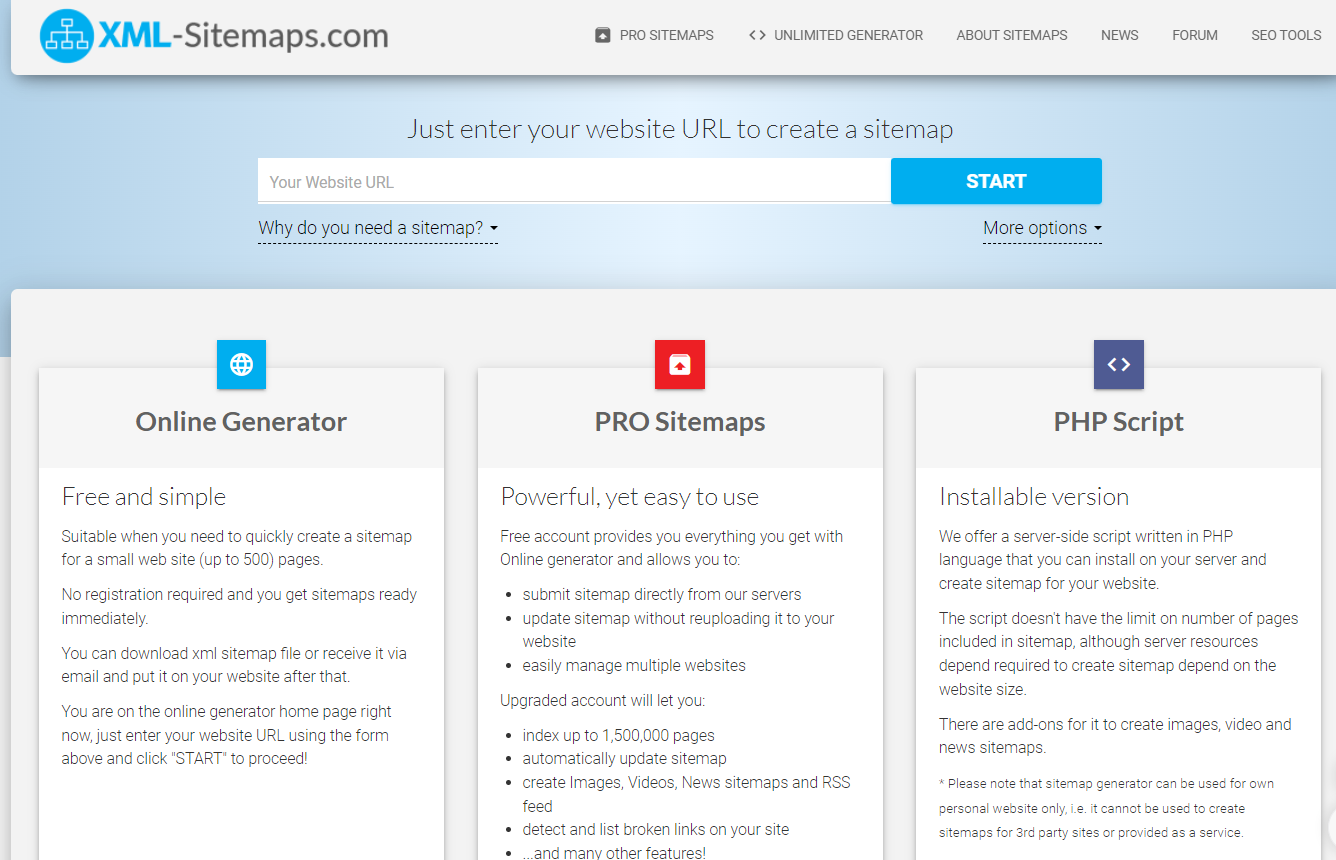
- Utilizing Sitemap Generator Tools: Several online tools, such as XML-sitemaps.com (as shown below) and Screaming Frog, provide free and paid services for generating sitemaps. These tools automate the process, making it easier to create a comprehensive and accurate sitemap for your website.
Step 2. Log in to your Commmerce’s Admin Panel by entering the
Registered mail ID and
Password. To log in
click here
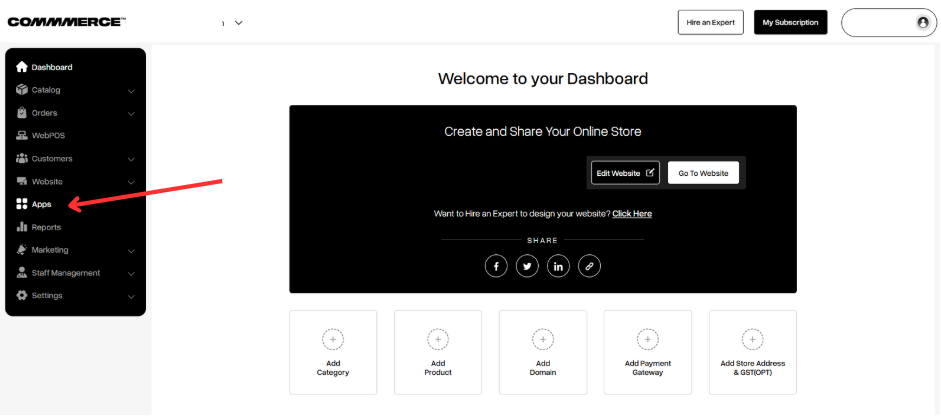
Step 3. Click on the Apps section on the left side of the dashboard (as shown below)
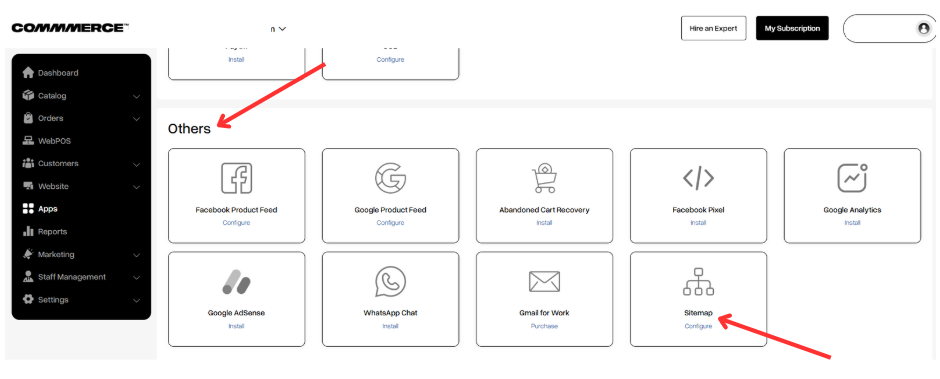
Step 4. After clicking on the "Apps" section on the admin panel, you must scroll down to the "Others" section (as shown below).
You will find the “Sitemap” option to configure (as shown below)
Step 5. Click on the Generate Sitemap button on the “Sitemap” Configuration page (as shown below)
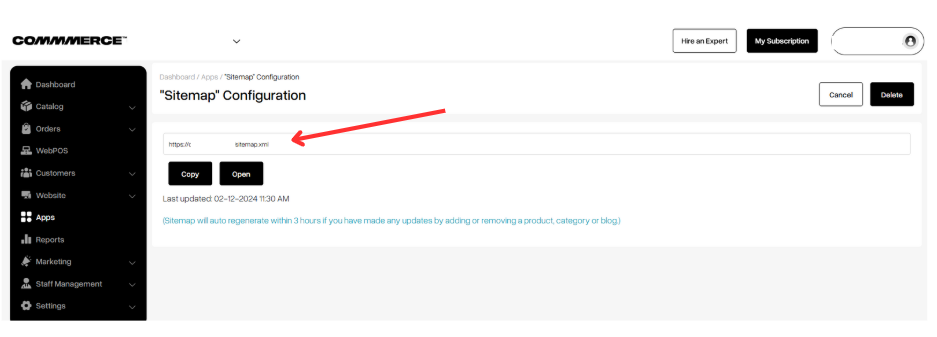
Step 6. After the sitemap link is generated, you have to click on the ‘Copy’ button to copy the link (as shown below)
Step 7. Now, go to
XML-sitemaps.com and paste the copied sitemap link in the area given to enter the website URL to create a sitemap.
Then click on the
Start button (as shown below)
This will crawl your complete website
Step 8: Once the crawling of your website is completed, you can download the XML Sitemap file (as shown below)
Once your sitemap is ready, follow the steps below to add it to Google Search Console:
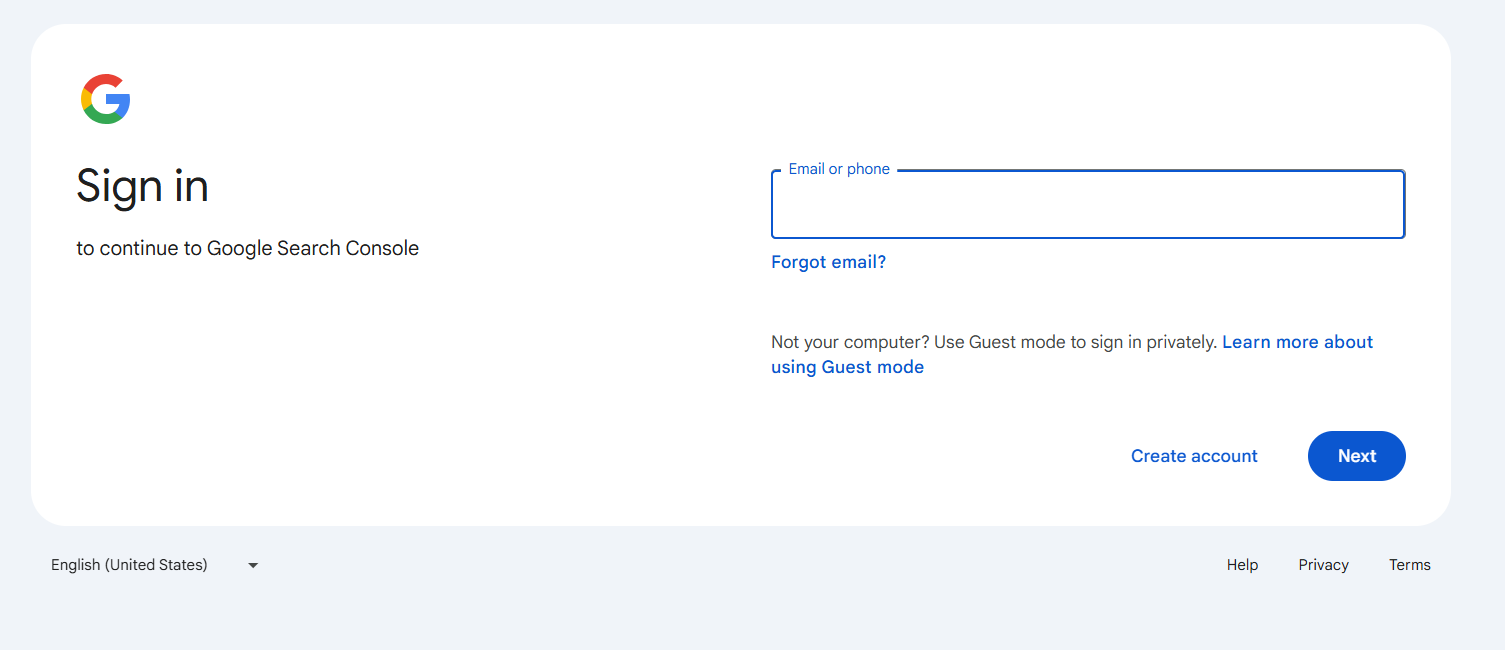
Step 1. Sign in to your
Google Search Console account.
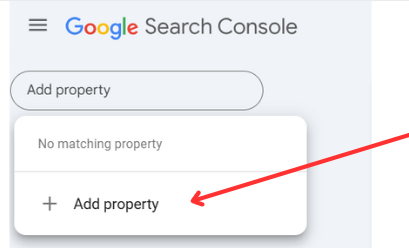
Step 2. Once you log in, click on 'Add Property' on the left side (as shown below)
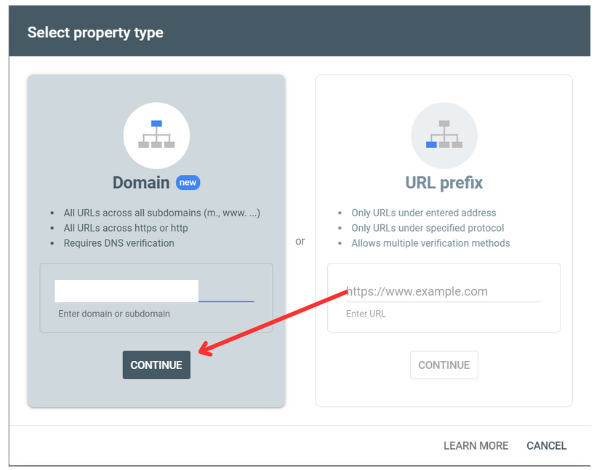
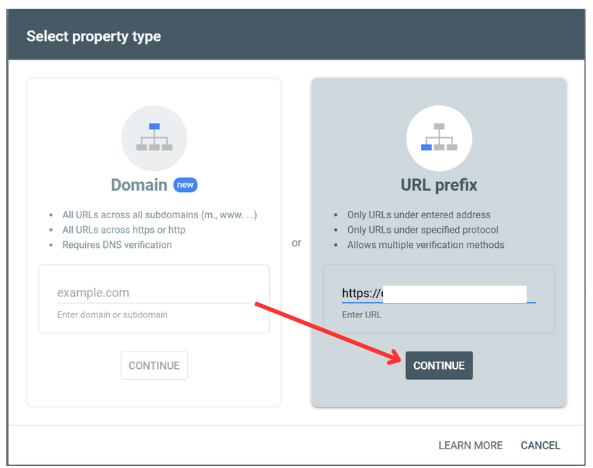
Step 3. You will see a pop-up where you can add your domain name and click on the continue button, or you can add your website link and click on the continue button (as shown below)
Step 4. Inserting the domain name
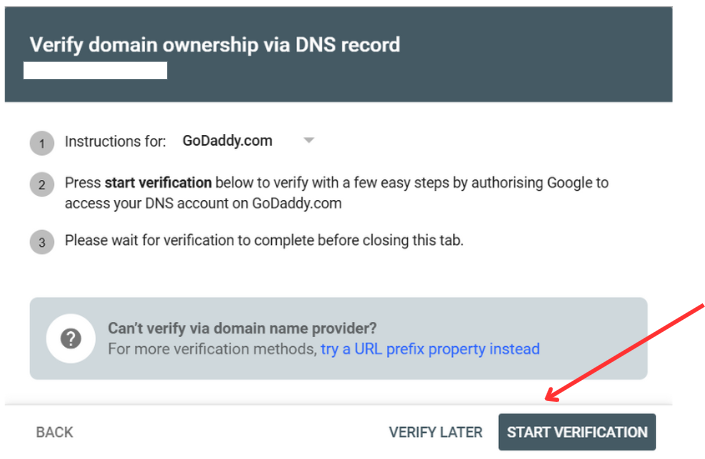
If you add your domain name and click on the Continue button, it will provide you with instructions on how to verify your sitemap through the domain portal. Click on Start Verification (as shown below), and it will redirect to the domain portal.
Inserting URL prefix
When you choose 'URL Prefix,' enter your website's complete URL, for example, https://abcd.com, and then click on the continue button (as shown below)
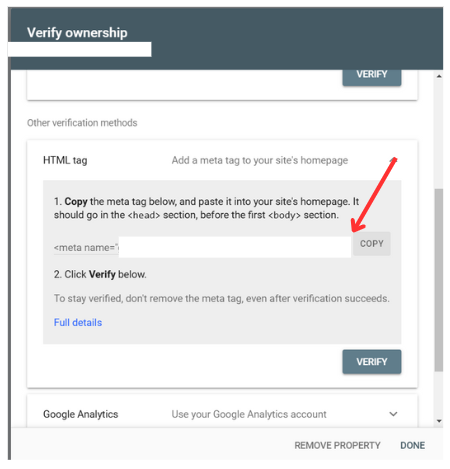
Once you click on the 'Continue' button, a pop-up will appear to verify ownership. In that pop-up, you can select 'HTML Tag,' copy the meta tag, and paste it into the Commerce admin panel (as shown below)
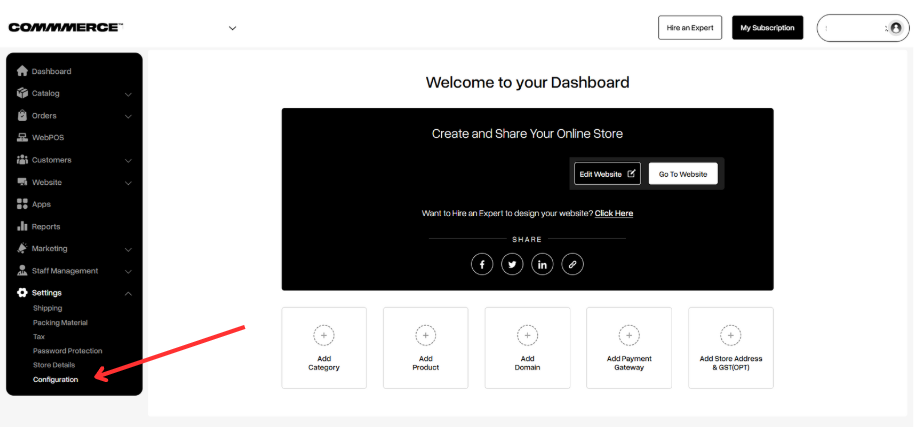
Step 5. Once you copy the meta tag, go to the Commerce admin panel and click on 'Configuration' under Settings (as shown below)
Step 6. Find the additional HTML/JS/CSS section, paste the meta tag in the Header HTML, and save your changes (as shown below)
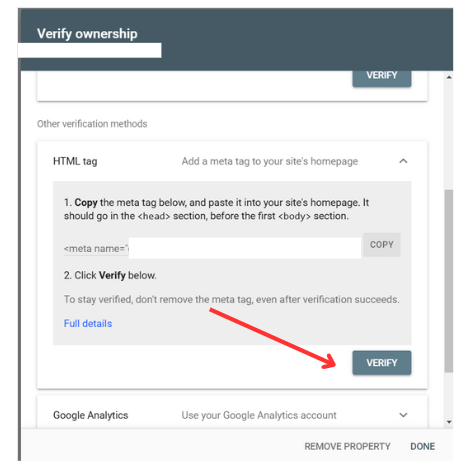
Step 7. Then go to the 'Verify Ownership' tab and click Verify.
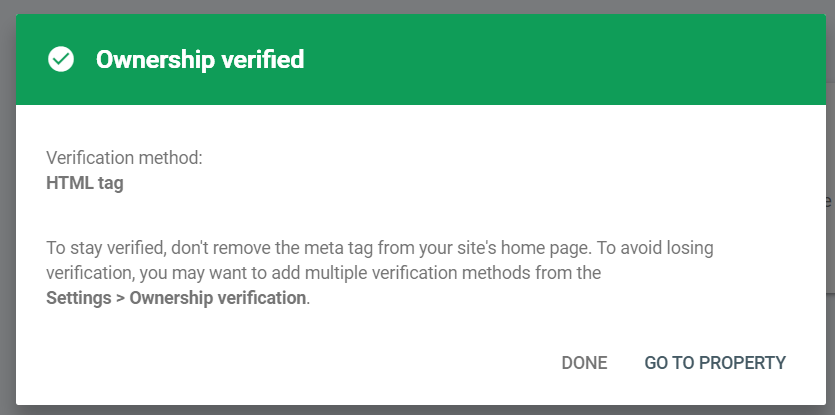
Step 8. Once ownership is verified, you will be able to see a pop-up. Click on 'Go to Property' to add the XML URL (as shown below)
Step 9. On the Google Search Console admin panel, check for 'Sitemap' and click on it (as shown below)
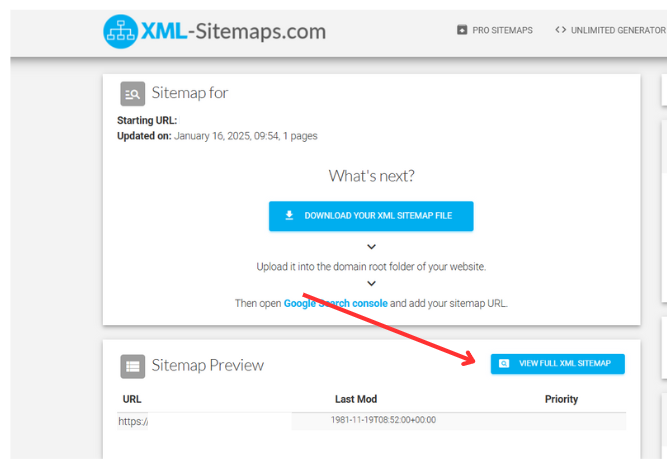
Step 10. Then go to the XML Sitemap tab where you generated the sitemap link and click on 'View Full XML Sitemap' (as shown below)
Step 11. In the new tab, the full XML details will open. Copy the URL that follows your domain name (as shown below)
Step 12. Then go to Google Search Console, add the sitemap URL, and click the submit button.
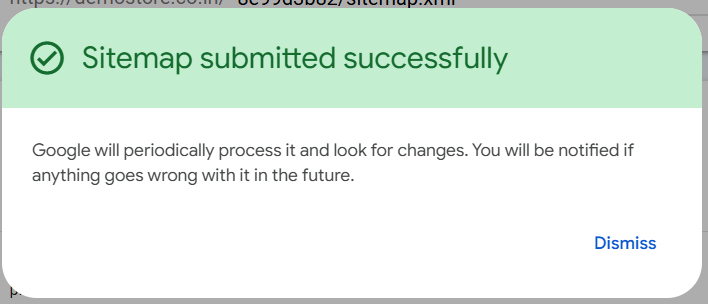
You will see a pop-up displaying “Sitemap submitted successfully”
After a sitemap has been successfully submitted to search engines, several important processes occur:
1. Crawling
Search engines begin to crawl the URLs listed in the sitemap. This helps them discover new or updated content on your website.
2. Indexing
The pages identified in the sitemap may be indexed, meaning they are added to the search engine’s database. This allows them to appear in search results when relevant queries are made.
3. Prioritization
The sitemap provides search engines with information about the priority of different pages and how frequently they are updated. This helps search engines determine which pages to crawl more frequently.
4. Error Reporting
Search engines may notify you of any errors encountered while crawling the sitemap, such as broken links or inaccessible pages. This feedback allows you to address issues that may hinder indexing.
5. Performance Monitoring
Search engines may offer analytics regarding how your pages are performing in search results, including impressions, clicks, and the overall visibility of your content.
6. Content Discovery
New content is likely to be discovered and indexed more quickly, enhancing your website's visibility and potential traffic.
