01 Jul 2025 12.00 AM I 333 Views
What is the process for adding a new customer?
- This Article is for stores running on Solo plan or higher
Follow these steps to add a new customer:
Step 1. Log in to your Commmerce’s Admin Panel by entering the
Registered mail ID and
Password. To log in,
click here
Step 2. After logging in, navigate to the Customers section from the left-hand menu and select the Customer option (as shown in “1”).
Step 3. Once you reach the Customer page, you’ll find two options for adding customers:
- Option 1: To add customers in bulk, click on Import Customers (as shown in “2”).
- Option 2: To add a customer individually, click on Add Customer (as shown in “3”).
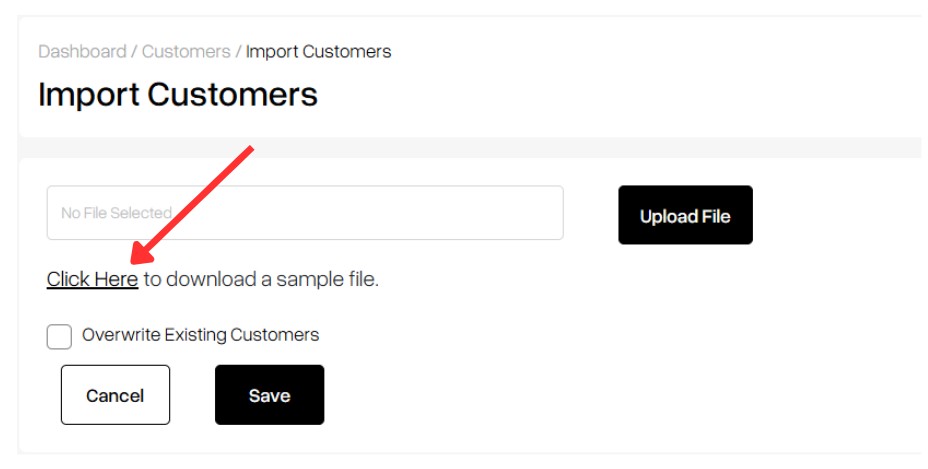
Step 4. On the Import Customers page, you’ll see an option to download a sample file by clicking on the "Click here" link.
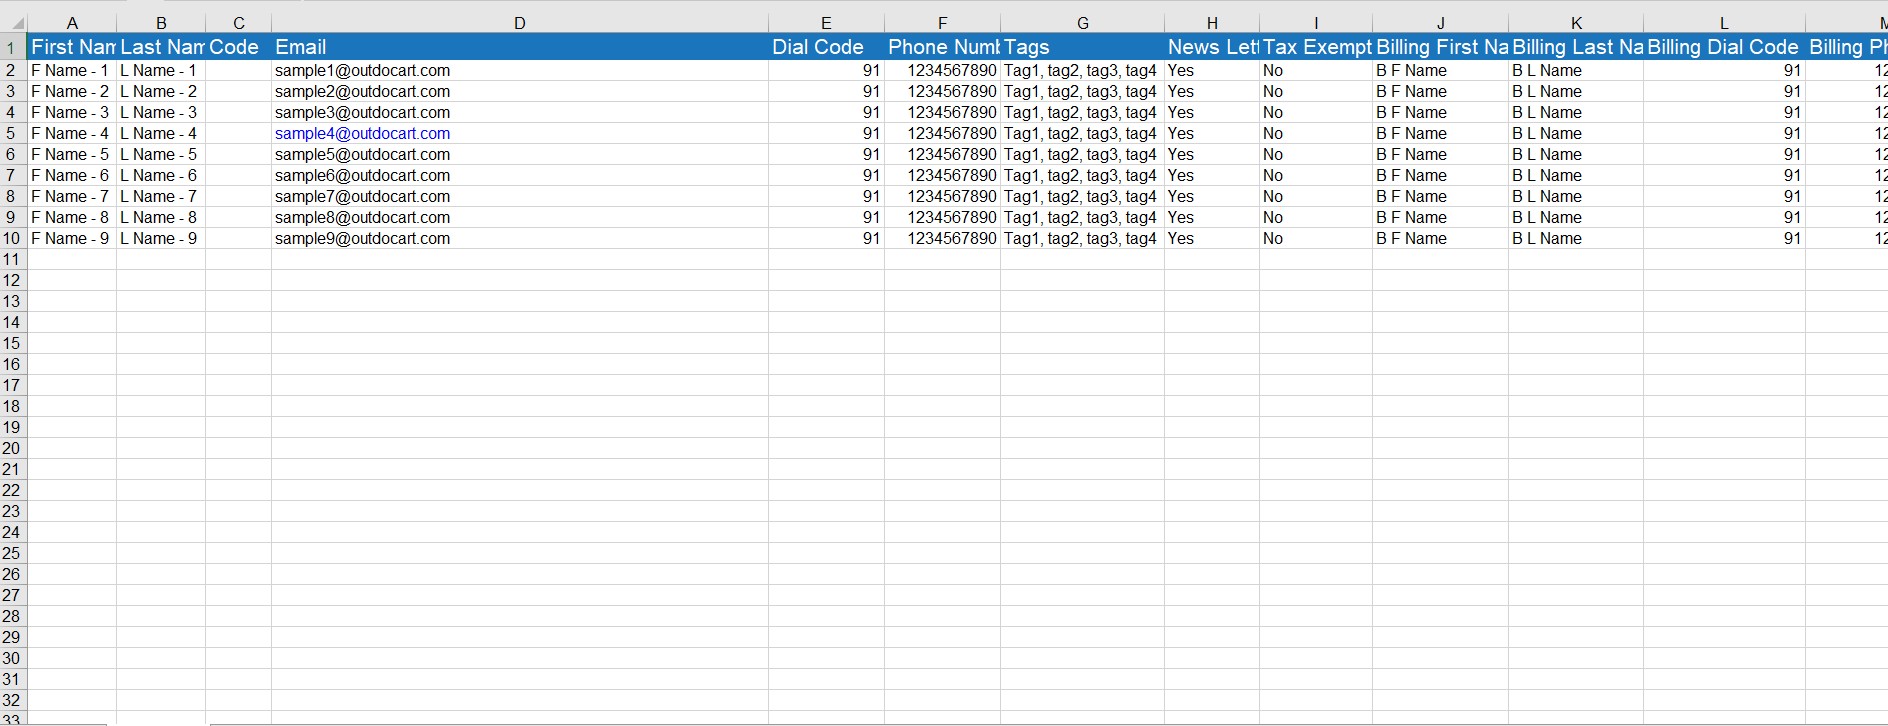
Step 5. An Excel file named "Customer Import Sample" will be downloaded. Please check your Downloads folder for it. Open the file and update it with all the required customer details before uploading it back to the platform.
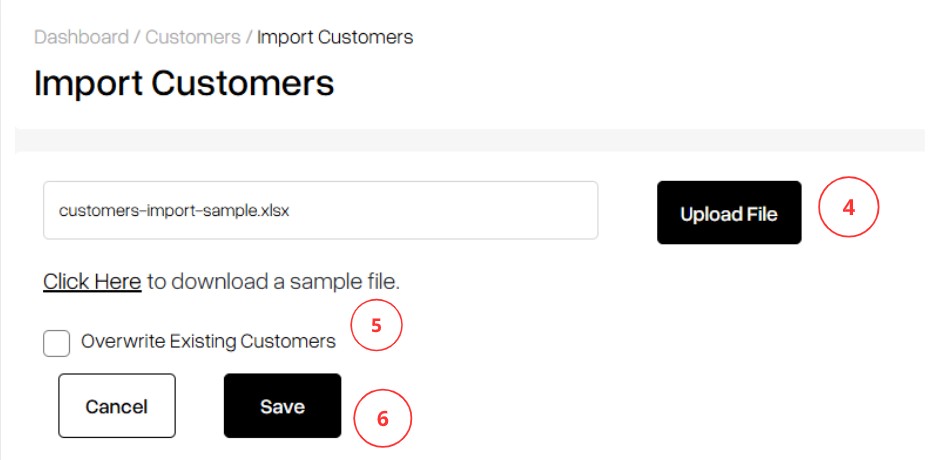
Step 6. Once all the details have been updated in the Excel file, go to the Customer Import page, select the file from your system, and click on Upload File to complete the import process (as shown in “4”).
Overwrite Existing Customers is an option you’ll find during the customer import process. When enabled, it allows the system to update the details of any existing customers in your database if their information (like email or phone number) matches entries in the uploaded file (as shown in “5”).
Once the file is selected, click on the Save button to proceed (as shown in “6”).
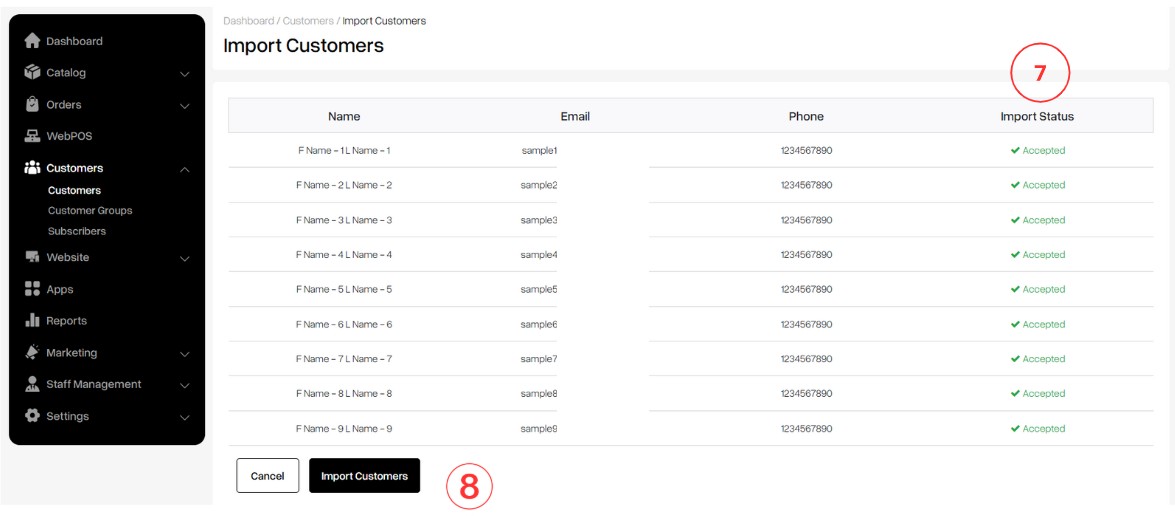
Step 7. Once you click the Save button, the customer import status will be displayed (as shown in “7”). If all entries are accepted, proceed by clicking on Import Customer (as shown in “8”).