28 Feb 2025 12.00 AM I 404 Views
Where do I set shipping zones on my Commmerce website?
- This Article is for stores running on Solo plan or higher
Follow the below steps to set shipping zones on your Commmerce website:
Step 1. Log in to your Commmerce’s Admin Panel by entering the
Registered mail ID and
Password. To log in
click here
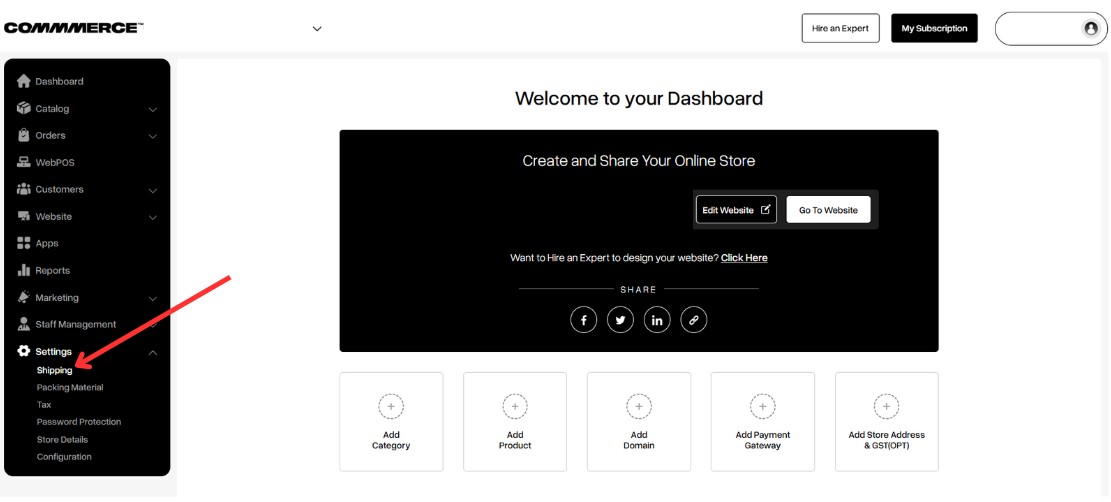
Step 2. Once you log in, you will be redirected to the Dashboard. Then navigate to the Shipping option below the Settings option (as shown below).
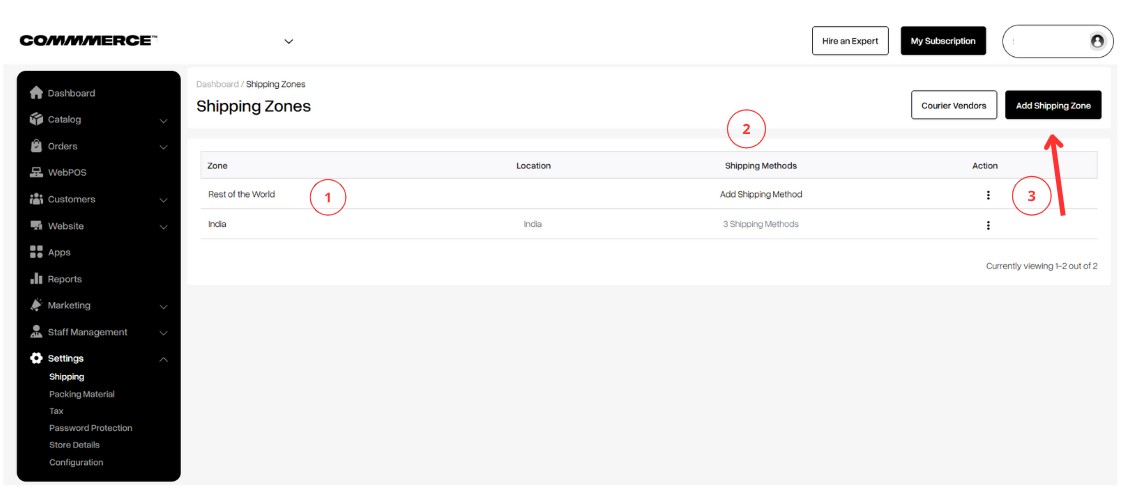
Step 3. Once you click on the Shipping option, you will be redirected to the existing shipping zones page in the backend. You can see “Rest of the World” and “India” as default options. You can click on a shipping zone name to edit it (as shown in "1").
Modify your shipping methods (as shown in "2").
Create a new shipping zone by clicking the Add Shipping Zone button at the top right corner of the dashboard (as shown in "3").
Step 4. When you click on an existing shipping zone name, you will see the option to rename it (as shown in "4").
Note: The “Rest of the world” zone name is not editable.
You can select the zone based on pin code, state, or city (as shown in "5").
You can choose to display either a category, a specific product, or a product group in that designated zone (as shown in "6").
Step 5. Once you make the necessary changes, click on the Save button in the top right-hand corner.


