28 Jan 2025 12.00 AM I 5363 Views
How to add a new product to your Commmerce Website?
- This Article is for stores running on Solo plan or higher
To add a new Product, you must follow the below-mentioned steps:
Step 1. Log in to your Commmerce’s Admin Panel by entering the
Registered mail ID and Password. To log in
click here
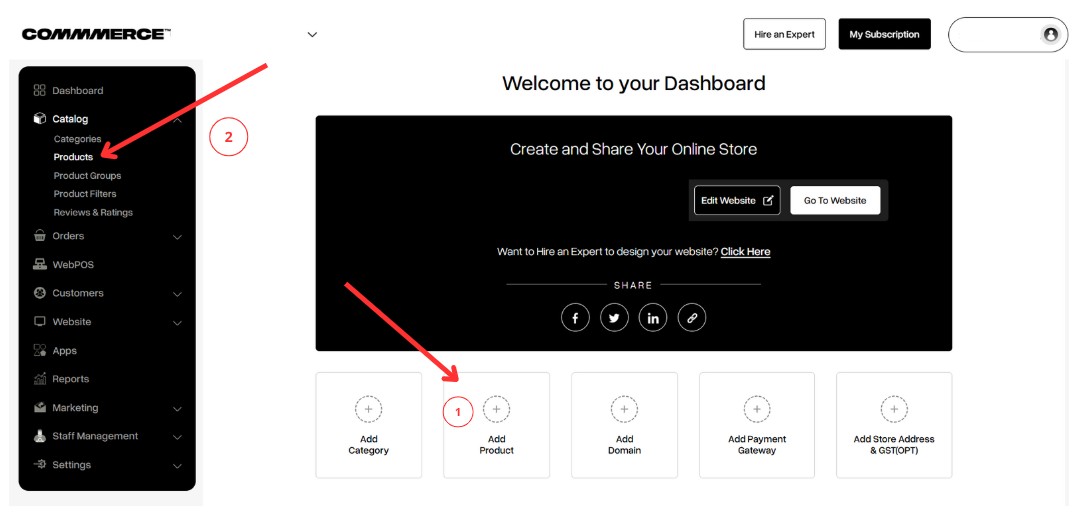
Step 2. After successfully
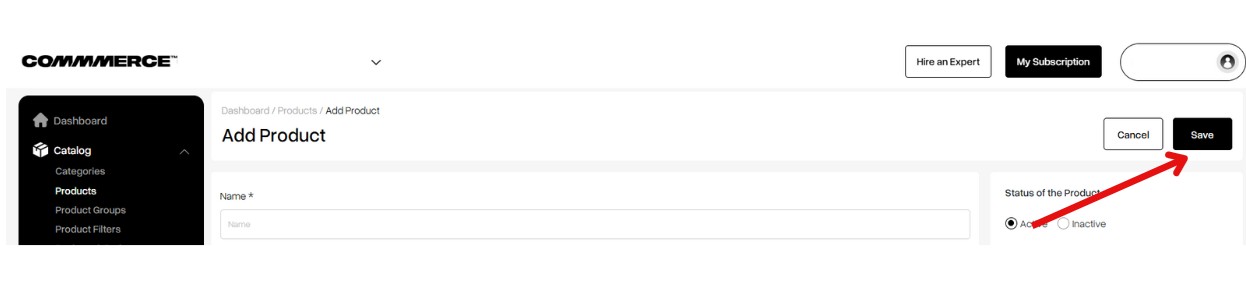
creating the category, you can either click on Dashboard on the left side of the admin panel and then click on the Add Product option (as shown in “1”) or navigate to the
'Products' section located under 'Catalog' in the dashboard (as shown in “2”)
Step 3. Add New Product
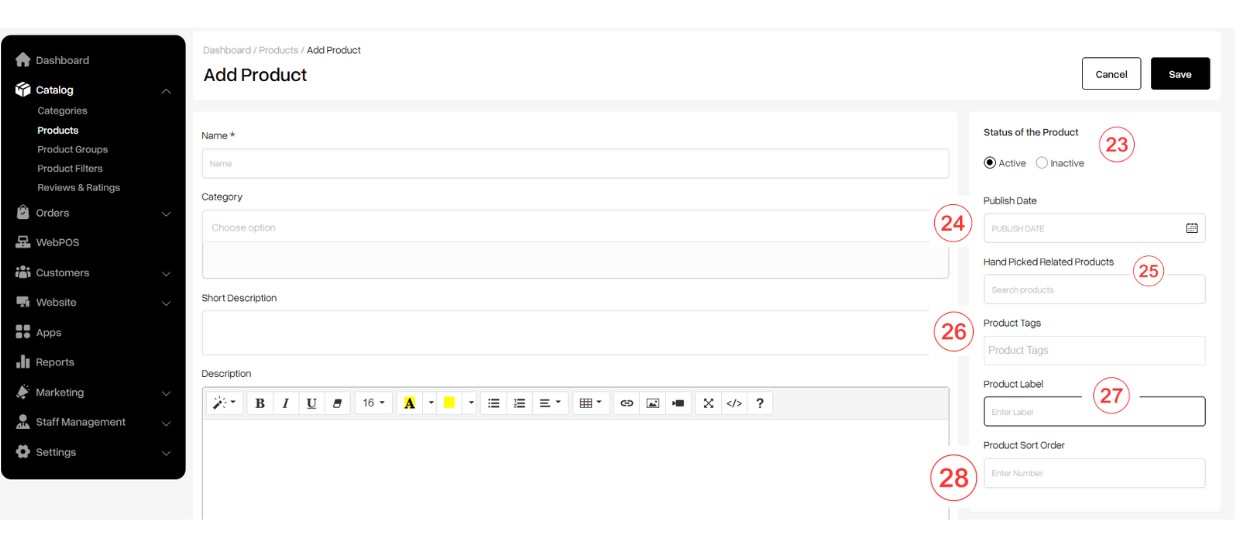
Click the "Add Product" button on the right side (as shown in “3”)
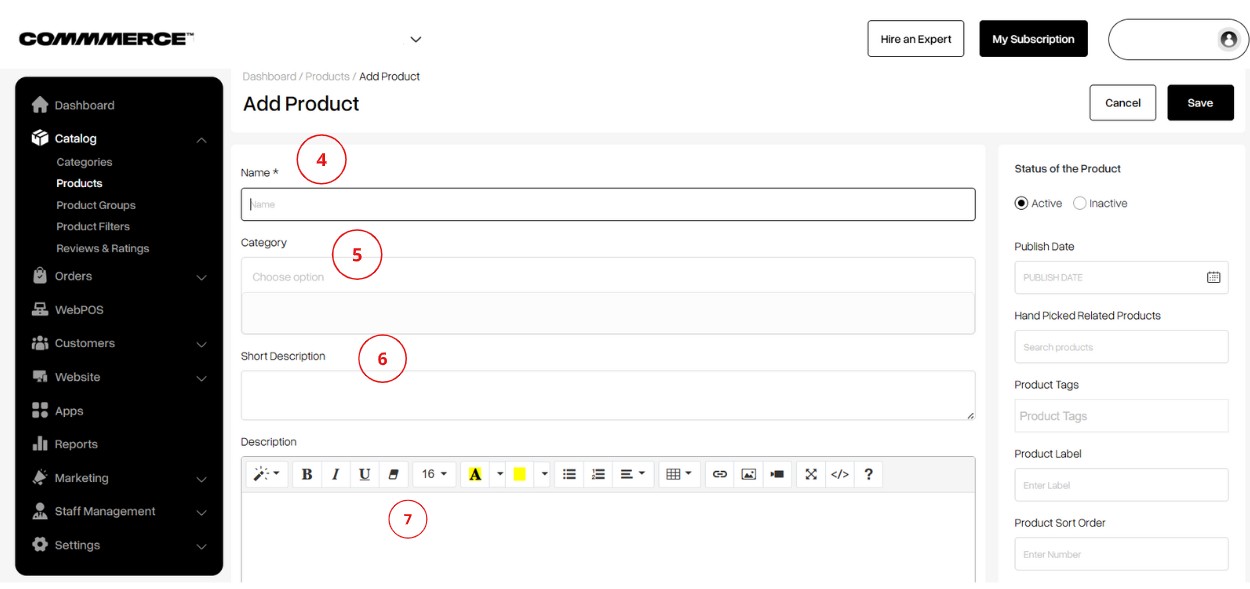
Step 4. Fill in the Product details
- Name: Fill in the name of the product (as shown in “4”)
- Category: Assign the product to relevant categories for easy organization (as shown in “5”)
Click here to learn how to create a new category
- Short Description: Appears near the product title and price, and helps customers quickly understand what the product is about before reading the full description (shown in “6”).
- Description- Write a detailed description of the product (as shown in “7”).
- Product Images: Ensure you upload high-quality images that showcase your product effectively (as shown in “8”).
Note- Keep the size less than 2mb
- Product Videos: Upload a high-quality video that highlights your product's features and benefits (as shown in “9”).
Note- Keep the size less than 10mb
- SKU (Stock Keeping Unit): A unique identifier assigned to each product to track inventory and sales efficiently (as shown in “10”).
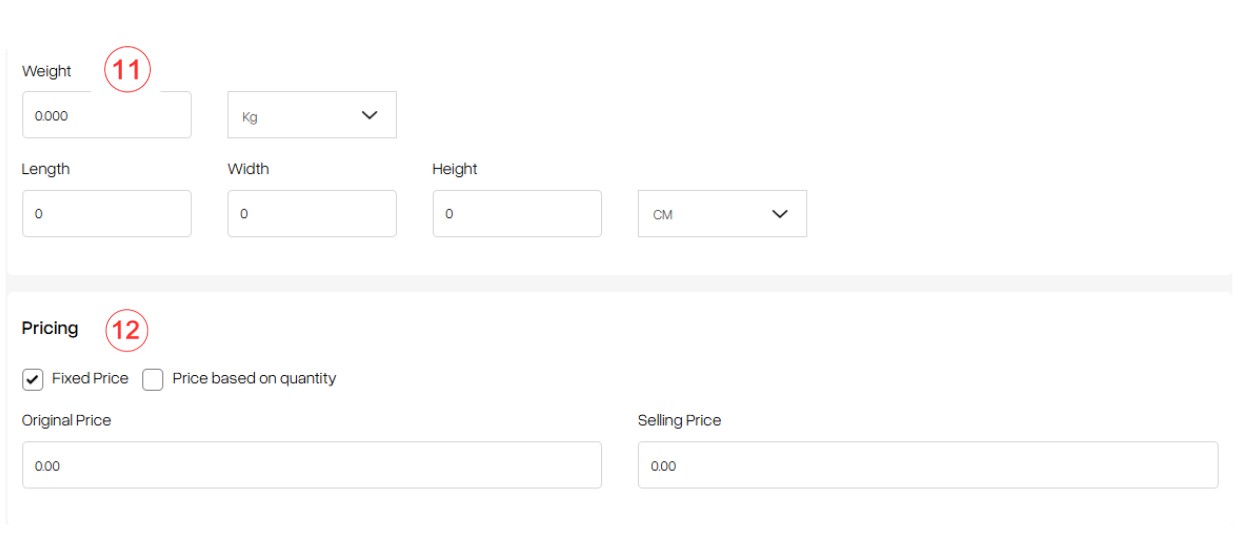
- Weight, Length, Width, and Height: Once your product is packed, you need to update its weight (in Kg), length (cm/inch), width (cm/inch), and height (cm/inch). This information is essential for calculating shipping charges and will be accessible exclusively to the shipping aggregators. (as shown in “11”).
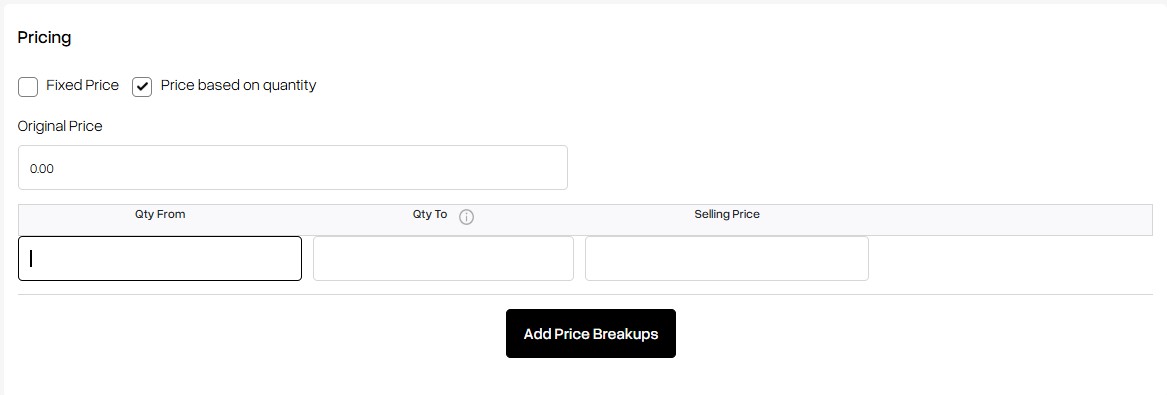
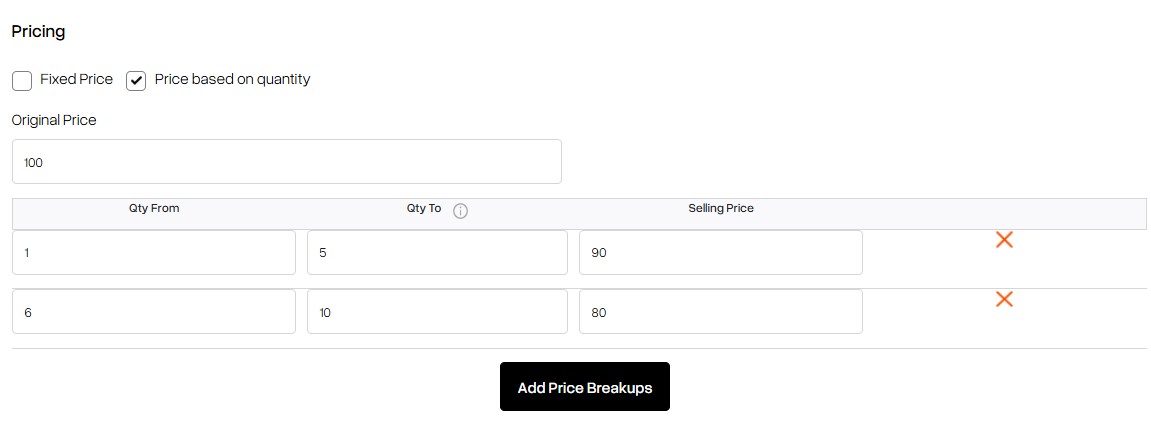
- Price: The cost of the product is determined by two options: Fixed price and Price based on quantity (as shown in “12”).
Fixed price: Display the set price for the product on the product page.
In the Original price, update the Maximum Retail Price (MRP), and in the Selling price, specify the price at which you want to sell the product.
Price based on Quantity: Adjust the product price according to the quantity purchased, offering discounts for bulk orders
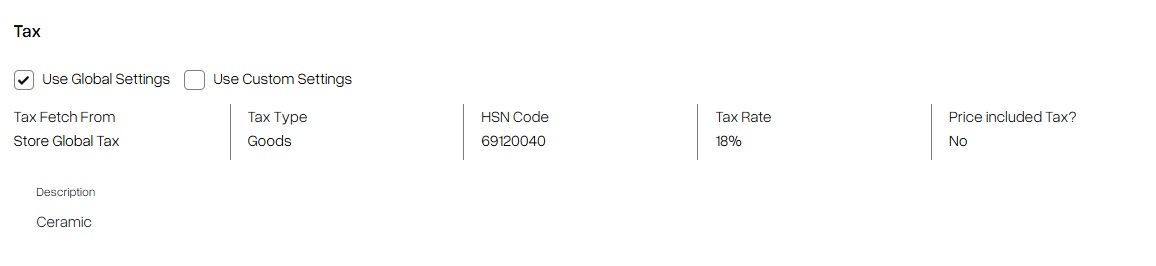
Step 5. Update the Tax option (as shown in the screenshot below)
You can update the tax option using global or custom settings, provided you have entered the GSTIN number in the store details.
If you haven't included the GSTIN number in the store details, you may skip adding the tax.
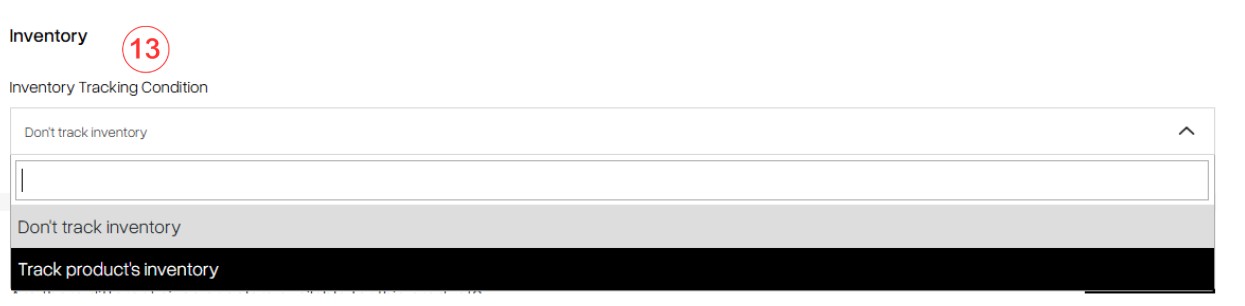
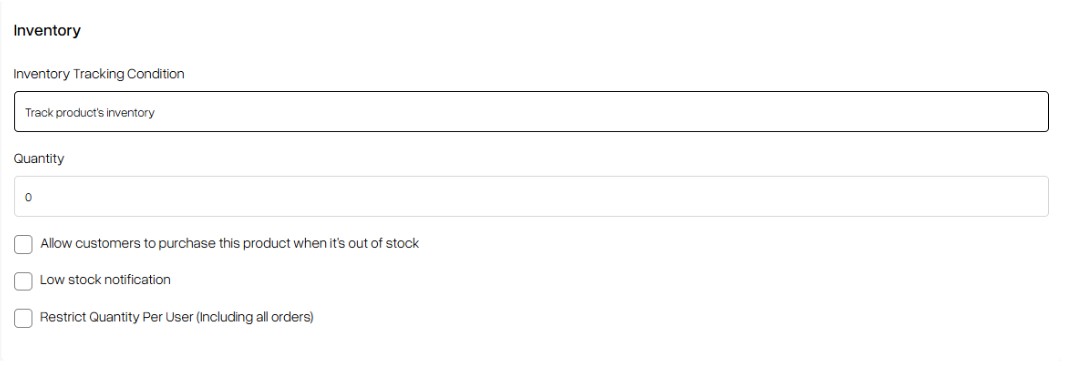
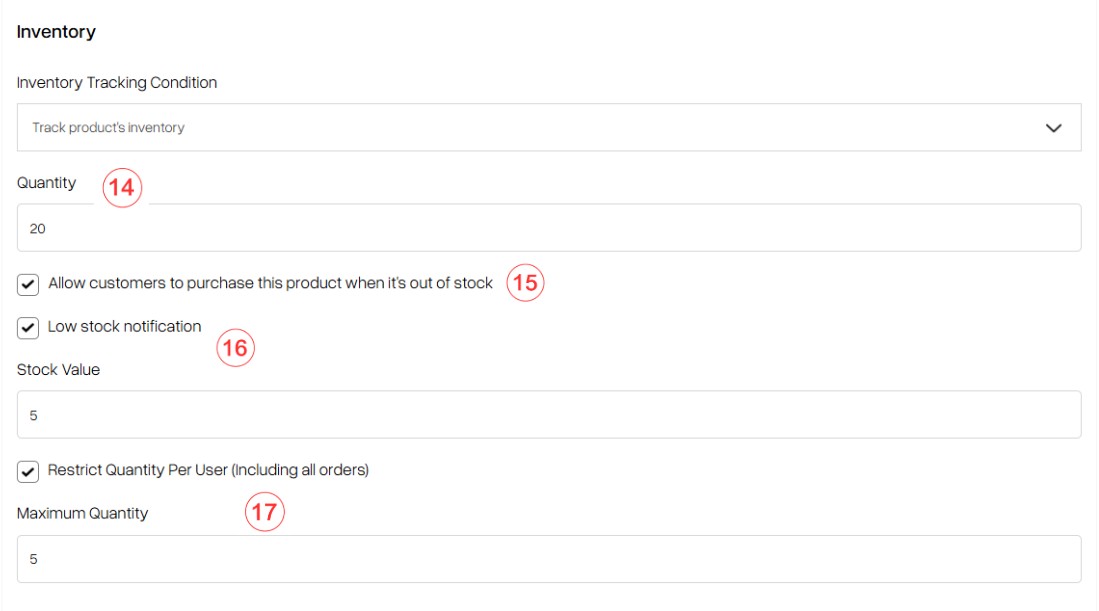
Step 6. Inventory: You have the option of tracking or not tracking the inventory (as shown in “13”).
- Don’t track inventory- Disable inventory tracking for this product, allowing for unlimited sales without stock limitations
- Track product’s inventory- Enable inventory tracking for this product to monitor stock levels and manage availability effectively
Quantity- Set the initial quantity of the product in your inventory (as shown in “14”).
You have the option to allow customers to purchase this product when it is out of stock (as shown in “15”).
Additionally, you can configure a low stock notification (as shown in “16”) and restrict the quantity per user, including all orders (as shown in “17”).
After updating
 After updating
Step 7. Add Product Variants (if applicable):
If the particular product comes in different variations (e.g., sizes, colors, etc.), specify these variants along with their respective prices and quantities by clicking on the ‘Add Variants’ button (as shown in “18”).
FYI- You can add up to 3 variants of option names and unlimited option values. Additionally, you have the flexibility to change the price and update the inventory based on your selected variants.
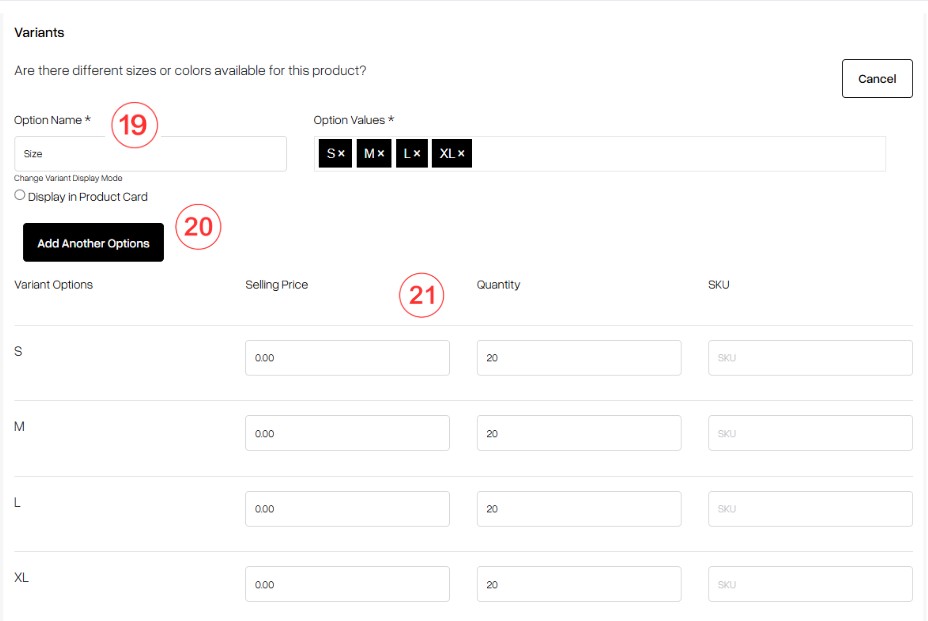
After clicking the ‘Add Variants’ button, make sure to update the variant name and its corresponding values (as shown in “19”).
To add an additional variant, click on the ‘Add Another Option’ button (as shown in “20”).
You will see the different combinations of variant values generated automatically. You can then manually adjust the selling price and quantity for each variant as needed. (as shown in “21”).
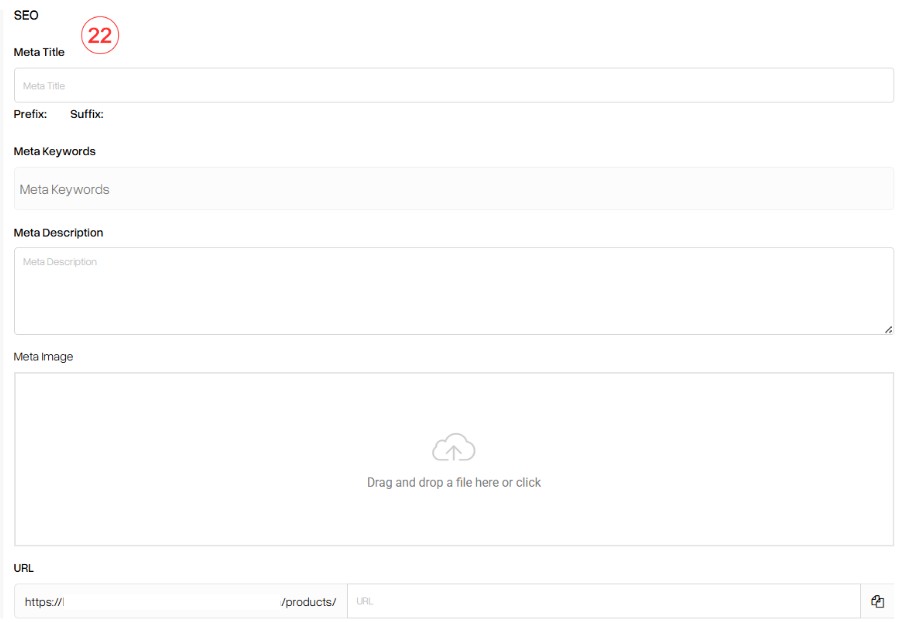
Step 8. Updating SEO details (as shown in “22”).
- Meta title- A meta title is a brief, descriptive text that summarizes a webpage's content. It appears in search engine results and browser tabs, influencing click-through rates. The ideal length for the meta title is 50–60 characters. Google starts to cut off the title tag after 50-60 characters. Hence it is a good practice to keep your title tag around this length.
- Meta Keywords- Meta keywords are a set of specific words or phrases that describe the content of a webpage. They are used to help search engines understand the page's topic. There is no specific limit to the number of meta keywords/tags you can include, but it's generally recommended to keep them relevant and concise.
- Meta description- A meta description is a summary of a webpage's content, typically 150-160 characters long. It appears in search engine results beneath the page title and aims to attract clicks by providing a concise overview.
- Meta image- A meta image (often referred to as an Open Graph image or social media image) is an image specified in the metadata of a webpage that appears when the page is shared on social media platforms.
- URL- URL or meta URL refers to the web address specified in the metadata of a webpage, often used to indicate the canonical URL or the primary link for the content.
Step 9. Update the status of the product (as shown in “23”).
You can keep the status as Active to show it in the front end of your Commmerce website or you can keep the status as Inactive if you do not want to show the product.
Step 10. Update the publish date of the product (as shown in “24”).
Specify the date when the product will be made available to customers.
Step 11. Handpicked related products- this section curates a selection of related items that complement the main product, enhancing the customer shopping experience. (as shown in “25”).
Step 12. Product tags- You can use descriptive keywords to categorize and improve the discoverability of your product in search results. In short, your customer can search for products using the search box by entering the relevant product tags (as shown in “26”).
Step 13. Product Label- A Product Label is a visual tag or marker used to highlight a product’s feature, status, or promotion. It typically appears on the product image within the product details page (as shown in “27”).
Common examples include:
- "New" – indicates newly added products
- "Best Seller" – highlights top-selling items
- "Limited Stock" – creates urgency due to low availability
- "50% Off" – showcases discounts or promotional offers
Step 14. Product Sort Order- You can navigate to the product page and arrange the products by numbering them according to your preference (as shown in “28”).
Step 15. You can update the product’s size chart (as shown in the image). This size chart will be visible on the product details page.
Step 16. After filling in the required details, you can click on the Save button on the right-hand top corner to save the product (as shown in the image).
Now a new product has been added to your Commmerce website.